How to Plan A DIY Wedding. Step-by-step guide. The art of DIY wedding. Handmade happiness. From Pinterest to reality. The creative couple’s guide to DIY wedding success. Creating wedding magic on a budget. Budget wedding you can do yourself beautifully. Your wedding, your way.
- Define your vision
- Understand your situation
- Manage your expectations
- Budget wisely
- Create a detailed plan
- Start early
- Seek help from the right people
- Get things done virtually
- Plan for logistics
- Keep a master checklist
- Capture Memories
- Day-of Wedding Timeline
This site contains affiliate links. For more info, please see our full disclosure. This post has Amazon links and as an Amazon Associate, Wedding Planning Resources earns from qualifying purchases.
From your wedding date, wedding guest list, wedding invitations, wedding decor ideas, wedding style, rehearsal dinner, wedding party, wedding venue, wedding vendors, wedding dress, marriage license, and wedding budget, to your wedding ceremony, wedding reception, and honeymoon, it can be overwhelming.
Planning a DIY (Do It Yourself) wedding can be a rewarding and budget-friendly way to create a truly unique and personalized wedding experience.
It lets you showcase your personality, creativity, and love in every aspect of your big day. Whether you’re a crafty couple or just looking to save money, here’s a comprehensive guide on how to plan a DIY wedding that doesn’t drive you crazy!
** SIDE NOTE: Before committing to a DIY project, it’s important that you evaluate what’s on your plate and estimate how much time it will take you to complete a task.
By the same token, also consider “phantom costs” associated with DIY projects like supplies. packaging, storing, transportation, and most importantly, being open to mistakes and re-doing things, which means you might need to re-purchase things to start over.
How to Plan A DIY Wedding
Define your vision
With your fiancé, identify the most important aspects of your wedding, a.k.a. “the non-negotiables” (accepting what can be a DIY idea versus something you need to hire a person for!)
When planning for a wedding, it is important to know your non-negotiables and how much you are willing to negotiate with the ones that are negotiables!
Is it booking your dream venue? Hiring a favorite photographer? List down your top 3 priorities as a couple, and book those first.
Booking these “priorities” will give you that committed and relaxed feeling.
Now all the other details are just minor, and you can work through them, given the long engagement, or even if you are planning an intimate wedding.
This also goes with prioritizing your time. Which DIY project needs more time? Which ones are “ok” to be done quickly? Knowing which projects need more time and effort will help you schedule your projects better.
If you haven’t, start creating Pinterest boards for what you have in mind.
Have a general idea of the design and the aspects of your wedding that you are committing to DIY.
Are you DIY-ing your wedding centerpiece? Your wedding invitations?
Once you know what aspects of your wedding you want to DIY, your Pinterest boards should have the designs you have in mind and Pins from DIY creators who have shared similar designs.
You can also start creating a YouTube playlist with the videos of the DIY projects you have in mind so you can have a better idea of the cost and time involved.
When you DIY, you might save money, but that means you will have to allot more time to work on those projects. DIY projects can be time-consuming, choose them wisely.
Understand your situation
Here’s why.
How much time do you REALLY have to take on DIY tasks?
Do you have enough space to store all your DIY supplies and projects?
Have you already spoken to the people that you plan to involve to help you with your projects to ask if they are available to help you out?
Knowing these things will help you decide on the scope of the DIY projects that you are willing to take on.


Manage your expectations
If this is your first time venturing into a DIY wedding project, be kind to yourself.
You might not get it the first time around and might need more practice.
If you have friends and family that have done it before, then great! But if not, you have to manage your expectations.
Remember, if you or anyone around you are not wedding professionals, you will need more time to execute something and results will vary.
To share a concrete example, if you are DIY-ing your wedding invitations, it might be that you will have some slightly crooked invitations. Your glue-ing capability of sealing 100+ envelopes might mean some of glue streaks will go onto places they shouldn’t be.
Remind yourself that there will be bouts of trial and error as you get started on your DIY projects.
Embrace and enjoy this process as a way to get to know yourself more and get that creative in you to blossom!
You know what, you might find yourself absolutely breezing through this and everything works out for you – and that’s amazing!
Just know that there is a chance multiple mistakes might come up.
Budget wisely (another important key on how to plan a DIY wedding!)
Budget restriction/s might be one of the main reasons you have decided to DIY your wedding.
But it’s not always all about the budget; you are also probably considering creating something that you did yourself to have a more personal impact, not just on your guests but also on yourself and your partner.
Budgeting wisely means being honest with how much your DIY project can possibly cost.
It’s hard to tell how much your DIY project will cost from the very beginning since you have not tried or done any of those before.
So before you finalize your budget, review your YouTube playlist and based on the materials needed, create an estimated project price.

Here’s what it can look like:
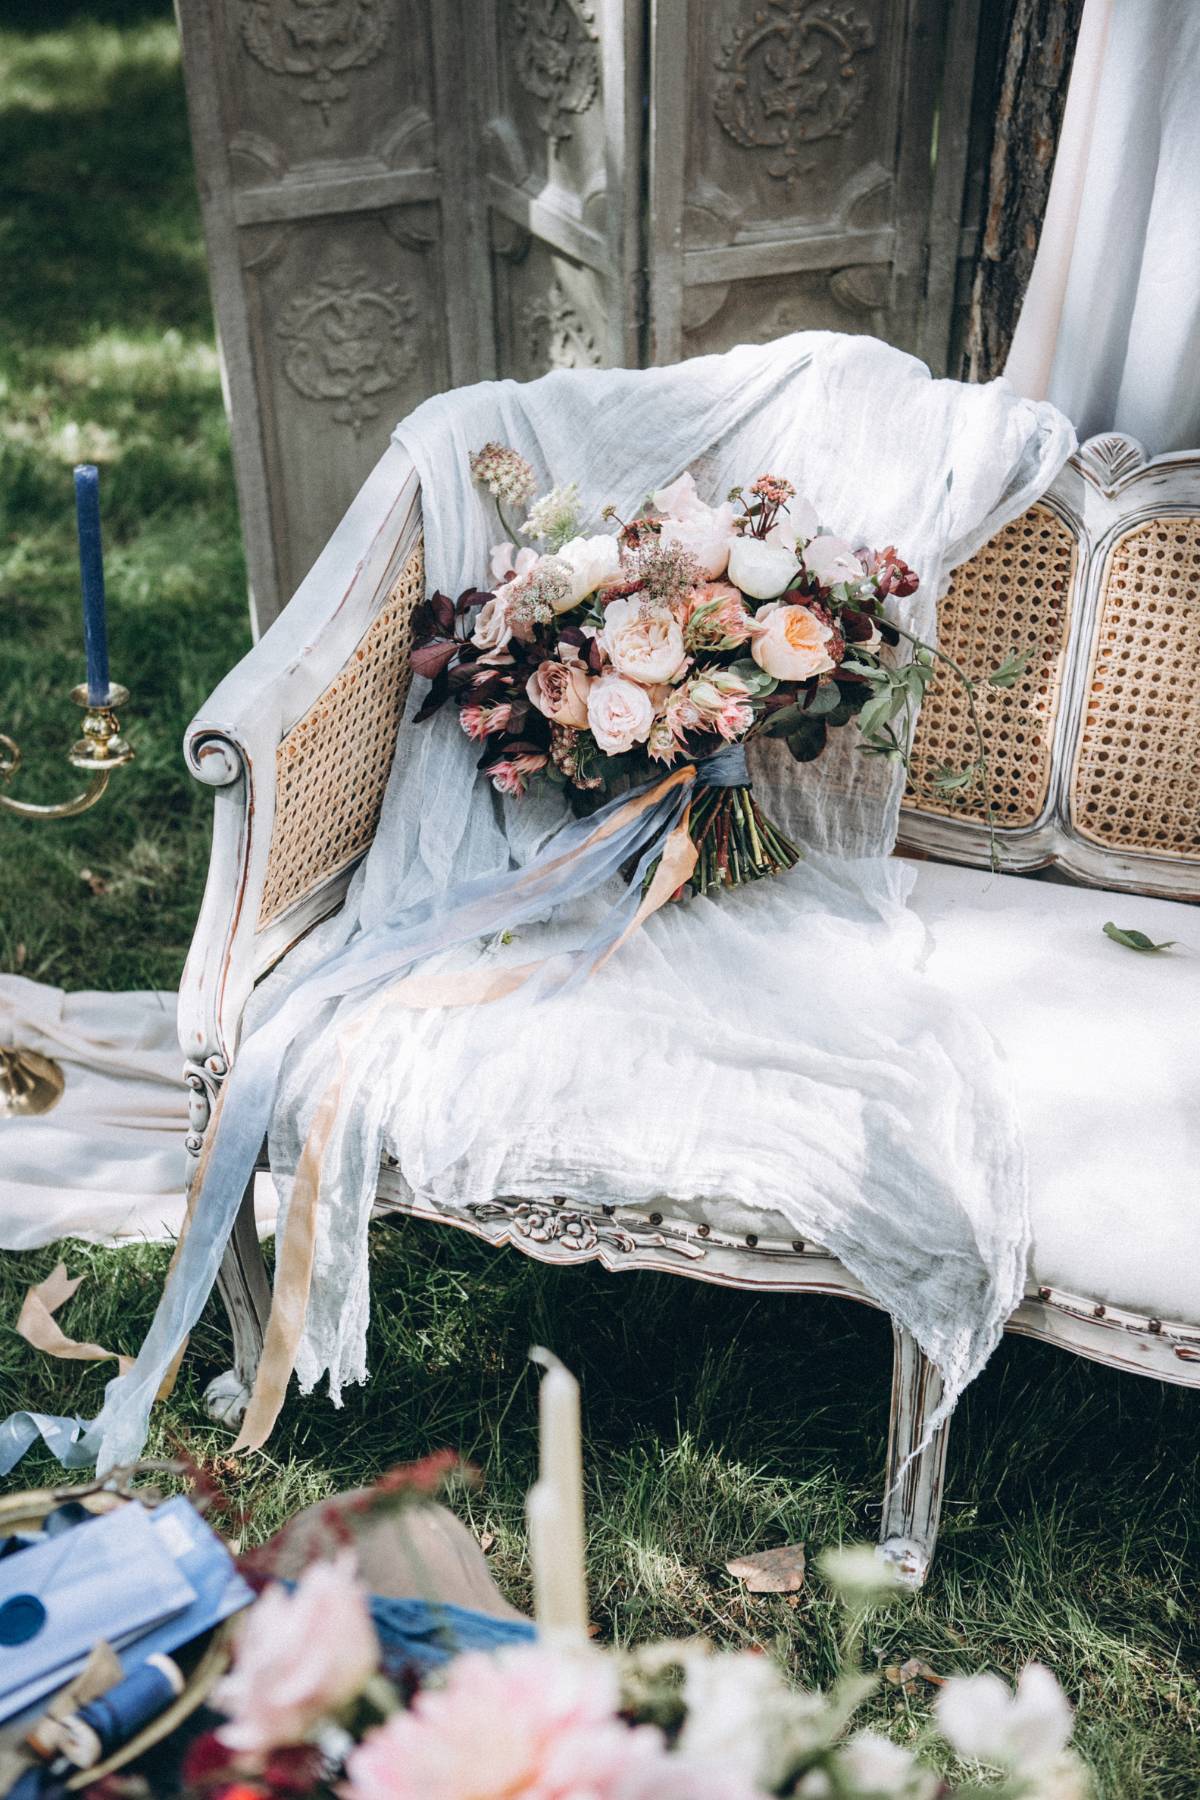
PROJECT: Centerpieces (greenery garland for 10 tables) – see above image for reference
PER TABLE BREAK DOWN: 1 bunch of preserved eucalyptus spread out on a champagne chiffon runner with 8 votive candles in between
- preserved eucalyptus: $25 x 10 = $250
- champagne chiffon runner (4 packs): $25 x 3 packs = 75
- votive candles, 10-hour burn (36 pack): $28 x 3 packs = 84
ESTIMATED TOTAL: $409
See how now you have an estimated total of the centerpiece?
Now, we also have to take into consideration phantom costs.
These are costs like packaging, lighter for the candles, boxes or bags for the greenery, markers to label the boxes, mini steamer (for the chiffon runner so it won’t be wrinkly!), trial centerpiece set (to practice assembly and setup), and anything else that you might discover you’ll need as you start your DIY project.
Do you have to purchase all of those? No. Of course not, if you have them at home already, then that’s great. But if you don’t, you’ll need to add them to your DIY project purchase list.
Adding 15-20% on top of the total estimate might help you cover the phantom costs.
It can look something like this:
CENTERPIECE ESTIMATED TOTAL: $409 (total for all 10 centerpieces) + 15% (other DIY needs) = $471
Now that you have this information, you can feel an increase in confidence about the budget you are setting.
Or, if you need to change your DIY project approach altogether to fit your budget, to either decrease or increase the cost.
Sticking to the budget is important, but so is your time. Choosing which part of your wedding to DIY should also be dependent on what your schedule can handle and how many people will assist you.
Create a detailed plan (an important part of how to plan a DIY wedding!)
Organization is key to a successful DIY wedding. Make a comprehensive checklist that outlines all the tasks, deadlines, and responsibilities.
This detailed plan includes your DIY processing, as well as how to assemble them on the day of your wedding.
Give yourself (and your team!) a time frame just enough to keep everything organized and done on time, but not too strict that you’ll feel overwhelmed and stressed.
As you start a project, you can adjust the time to give you grace to get around them.
Here’s an example of your DIY processing detailed plan if you are to assemble your wedding invitation:
SUPPLIES NEEDED FOR ASSEMBLY (2-3 days):
- paper cutter
- glue stick
- precision scissors
- address labels (easier to print addresses than handwriting them)
DIY INVITATION DESIGN (2 days):
- pick a style (Canva has lots!)
- start editing
- finalize design and wording
- download PDF (check final proof)
- send to local printing service
- pick up printouts
ADDRESSING: (1 day)
- if you are using address labels, you can use this template and print at home (or you can take the labels and the file to your local printing service and they can print for you too)
ASSEMBLY: (you can pace this out to 40-50 invitations a day)
- cut invitations
- assemble them accordingly
- seal envelope
- start addressing envelopes (check your guest list)
Here are some things you should consider looking into as you create your plan for wedding day assembly, logistics, and setup:
VENUE: If you are transporting a lot of your DIY projects, are you able to do so easily? Or do you need to buy a cart? Can you rent a cart from your venue? Is there a place where you can assemble your DIY projects?
DECOR: Create a detailed diagram – not just a list, but a diagram of how you are setting up at the venue.
Here’s an example:

Create a wedding to-do list to ensure that you don’t miss anything and keep yourself on track.
Lots of planning websites where you can keep your checklist (especially if you are on the go): Wedsite is one of our faves; also, Google Drive always comes in handy.
If you are a pen, paper, and binder type of person, we have printables and sheets for you.
Start early
Begin your DIY projects well in advance to avoid last-minute stress. Whether it is for your wedding bouquet, centerpiece, or even DJ-ing your wedding.
Crafting and creating take time, so factor in extra hours for unexpected delays or changes.
Anticipating the work needed and the help you have available (especially if you are DIY-ing a lot!) to execute your theme and vision is something you have to plan closely.
A good thing to remember is that just because you’re planning your own wedding and have already DIYed many things and already have everything planned does not mean you do not need help.
You will still need people to help you execute on the day because, after all, you are still the newlywed-to-be.

Seek help from the right people
Don’t be too hard on yourself, and get the extra helping hands where you can. Enlist some of your trusted friends and also give some responsibilities to your closest family and fiancé.
Needing assistance doesn’t necessarily mean physical work (although it can also be!), but even having someone (non-judgemental!) to bounce ideas off. Or just someone to talk to when you feel overwhelmed.
Ask your venue for input for setting up your DIY items. On your wedding day, you can hire help (or a wedding coordinator) to execute your plans, especially if you do not want to ask friends and family.
Get things done virtually (this will help a lot on how to plan a DIY wedding!)
Thank God for the power of technology! Wedding websites like Wedsites can help you cross some important items on your to-do list in the comfort of your couch, ALL IN ONE PLACE! Making how to plan a wedding a little bit more manageable!
Yes, you can totally plan your wedding online!
Some of the things that you can accomplish online are:
** Vendor research, virtual consultations, and eventually book/secure vendors. Round up your top 5-6 choices for each category and start contacting them.
Check out wedding venues and even take virtual tours. When you’ve narrowed down your wedding vendors to your top 2-3, you can then move on to in-person consultation to help you make your final decisions.
Here is a quick sample of how to manage your vendor consultations and bookings.
** Wedding websites like the free ones from Minted help your guests check on your wedding details easily.
** Build a wedding registry; you can now send your registry links to your guests (or you can also set up “monetary” gifts from sites like Honeyfund!)
** Invite guests and send out electronic invitations from Greenvelope; where you can track reads, RSVPs, and send follow-ups.
Plan for logistics
Timing for the DIY projects to be set up is key.
Remember on the day. of your wedding, other vendors are working and are also setting up. Having someone (a wedding day coordinator or a trusted friend) to help you set up everything, coordinate vendors, and oversee setup will help your day go smoothly.
If there are some unexpected issues, check with your venue coordinator on who can be a point person (usually it is the venue coordinator!) from the venue who can help when some hiccups come up.
Keep a master checklist
This is pretty much the summary of all the things we’ve enlisted there. The culmination if you will, of all. your DIY plans.
This will make it easier for you to check everything before you hand it to the person/people who will be helping you.
Capture Memories
We are a big advocate for hiring a professional photographer.
A professional photographer can make any event look like a million dollars and leave you with amazing memories through phenomenal photos.
Don’t underestimate how a great photographer can help preserve memories of your wedding! This is definitely worth investing in!
Whether you decide on a small or big wedding, pro photographers will help you preserve those memories and make you feel that “wedding feels” again.
However, we of course understand that a professional photographer might not be top on the budget list, and that’s ok too.
If you know an up-and-coming photographer or a friend who has a great experience with photography, they might be able to help you out.

Day-of Wedding Timeline
Having an idea of what the day will be like will be a great help. Creating a day-of timeline is necessary.
If you are also DIY-ing your hair and makeup (say for example!) – you might want to give yourself more time to do so. Better to have some extra 10-15 minutes to chill, than be late.
When you look at the number of hours and people needed to execute a task/responsibility (your DIY projects), you can plan better and smarter.
It helps the day have a better flow.
Events, especially weddings, have a lot of moving parts. Giving yourself, your wedding vendors, and the team a schedule/time frame to work with will make them independent and not always go to you for questions.
Don’t forget to coordinate your wedding timeline with the wedding venue to ensure that it also works for them.
There might be instances that multiple events are happening and you, as well as the vendors you are working with, might need to book their own slot when loading in.
〰️ Planning a DIY wedding is a labor of love that allows you to infuse your unique personality and creativity into every aspect of your special day.
It’s an opportunity to create a wedding that not only reflects your love story but also fits within your budget.
Remember that organization, early preparation, and involving loved ones are key to a successful DIY wedding.
Trust your vision, enjoy the journey, and celebrate your love in a way that’s truly and authentically you!

As mentioned earlier, before committing to a DIY project, it’s important that you evaluate what’s on your plate and estimate how much time it will take you to complete a task.
By the same token, also consider “phantom costs” associated with DIY projects like supplies. packaging, storing, transportation, and most importantly, being open to mistakes and re-doing things, which means you might need to re-purchase things to start over.
When you plan to DIY your food, include storing, prepping, cooking, serving platters, serving utensils, set-up, utensils and flatware, food circulation, bussing, and cleaning (garbage) into your plan and costs as these can easily add up.
There you are lovelies! How to plan a DIY wedding!
** This post has Amazon links and as an Amazon Associate, Wedding Planning Resources earns from qualifying purchases.