Cheap DIY Wedding Centerpiece: Easy Ideas. Save Big on Wedding Decor with These Stunning DIY Centerpieces. Wedding Centerpiece Hacks That Will Wow Your Guests for Less. DIY Centerpiece Ideas That Save You Money and Look Beautiful. Create Stunning Centerpieces Without Breaking Your Budget. Budget Wedding Magic with These Easy DIY Centerpiece Ideas.
This site contains affiliate links. For more info, please see our full disclosure. This post has Amazon links and as an Amazon Associate, Peppermint & Co. Ltd. earns from qualifying purchases.
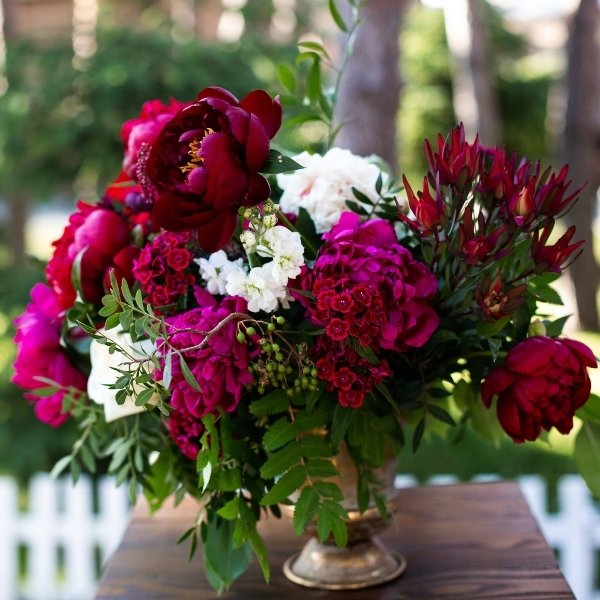
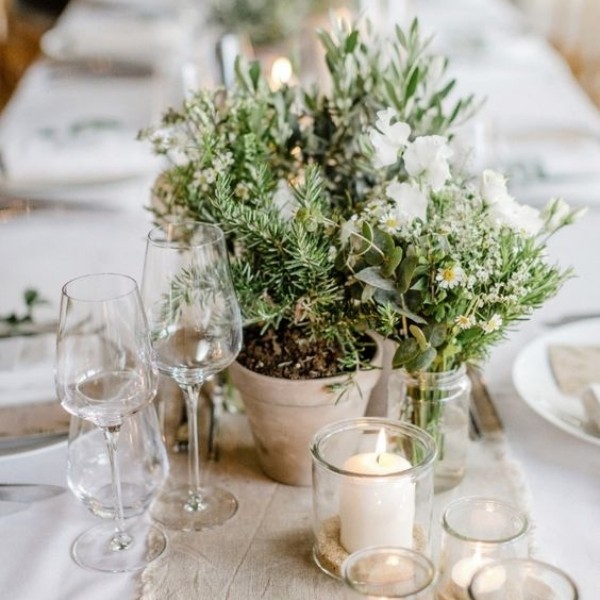
You’re planning your wedding and want your tables to look stunning without spending a fortune, and guess what, we will help you do just that. When you choose DIY centerpieces, you get full control over your decor, style, and budget in a way that feels personal and intentional. We will show you how to build beautiful table arrangements using simple materials like candles, greenery, potted plants, and more. Instead of hiring expensive florists, you can source affordable stems or repurpose things you already love. We will walk you through ideas that feel elegant, affordable, and totally doable. Whether you’re going for a rustic, boho, or modern wedding look, these centerpiece ideas can adapt to your vision. We will explore how candles can create a romantic glow and make your tables feel warm and intimate. Greenery is another go-to, it’s lush, natural, and doesn’t cost as much as full floral blooms. We will guide you on how to mix greenery with other accents to give your table depth and texture.
Potted plants and herbs are cheap, cute, and practical, plus, they double as take-home favors. We will also talk about dried flowers, like preserved stems or pampas grass, which add timeless elegance without wilting. You don’t need to be a crafting pro to pull this off; most of these ideas rely on creativity, not experience. We will give you pro tips for arranging stems, layering elements, and creating balance so your centerpiece looks thoughtfully designed. Storage and transportation? We’ve got you. We will walk you through how to prep centerpieces ahead of time, pack them safely, and set up quickly at your venue. You’ll feel empowered knowing you can craft something gorgeous on your own or with help from friends or family. We will also talk about how to match your centerpiece budget to your overall wedding budget so you don’t go over. Making these centerpieces yourself means you can also use items in multiple ways, reusing vases, repurposing materials, or re-gifting plants.
We will encourage creative touches that bring your personality into each table design. These diy ideas are not only economical but also deeply meaningful because they reflect you as a couple. You’ll love how customizing your own centerpieces makes your wedding feel more personal and handmade. We will help you balance affordability with beauty so that every table looks polished and intentional. When your guests walk in and see your handcrafted decor, they’ll feel immediately touched by how thoughtful the details are. Building your own centerpieces also creates opportunities to bond with your bridal party or family as you craft together. We will support you in making something memorable, charming, and budget-smart. You’ll walk away from the process with both beautiful decor and the joy of having done it yourself. Let’s get ready to design wedding centerpieces that shine, without compromising on your budget, style, or heart. Your special day deserves decor that means something, not just expense. And together, we will make it happen.
Cheap DIY Wedding Centerpiece: Easy Ideas!
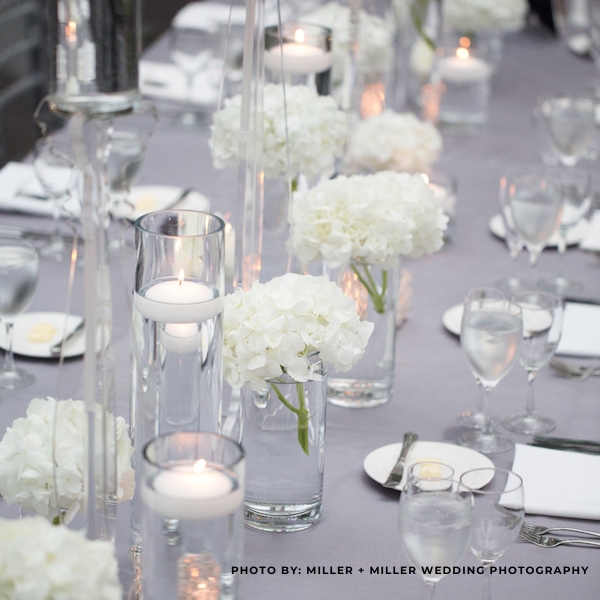
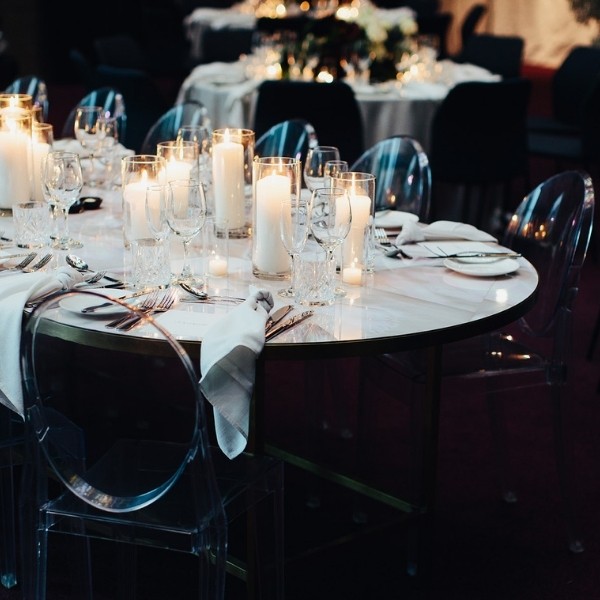
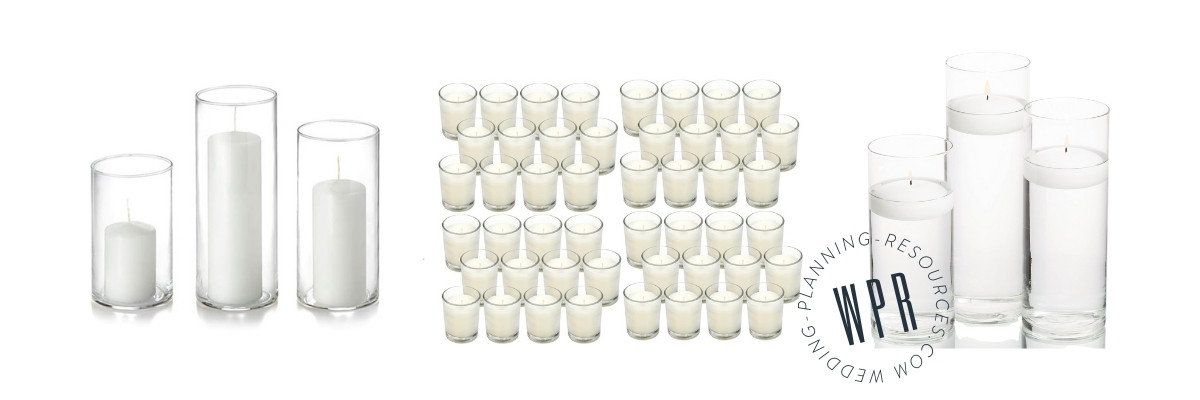
1. Candles
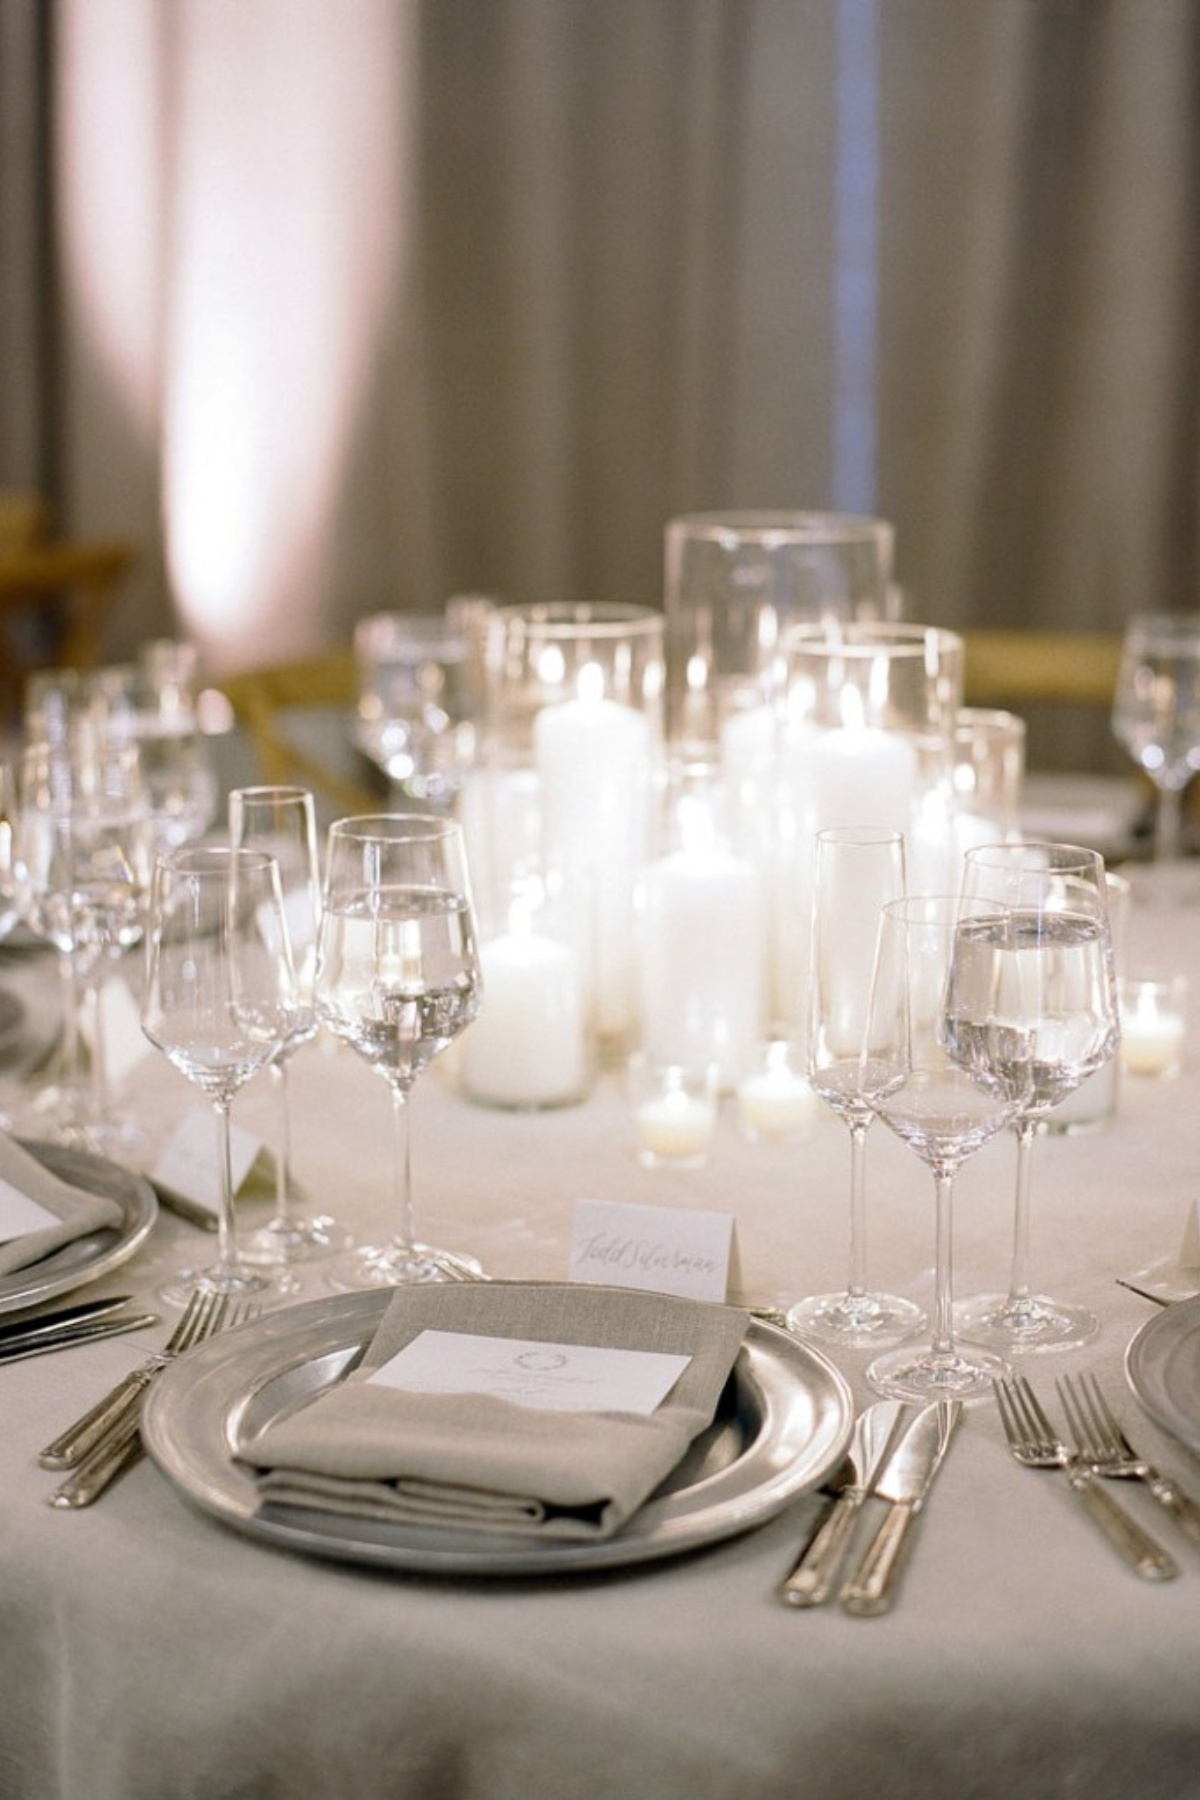
Candles are a fantastic and budget-friendly choice for wedding centerpieces because they add a warm, romantic glow without costing a fortune. They come in various sizes, colors, and styles, allowing you to customize them to match your wedding theme effortlessly.
Plus, candles are easy to arrange and can be combined with other decor elements like flowers or greenery for added elegance. They also create a cozy atmosphere that enhances the overall mood of your celebration. Choosing candles as your centerpiece can help you save money while still achieving a stunning and sophisticated look.
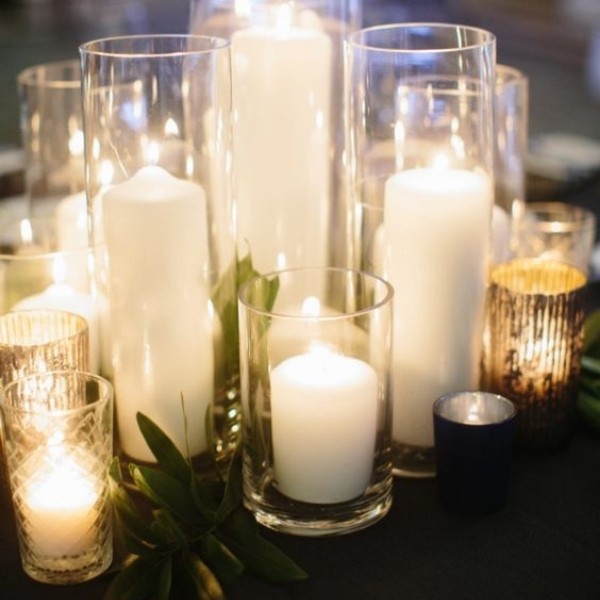
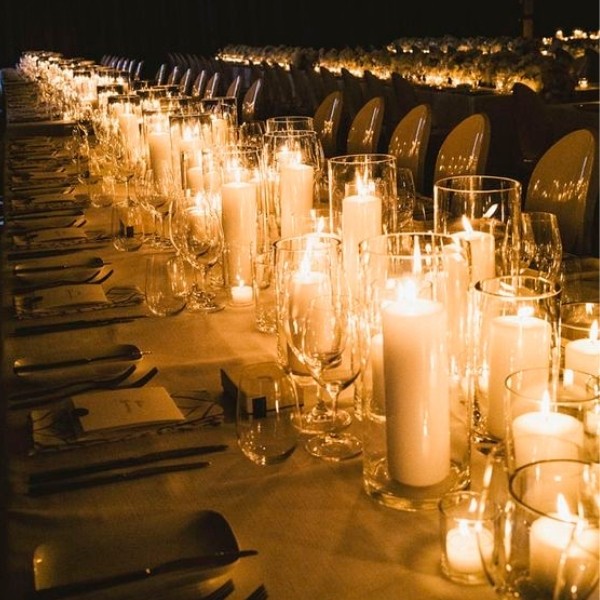
PRO TIP #1: Choose votives! It might be tempting to use floating candles (vases filled with water), but as pretty as it looks, it will take a lot of time to fill up those vases and clean them up afterward.
Votive candles are the best candles to use! All you need to do is place them randomly (somewhat creatively!) on the table, light them up, and voila! The centerpiece is ready to go!
PRO TIP #2: You can add some height by mixing in different votive heights! For example, mix 2-3 inch votives in with 5-6 inch votives to create that “height” and “movement,” so it won’t be just lined up “flat.”
PREP TIME: Little to none. Only place them on the tables and then light them up 20-30 mins before the reception doors open. Just enough time for the candle to be really lit up.
RELATED: CANDLE CENTERPIECE WEDDING IDEAS

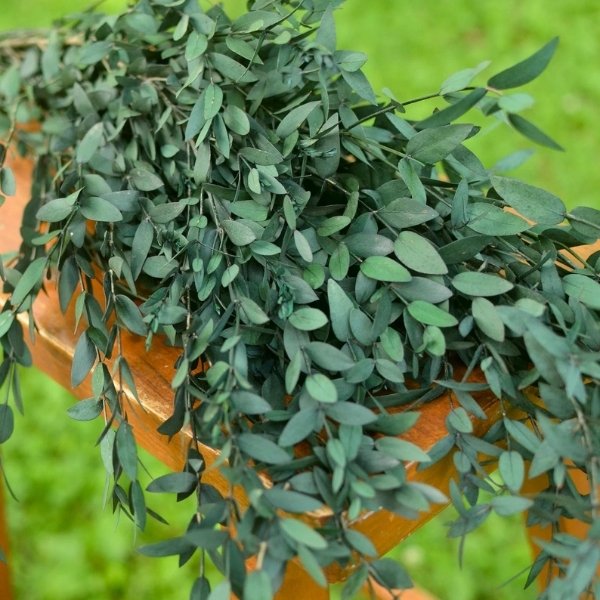
2. Greenery (this one is readers’ favorite when it comes to cheap DIY wedding centerpiece ideas)
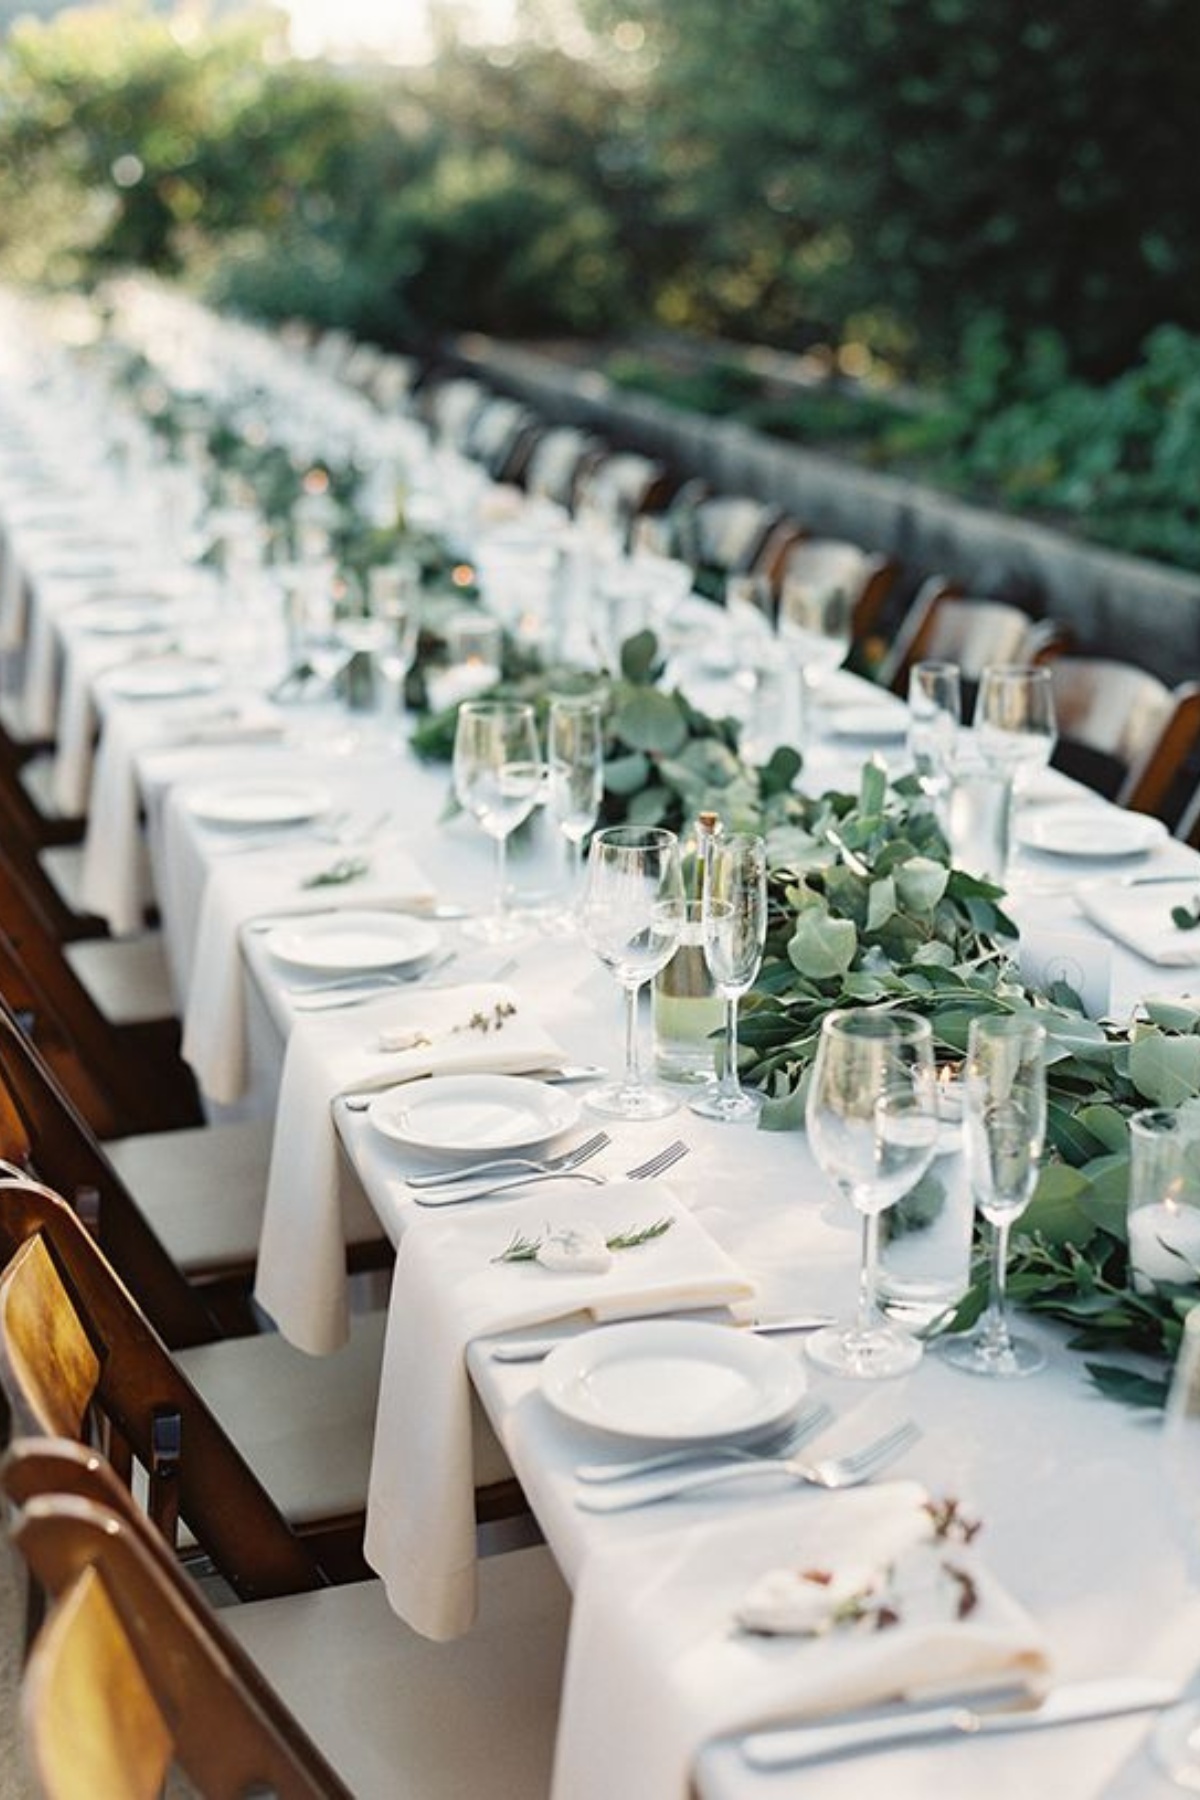
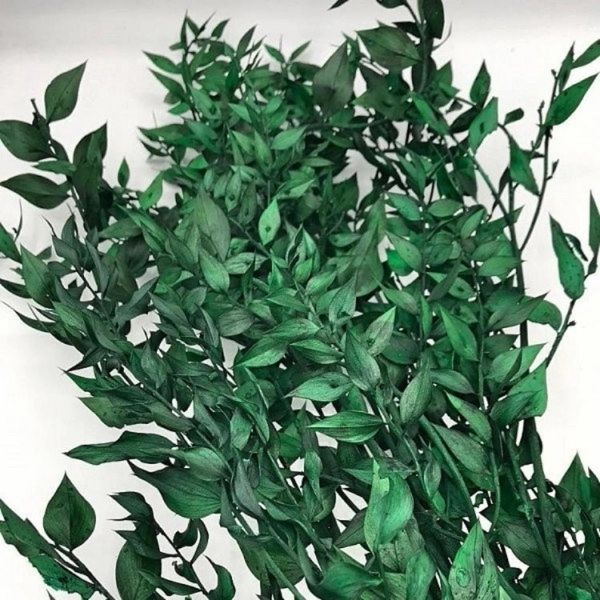
Low greenery garland is a brilliant and budget-friendly choice for wedding centerpieces because it offers a lush, natural look without breaking the bank. It’s versatile and can be easily draped across tables or combined with candles and other accents for a chic, cohesive design.
Using greenery adds a touch of elegance and freshness, creating a beautiful backdrop for your wedding photos. Plus, it’s easy to source and often more affordable than elaborate floral arrangements. Low greenery garland also requires minimal maintenance, making setup and cleanup a breeze.
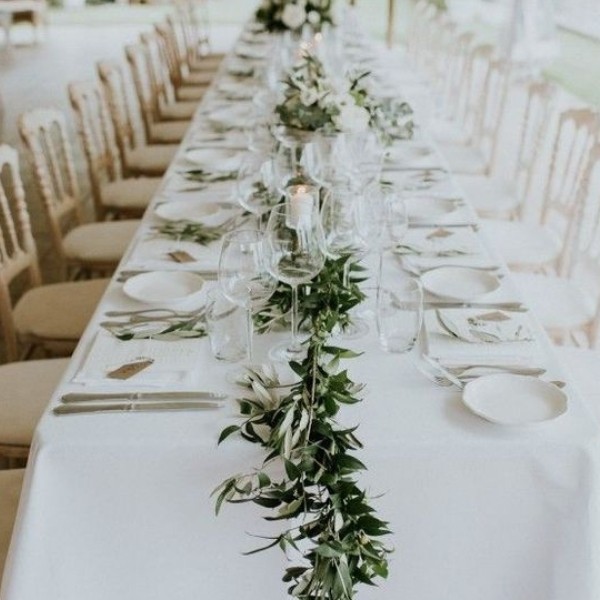
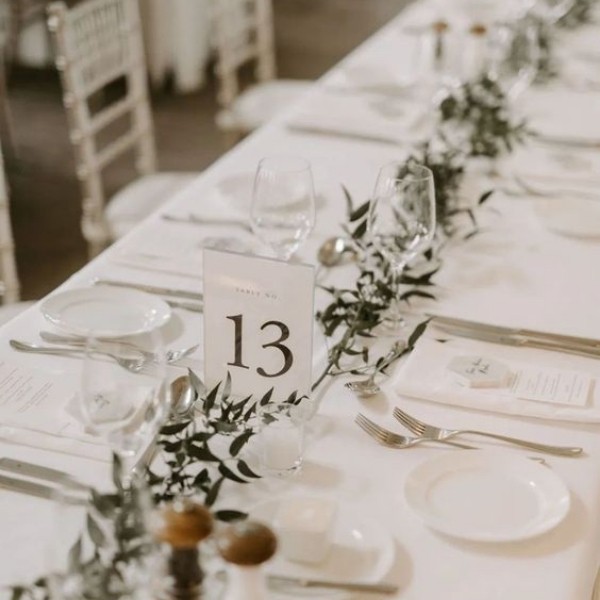
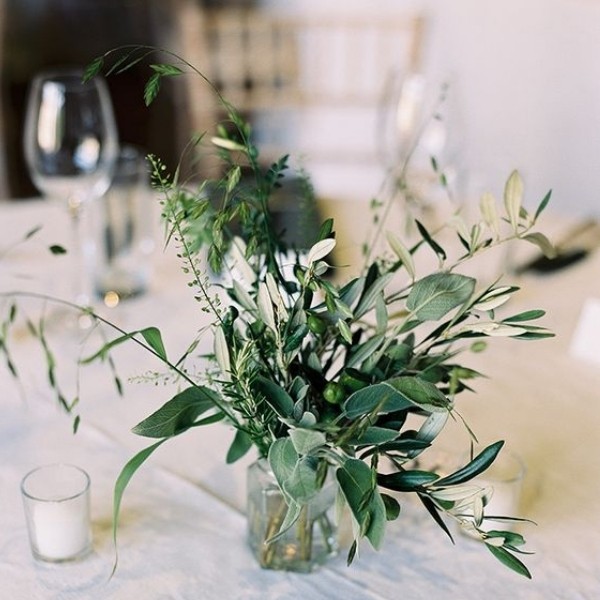
We have talked about this a lot in this article. This is one of the easiest wedding decorations for the tables! We made a greenery centerpiece DIY guide here that details how to design and execute this centerpiece.
But to give you some ideas here, the best 2 varieties to use for your greenery centerpiece are Ruscus and Salal; check more about these greenery varieties here.
You can also shop for fresh wholesale greenery and flowers over at JR Roses.
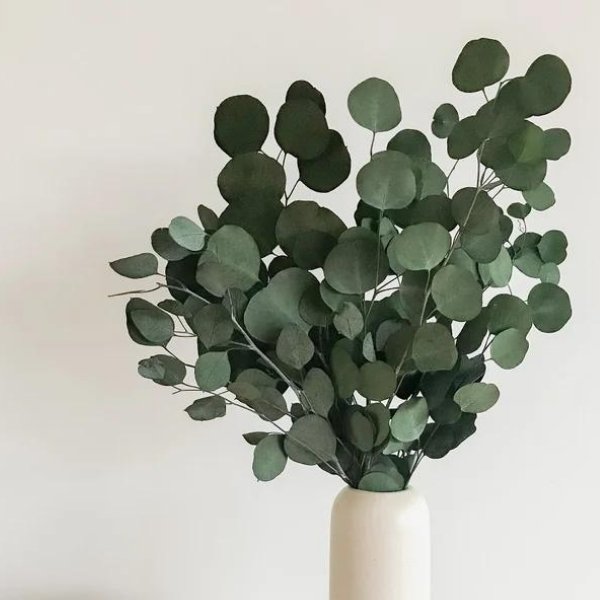
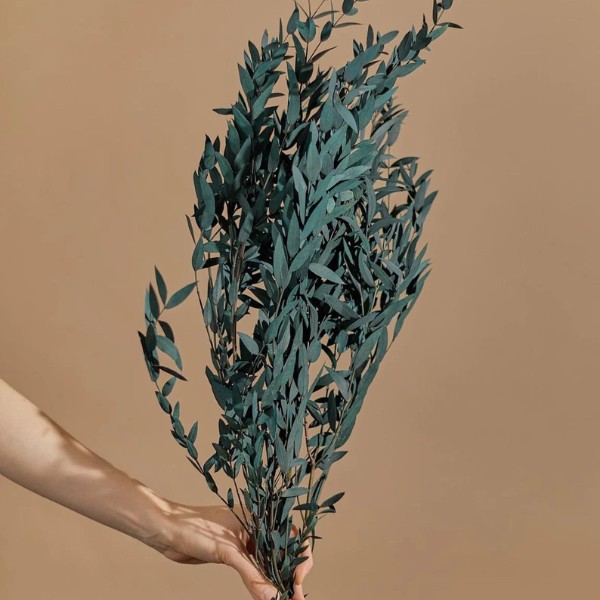
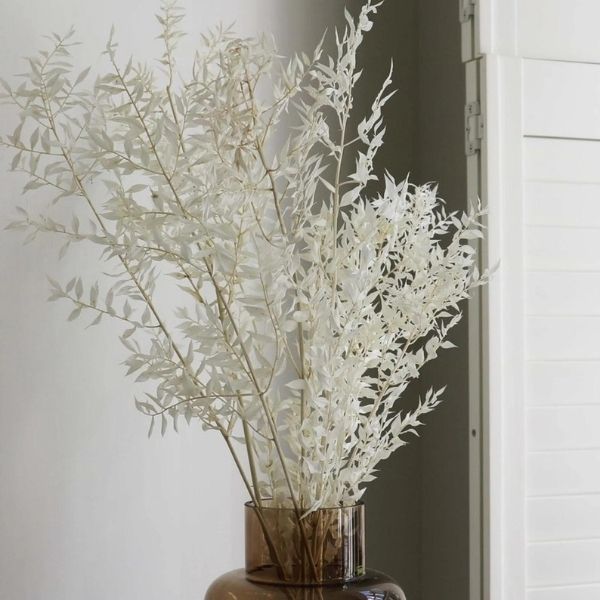
Dried or preserved greenery stems are also a great idea. They are not only easy to work with, they are also affordable. You can purchase them ahead of time and not worry about them wilting.
PRO TIP #1: This is also a great addition to the candle centerpiece.
Add a few greenery stems to add some “earthy” and “garden” vibe to your table!
PRO TIP #2: If you consider using silk/fake greenery, ensure to find something that has some coating or is a “mint” color.
Using something that looks less plastic and not shiny will help minimize the “fake” look.
PRO TIP #3: Instead of silk or real greeneries, you can also use dried or preserved ones!
When purchasing dried greeneries, ensure to read through storing and care instructions so you can keep preserving them!
Especially if you are getting married in the winter, dried flowers will literally wilt and melt when there is moisture! Ensure you check the temperature and packaging to keep them looking good!
RELATED: DIY WEDDING GREENERY CENTERPIECE: STEP BY STEP GUIDE
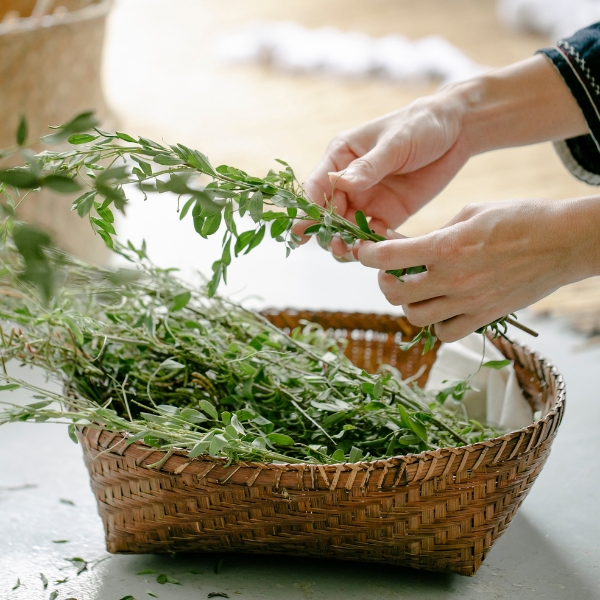
PREP TIME: Per 8 seater rectangular table, if you are laying down 2 bunches of greenery, it will take about 15-30 mins. As you design more tables, you get faster.
The key is to pre-bundle and pre-cut the stems PER TABLE (meaning you will have a bag of them per table) before heading to the reception, so you can easily and quickly place them on the table.
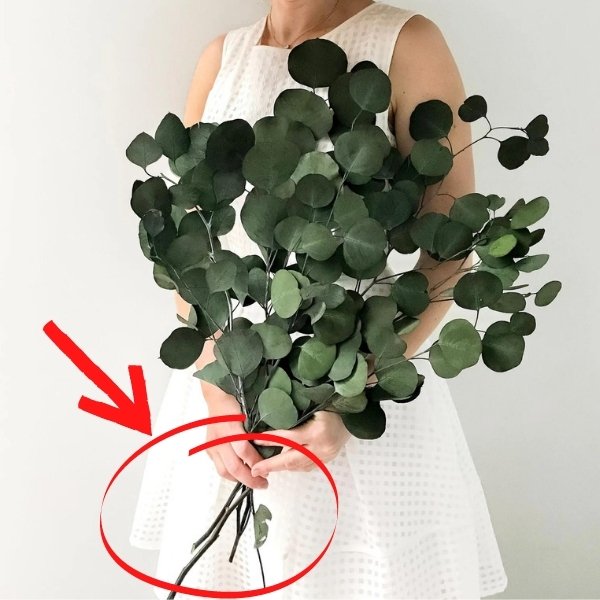
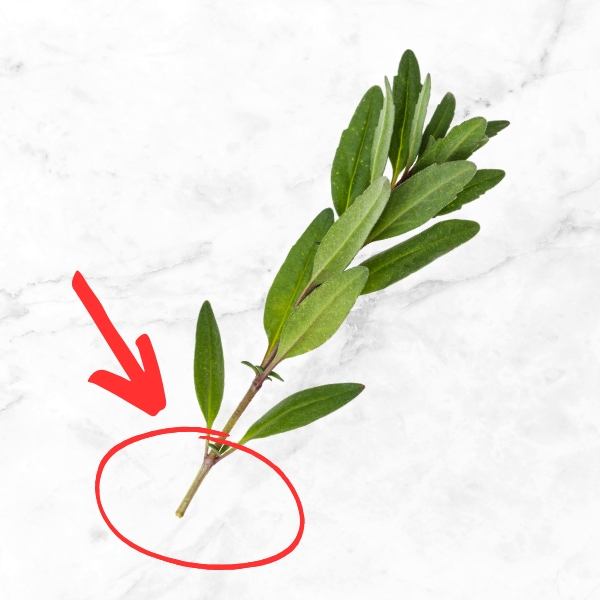
** PRO TIP: Remember to cut the excess stem at the bottom and only keep the stems with leaves on them and cut all the stems. Photo from FairMileHomeDecor.
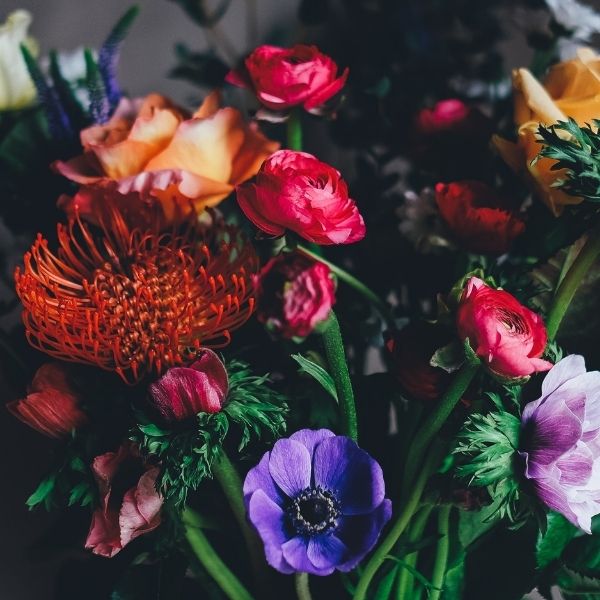
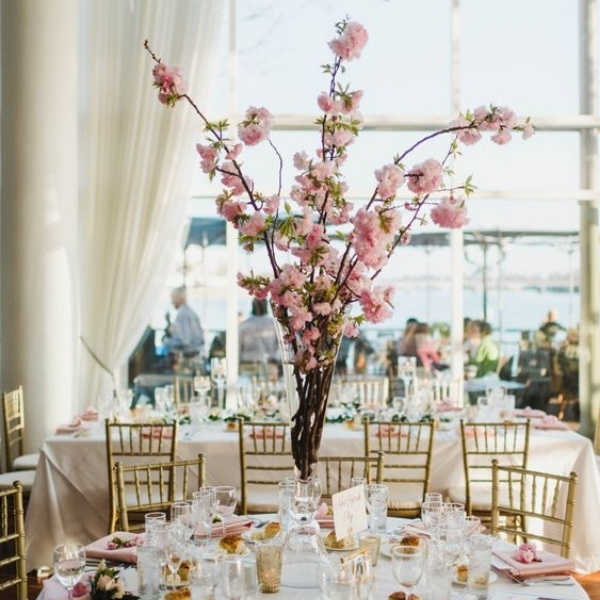
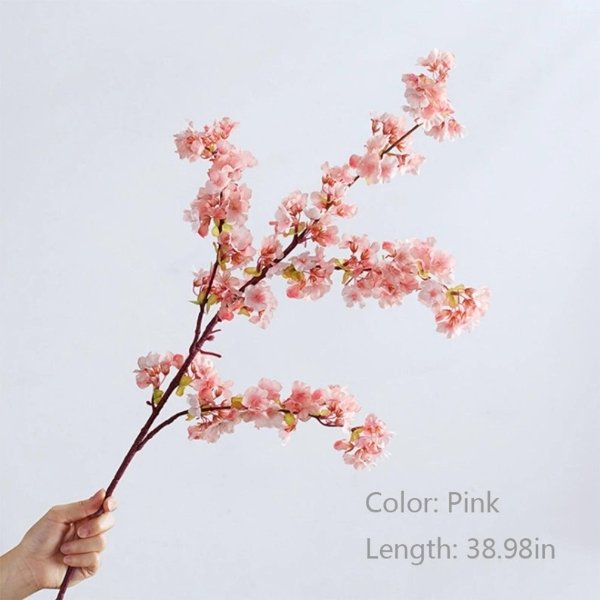
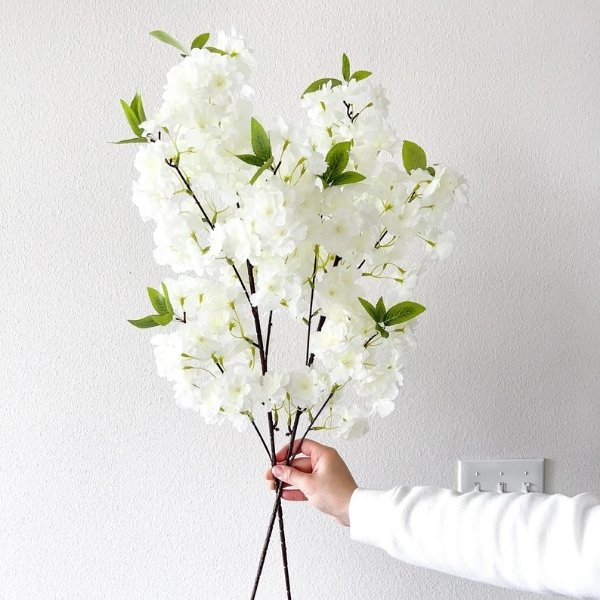
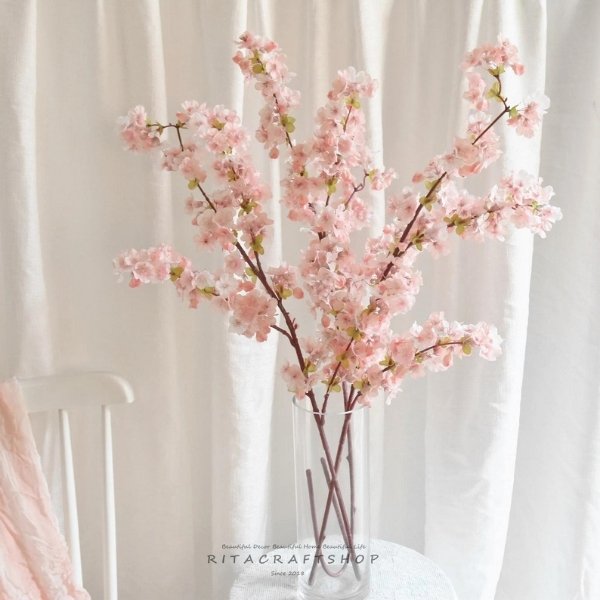
3. Cherry Blossoms: Cheap DIY Wedding Centerpiece
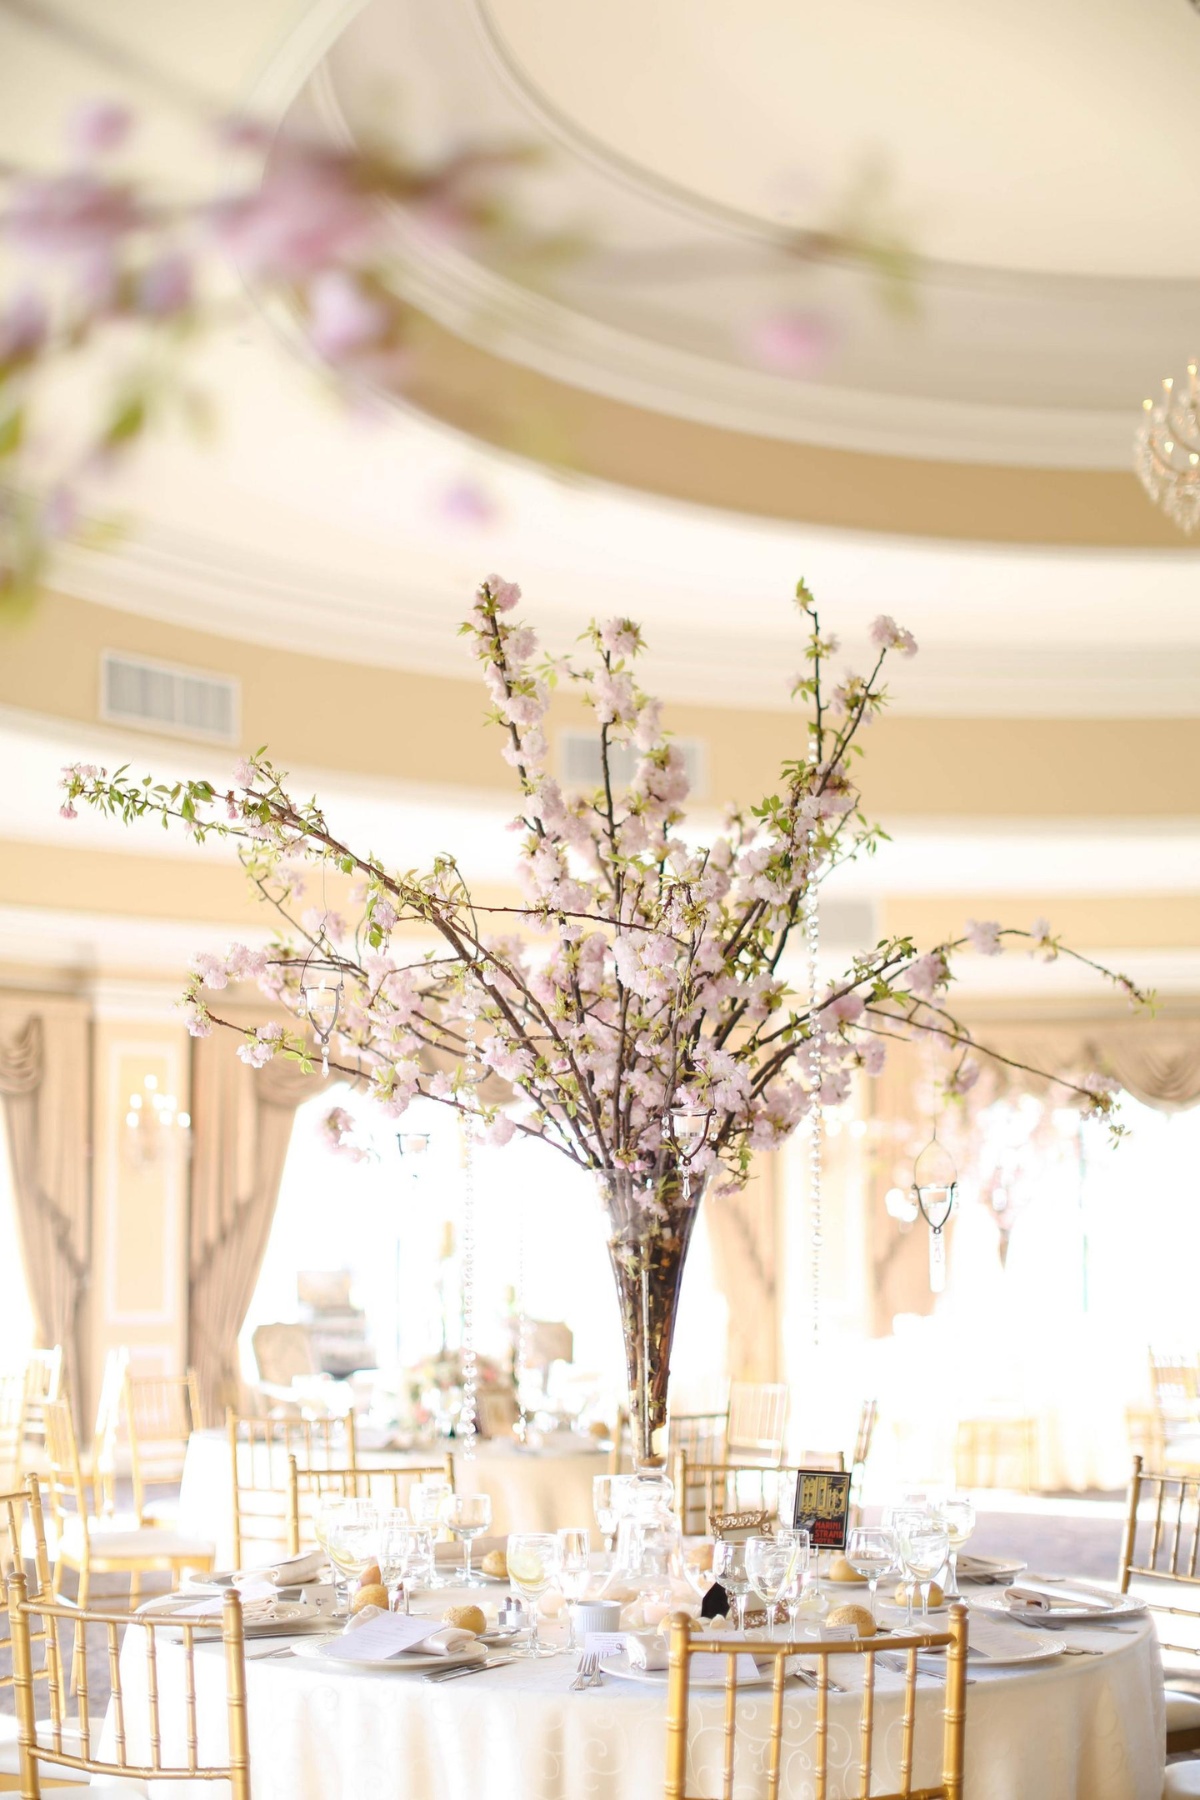
Cherry blossoms are a fantastic and cost-effective choice for wedding centerpieces because they bring a delicate and elegant touch to your decor without a hefty price tag.
Their soft, pastel hues add a beautiful, romantic vibe that’s perfect for weddings. Cherry blossoms are often available in seasonal blooms or as faux arrangements, making them budget-friendly and versatile. They create a stunning visual impact with minimal effort, as their natural beauty speaks for itself. Plus, their light and airy appearance works well with various themes and color schemes.
Cherry blossoms (silk stems – fake, not real!) are the best example of stems that you can easily use! Of course, there will be some assembly needed to put this together, but it is certainly easy and fast!
The cost depends on how “fluffy” you’d like it to be. If you want them to be fuller, the number of stems you’ll need will increase, but if you are going for a minimalist look, then this will surely save you a lot of money!
PRO TIP #1: Use a tall vase, and if possible, a colored one. If you cannot find a colored one, you can purchase clear ones and spray paint them.
Covering the stems of your silk cherry blossom will “hide” the fact that it is fake/silk and will also provide the “illusion” that the centerpiece is “bigger and taller.”
Also, choosing a vase that is not too wide will help make the blooms look bigger!
PRO TIP #2: Don’t forget to bend the stems outwards so they won’t be standing up “straight.” Create movement and mimic what a real cherry blossom tree looks like!
PREP TIME: Spraying the vase will take about 24-48 hours, including the drying time. It will be about 10-20 minutes for about 3-5 stems of cherry blossom to set up per round table.

YIBELAAT Artificial Cherry Blossom Branches
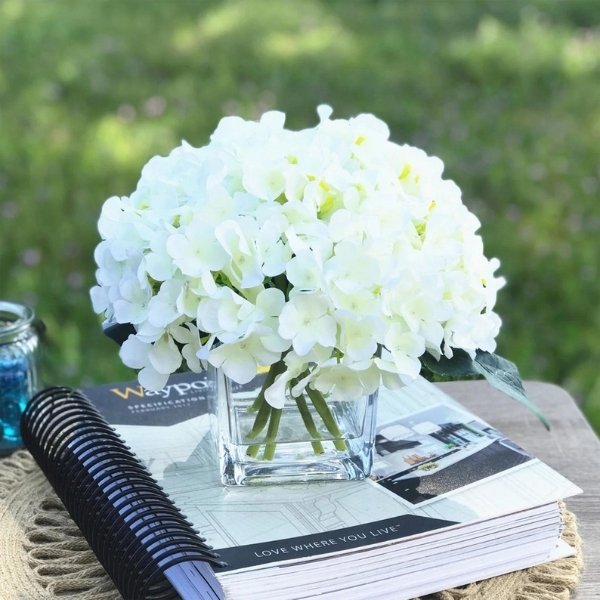
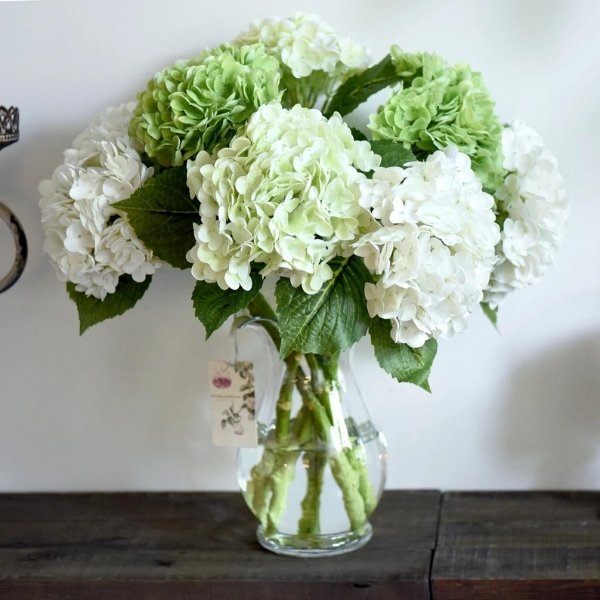
4. Hydrangeas
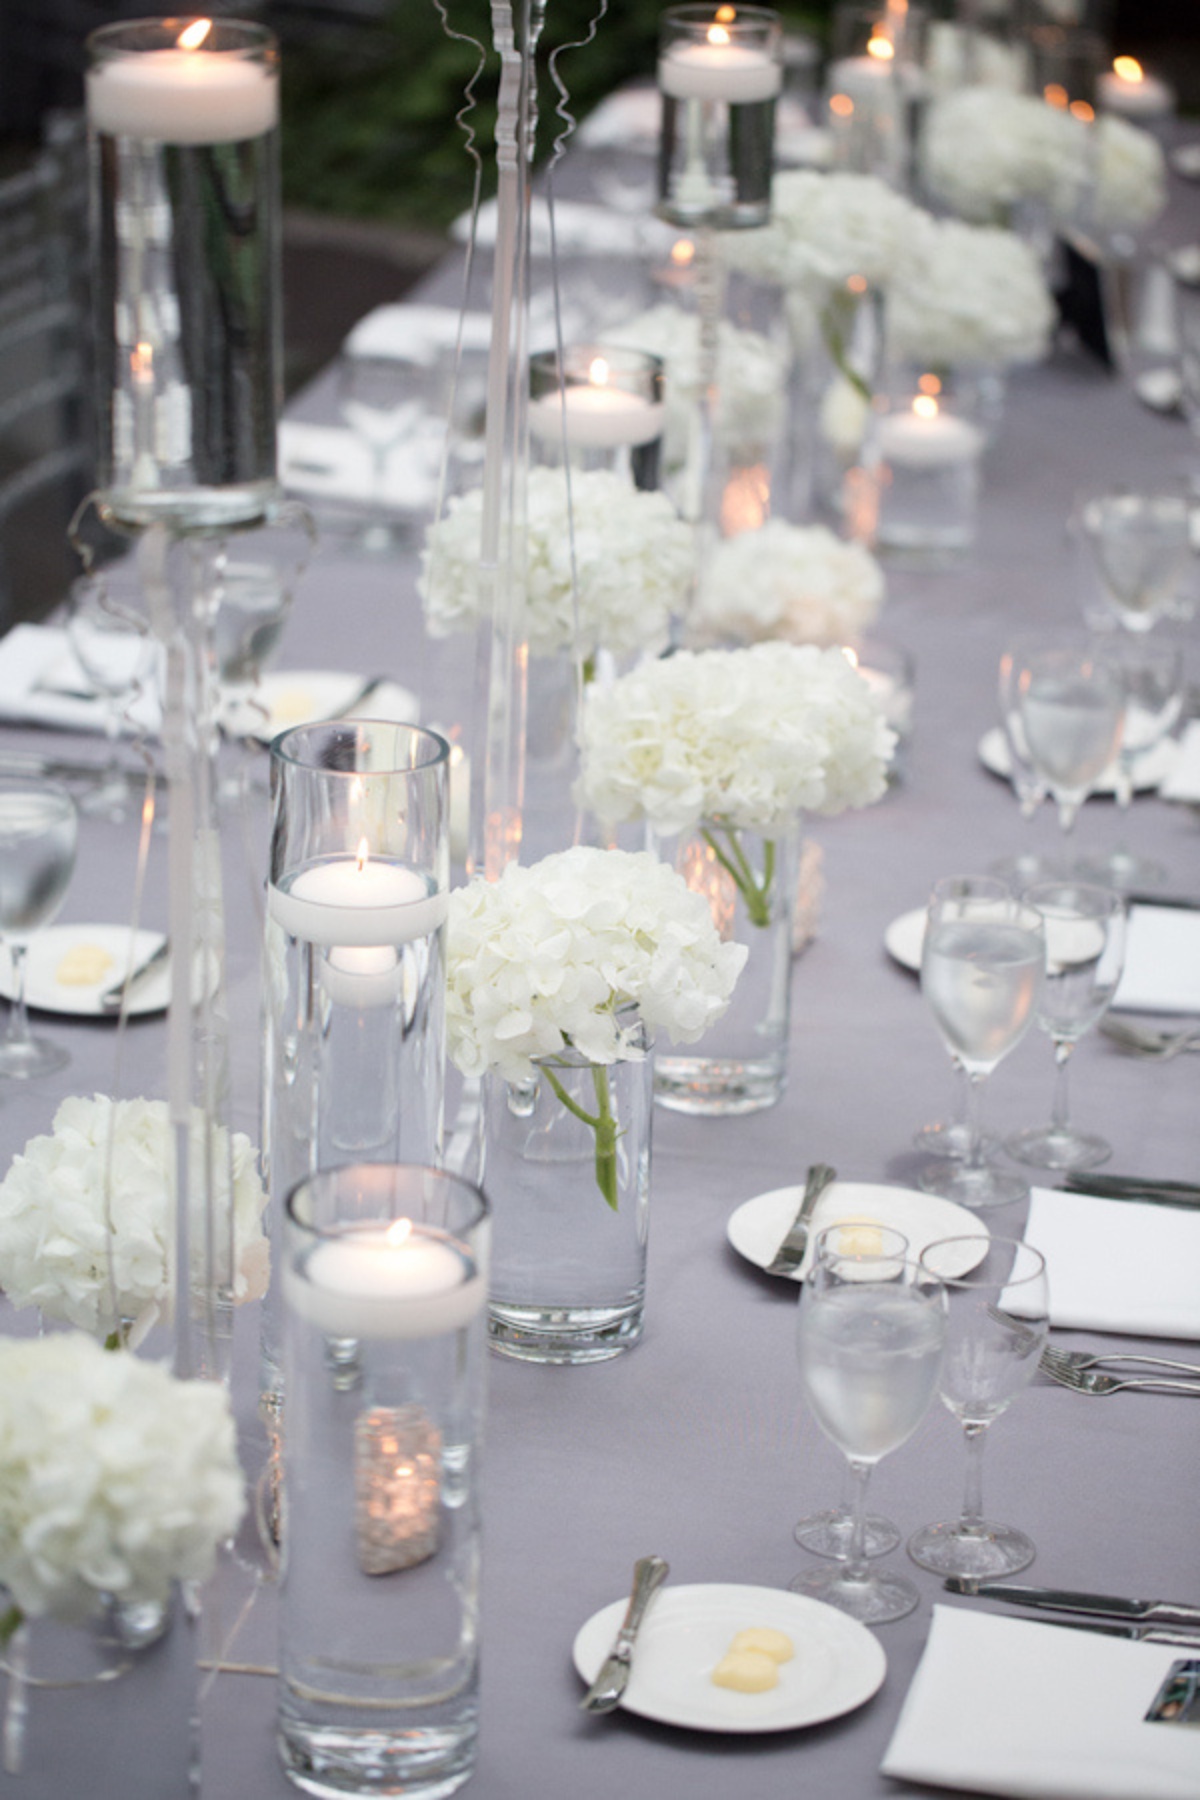
Hydrangeas are a great and affordable choice for wedding centerpieces because they offer a full, lush look without breaking the bank. Their large blooms make a big impact, filling space elegantly with fewer flowers needed.
Available in a range of colors, hydrangeas can easily match your wedding theme and color scheme. They’re also versatile, looking stunning both as standalone arrangements or mixed with other flowers and greenery. Their hardy nature means they require minimal maintenance, reducing stress on your big day.
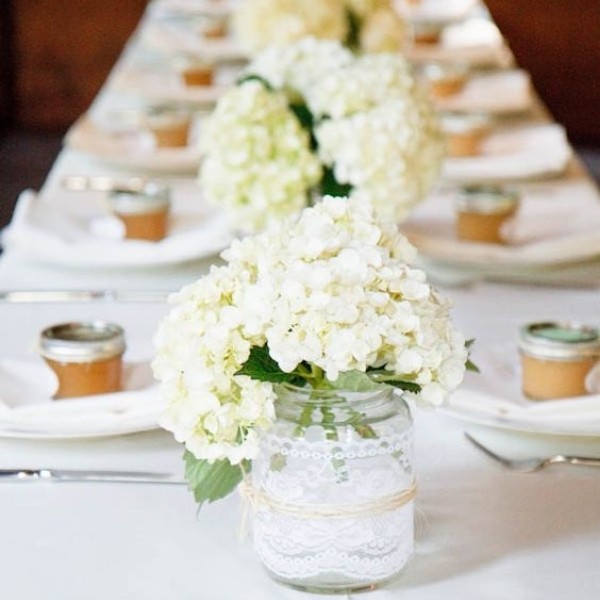
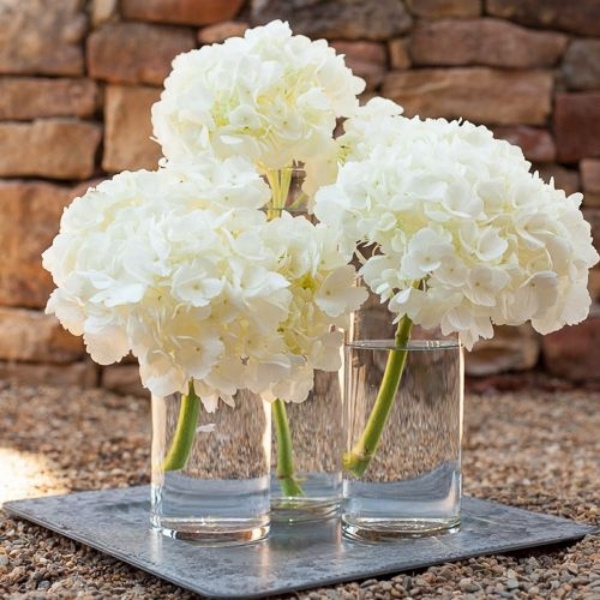
These hydrangeas are super fluffy and can cover many areas that are always great for a centerpiece! You can consider real ones or silk/fake ones! You can check out JR Roses for wholesale hydrangeas and other flowers.
Dried or preserved hydrangeas are also a great idea!
PRO TIP #1: Instead of making one large arrangement, why not consider individual vases or a grouping of them and place only one stem of hydrangea in each vase? Consider bud vase centerpieces.
Cutting the individual hydrangea stems in different lengths/heights will create a nice movement and organic look to the centerpiece.
PRO TIP #2: Similar to the cherry blossom idea, using a colored or spray-painted vase will help cover/hide the silk/fake stems!
Choosing a vase that is not too wide will help make the blooms look bigger! Also, remove the green plastic-looking leaves, as they are usually the telltale sign that the flower is fake!
PREP TIME: Per round table, if you choose a 6″ cylinder with 4 stems of fresh hydrangeas, including cutting, filling the vase with water, and wiping them clean, it will take about 20-30 mins per table; especially if you have not done this before.
Practice is key. Practice before the wedding.
RELATED: HYDRANGEA WEDDING CENTERPIECE IDEAS
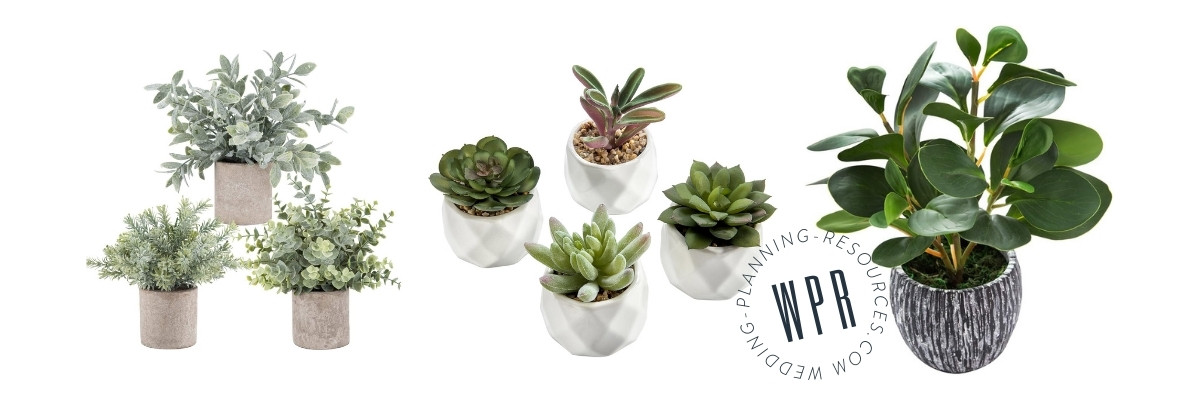
5. Potted Plants & Herbs

Potted plants and herbs are an excellent and budget-friendly choice for wedding centerpieces because they offer a fresh, natural look at a low cost. They can be easily customized to fit your wedding theme by choosing varieties that match your color scheme.
These living centerpieces add a touch of greenery and elegance, while also being practical—guests can take them home as favors. Plus, potted plants and herbs are low-maintenance and durable, reducing the hassle of wilting flowers. They also provide a pleasant aroma, enhancing the overall atmosphere of your celebration.
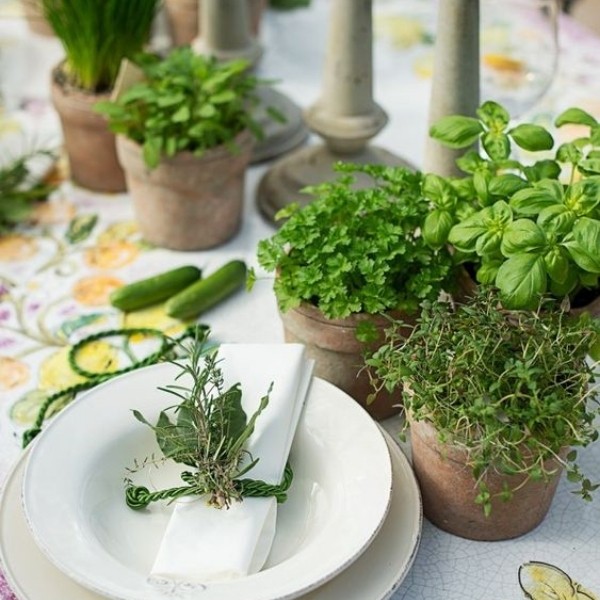
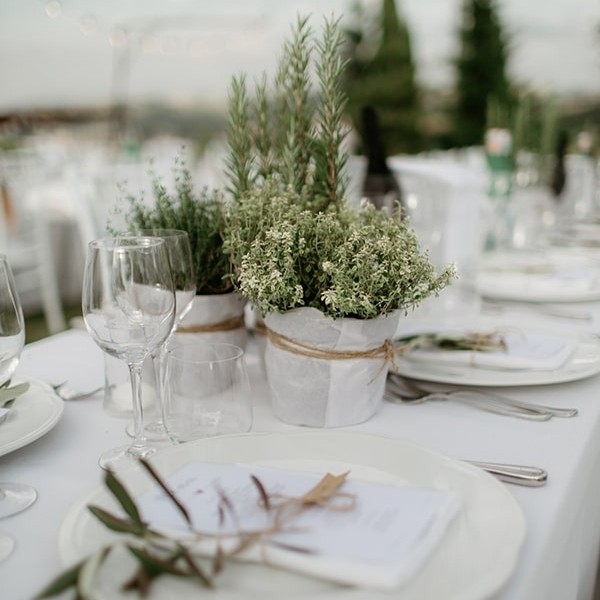
Super straightforward and easy! Purchase bulk from your local garden center or floral shop, and they will already come in trays, so it will also be easy for you to transport them! Definitely a rustic DIY wedding centerpiece favorite!
PRO TIP: Beware of the soil getting scattered on the table! There is a tendency for the soil (for real potted plants!), and we have to avoid this!
Not only is it unsightly, but it can also get unsanitary. What you can do is purchase coasters! So even if some soil falls off the pot, it will be on the coaster and not on the table!
HERB TIP: Be conscious of the herbs’ scents. Don’t use the ones that have heavy scents. It can get overpowering, and you want to keep the scents at a minimum so your guests can still enjoy their meal without getting distracted by the smell.
PREP TIME: Very little time. Place the coaster first, and then place the potted plant/herb on top. You might need some time to clean up after yourself. Check around to ensure there is no soil spillage anywhere.
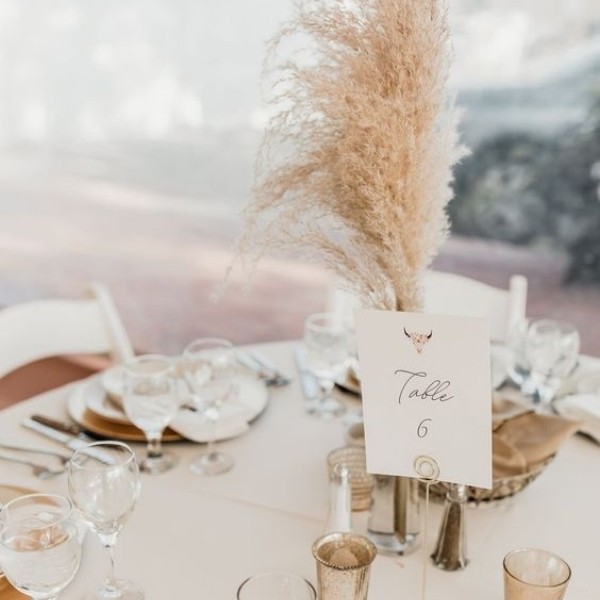
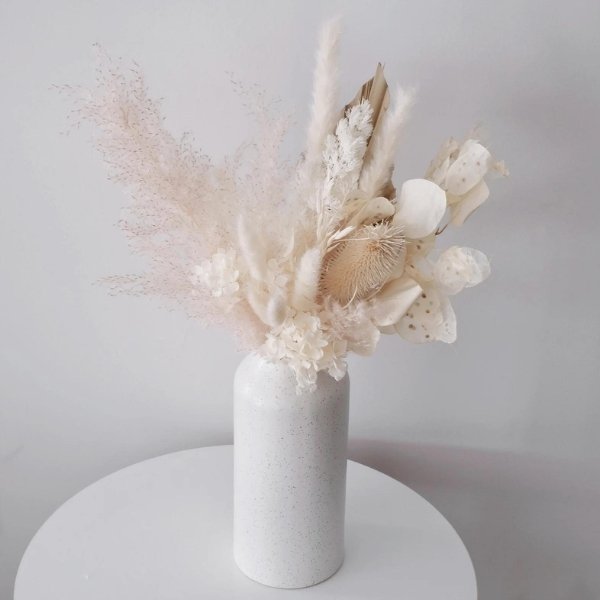
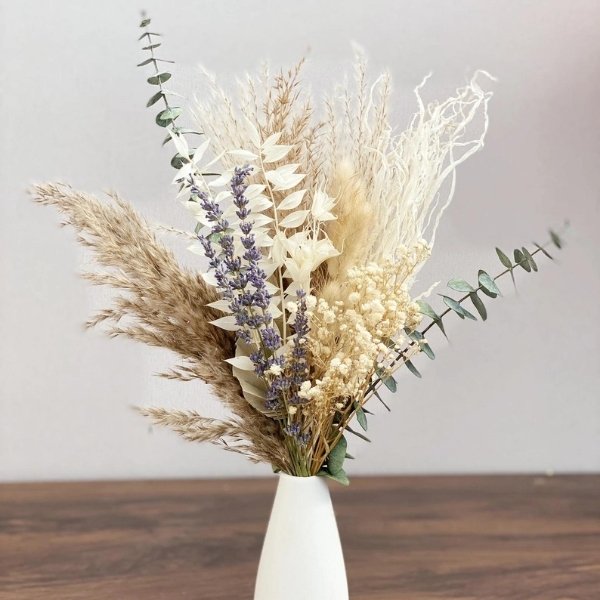
6. Dried (Preserved) Flowers / Pampas Grass : Cheap DIY Wedding Centerpiece
One of our fave Easy DIY Cheap Wedding Centerpieces is Dried Flowers!
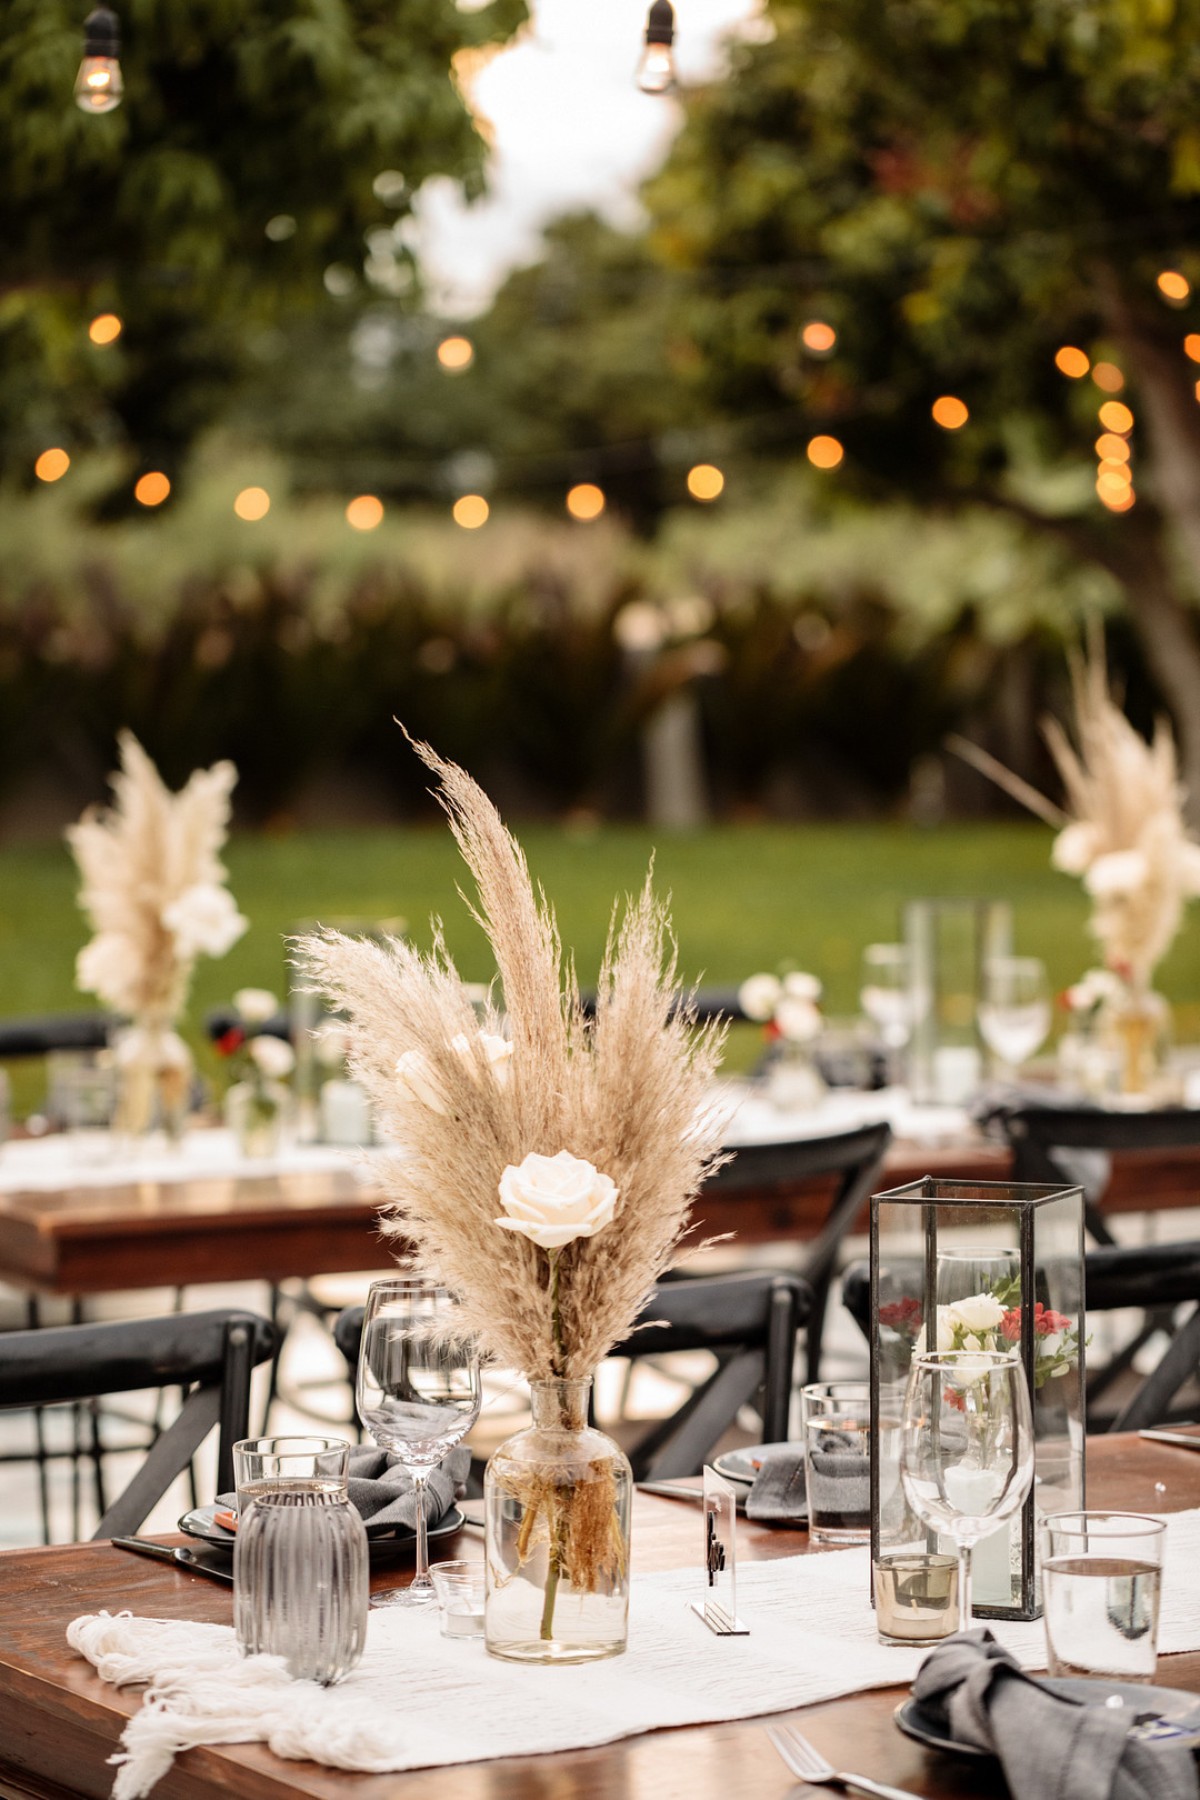
Dried and preserved flowers are a fantastic and cost-effective choice for wedding centerpieces because they offer long-lasting beauty without the high price of fresh blooms. They come in a variety of styles and colors, making it easy to match your wedding theme.
These flowers are low-maintenance and don’t require constant care, so you can enjoy their elegance throughout your celebration. Additionally, they can be used as keepsakes or home decor after the wedding, providing lasting memories. Dried and preserved flowers also eliminate the worry of wilting or fading, ensuring your centerpieces look stunning all day long. So, opt for these timeless blooms to create a charming and budget-friendly centerpiece!
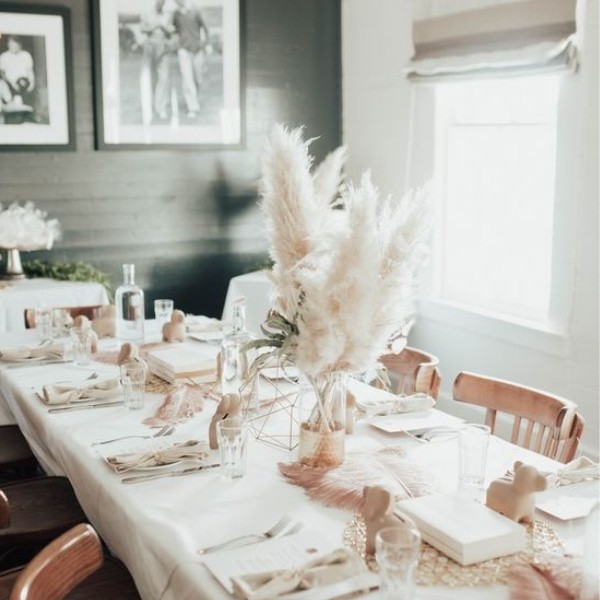

This is probably our favorite out of our easy and affordable DIY wedding centerpiece ideas list: Unique, preserved, beautiful… DIY dried flower arrangements!
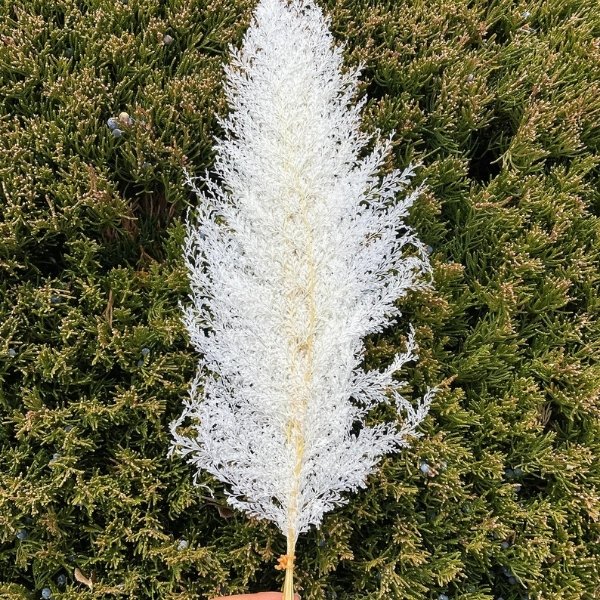
Pampas Grass is probably one of the easiest and quickest centerpieces to work with!
PRO TIP #1: Pampas grass is usually shipped in a bundle, and it comes very tightly wrapped in plastic.
To fluff, it, use a hairdryer (low heat) to soften it and make it easier for you to fluff it. The fluffier, the better!
PRO TIP #2: When working with DIY dried flower arrangements, and you’d like them to look more spread out, opt for a vase that has a wider opening.
This way, the stems will be spread out more, covering more area, and giving the illusion that it is bigger. Insert them into the vase sideways around the rim first, and build from there.
PRO TIP #3: If you are working with a rectangular table, try using vases with multiple heights. Cut the pampas grass (or your choice of any dried flower variety!) accordingly to create a high-low effect, adding movement to your table.
Always check your height combination first before cutting by volume!
PRO TIP #4: If you are using a mix or looking to design your own bundle for your easy DIY cheap wedding centerpiece, you can pre-design and pre-make the bundles and tie them together using a chenille stem/pipe cleaner.
This will make it easier to set it up on the day of your wedding!
PREP TIME: Initial prep time to fluff the stems will be about 5-10 mins per stem. But on the day of the wedding, it can be super quick! You take these babies out of the box and put them in the vase, and voila! You are all set!
〰️ Cheap DIY wedding centerpieces are a fantastic way to add a personal and meaningful touch to your wedding decor while staying within your budget.
These DIY centerpieces offer a world of creativity and versatility, allowing you to tailor your designs to match your wedding theme and style.
Remember, DIY projects also provide an opportunity to involve friends and family, turning the process into a memorable bonding experience.
Whether you’re planning an intimate backyard wedding or a grand celebration, cheap DIY wedding centerpieces allow you to create beautiful and memorable focal points that reflect your love story.
So, embrace your creativity, get inspired, and have fun crafting the perfect centerpieces that will make your wedding day gorgeous, fun, and unforgettable!

What You Really Need To Know
For DIY centerpieces, you can store the finished products in boxes from your local hardware store with rubber non-slip liners for dry centerpieces.
If you are filling up the vase with water, only fill it out halfway through so the water won’t spill while in transit.
Looking for boxes that you can stack will make it easier for you to transport them. Non-slip rubber liners in between boxes will be your best friend to avoid any slipping while in transport.
If you are not able to stack, you can pre-bundle the flowers using pipe cleaners and stack them gently in a box. This way, when you get to the venue, you can assemble, fluff, and set them up easier and faster.
Don’t forget to label boxes and have a “visual” sample of how things are supposed to be set up as a reference.
Before committing to a DIY project, it’s important that you evaluate what’s on your plate and estimate how much time it will take you to complete a task.
By the same token, also consider “phantom costs” associated with DIY projects like supplies. packaging, storing, transportation, and most importantly, being open to mistakes and re-doing things, which means you might need to re-purchase things to start over.
Cheap DIY Wedding Centerpiece
Planning your wedding doesn’t have to cost a fortune, especially when it comes to stunning centerpieces. With these cheap DIY wedding centerpiece ideas, you can create a stylish and personal setup that reflects your love story beautifully.
You’ll save money, stay on budget, and still wow your guests with thoughtful and creative details. These affordable wedding decor tips are perfect for couples who want elegance without the splurge. Whether you’re going for rustic, romantic, or modern vibes, there’s a DIY centerpiece idea here to match your wedding theme.
Using candles, florals, greenery, hydrangeas, and simple touches, you can craft decorations that look high-end but cost very little. You don’t need to be a pro to make these centerpieces shine on your special day. Just follow your instincts, use what you love, and have fun with it. This is your celebration, and it deserves to look and feel like you.
** This post has Amazon links, and as an Amazon Associate, Peppermint & Co. Ltd. earns from qualifying purchases.