Easy DIY Chocolate Wedding Favor. Looking for affordable yet elegant wedding favors? Considering chocolates for your wedding favors? Wondering if you want to go down a “chocolate wedding favor” route? We got tips for you!
This site contains affiliate links. For more info, please see our full disclosure. This post has Amazon links and as an Amazon Associate, Wedding Planning Resources earns from qualifying purchases.
When it comes to choosing wedding favors that encapsulate love and gratitude, few options are as universally adored as chocolate.
A symbol of indulgence and delight, chocolate carries with it an inherent charm that resonates with guests of all ages. Rarely will you find someone who doesn’t appreciate a good piece of chocolate. Its appeal spans generations, making it a thoughtful choice that’s sure to delight all your wedding guests.
From elegant truffles to artisanal bars, the world of chocolate offers a plethora of customization options. You can choose flavors, shapes, and packaging that align perfectly with your wedding theme and color scheme.
Just like you and your partner, chocolate comes in an array of flavors and styles.
Whether you’re drawn to classic milk chocolate, sophisticated dark chocolate, or even unique combinations like chili-infused or sea salt caramel, your choice of chocolate can reflect your personalities and preferences.
Edible favors are often the most memorable ones, and chocolate is no exception.
Chocolate favors can be elegantly presented in various ways. From beautifully designed boxes to charming mini bags, the packaging options are endless, allowing you to present them as elegant keepsakes or delightful treats.
Incorporating chocolate wedding favors into your décor can add a touch of elegance to your reception tables.
Strategically placed favors can enhance the visual appeal of your table settings while also providing a delightful treat for your guests.
Whether you’re having a winter wonderland wedding or a summer soirée, chocolate is a versatile choice that suits any season. It can be enjoyed as a comforting treat or a refreshing delight, making it a timeless favorite option.
Wondering why we chose Lindt Chocolates specifically?
Because it doesn’t give “Halloween candy” vibes.
Other brands are a little tricky to work with.
As much as we love Ferrero Roche and Hershey’s, they’re pretty tricky because they are commonly handed out during Halloween. So let’s avoid those ones that give off “Halloween candy” vibes altogether.
I had to go to check out the Lindt store in person because they didn’t have a lot of selections online. In the store, you can actually see the products and check out their sizes. Just a better experience altogether.
The lady at the store said once you have decided what you want to order in bulk, you can call the store ahead of time and pre-order. Set a pickup date and they will box it up so you can pick it up easily!
Here’s a video on how we put together ideas for easy DIY chocolate wedding favor:
PRO TIP #1: The truffle balls tend to melt so much quicker in the summer. Choose a solid mini bar so it can stand the heat longer.
You can look for other similar-sized chocolate if you are not a big fan of LINDT. Just be sure to check on the size and the thickness to ensure that they still work with the packaging.
We’ve purchased packaging from Creative Bag. We did go in-store, but most of the products are available to order online.
PRO TIP #2: Choose labels and tags that are max 1.5 inches in diameter/long. Since the packaging and chocolates are smaller, you do not want the label to cover the whole thing. The right balance of size is key!
PRO TIP #3: To elevate the look of wedding favors, you can order customized wedding tags and stickers!
This video is a good gauge to decide if you want to go this route or not. Having an idea of the “work” involved in any DIY project you decide to take on, makes it easier for you to decide on it.
Whether it is for your bridal shower, engagement party, and/or your wedding, these ideas will help you figure things out!
Our goal is to come up with the easiest, fastest, most affordable, and yet still elegant options so you can elevate seemingly simple ideas with some easy design adjustments!
RELATED POST: DIY Grocery Cookies Wedding Favor

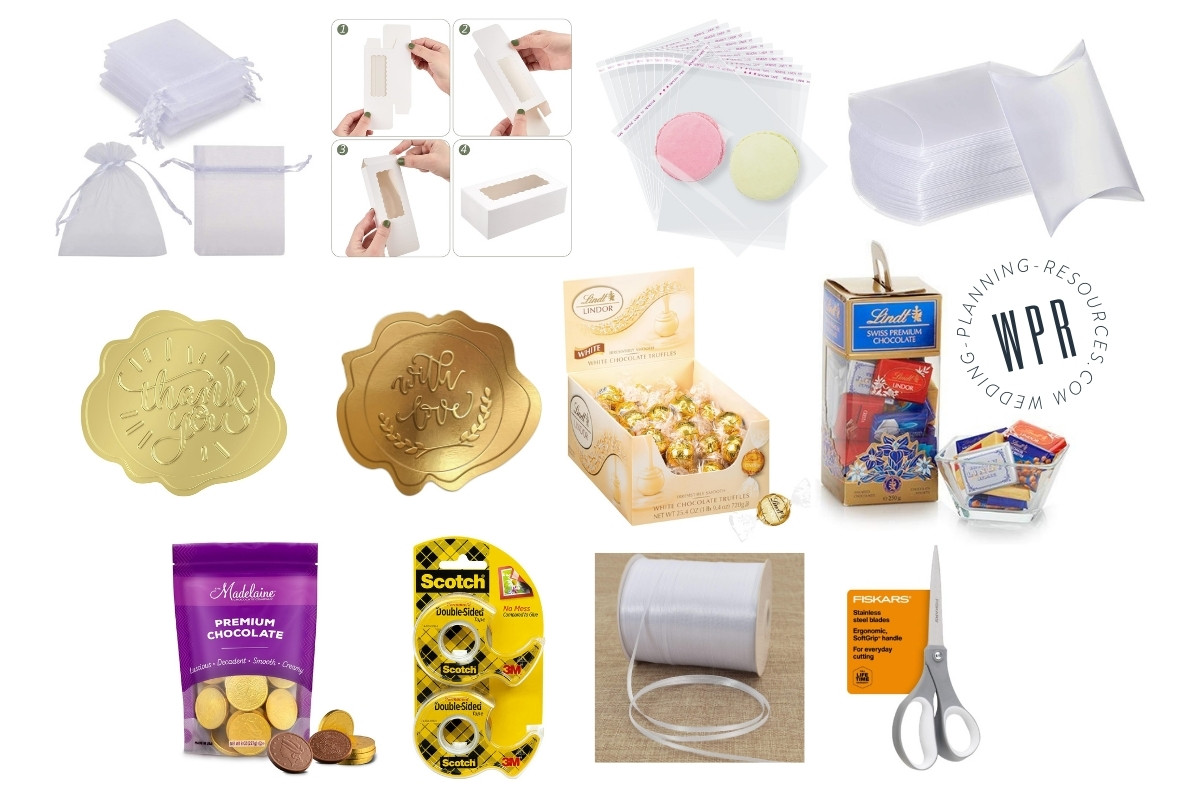
Here are the products that we used:
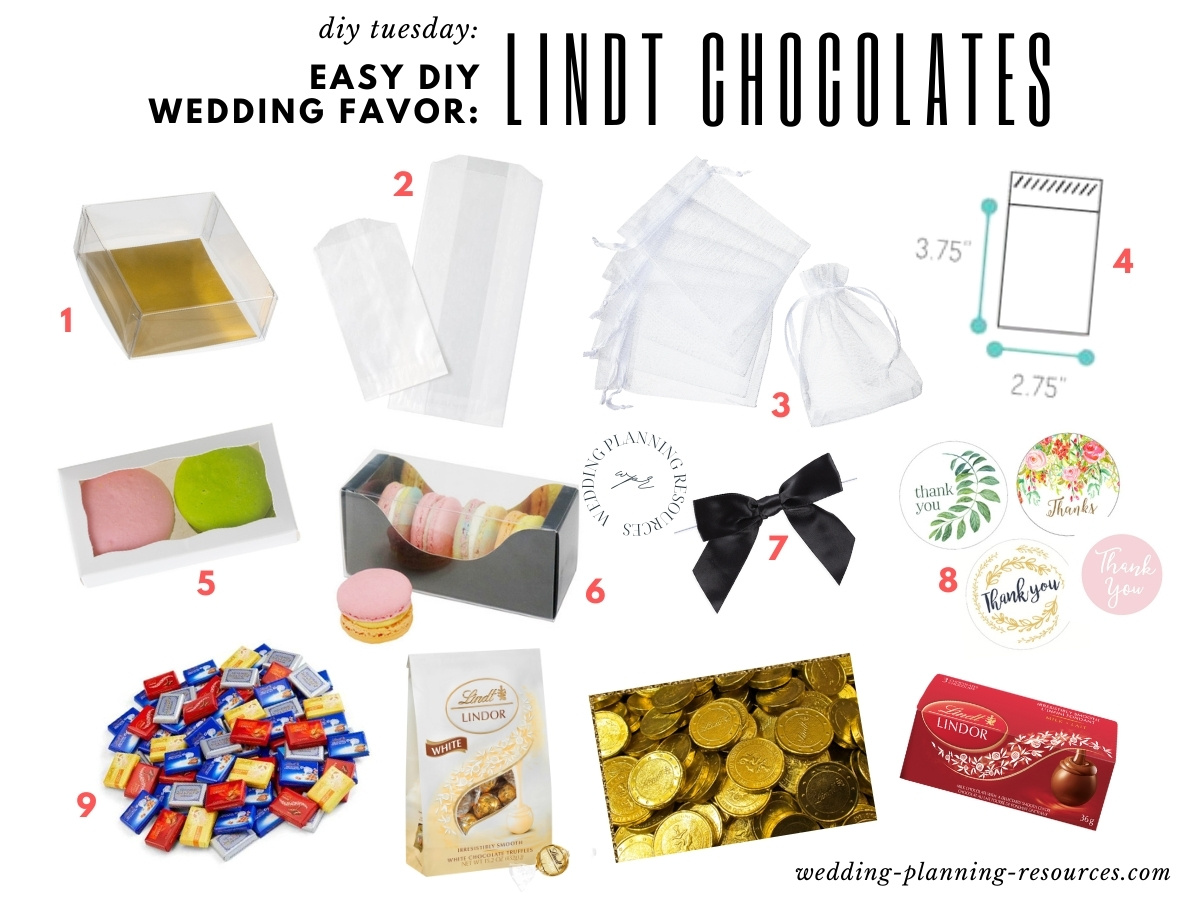
1. Clear Set Up Boxes with Gold Liner // 3 x 2.75 x 1.25in.
2. Glassine Bags // 3 x 5.5in.
4. Clear BOPP Self-sealing Bags // 3×2.75×1.25in.
5. White Macaron & Candy Boxes // 4-5/16 x 2.25 x 1in.
6. Macaron Boxes with Clear Sleeve // 4.3 x 1.8 x 1.8in.
7. Satin Pre-Tied Bows // 2in. Bow, 3/8in. Ribbon, 1.5in. Tail
EXTRA TIPS
- Consider products that are easy to store, transport, and set up.
- If you are wrapping with ribbons, tape the bottom part (ever so lightly-tiny tape!) to ensure that the placement does not move around while transporting.
- If you are adding the tiny bows, use a glue gun (tiny dot!) to stick (push down) those. The bows do not have a flat back, so they will need a cushion-like bed to stick to – which the glue gun provides inconspicuously.
- You can use a box to stack them inside for transportation. Don’t squish them too much so they can keep their shape.
- Store them in a cool place. Not in the fridge! The moment you take them out of the fridge, they will melt and get all liquidy. A cool place is good enough for it to maintain its shape before the wedding.
HERE ARE SIMILAR PRODUCTS YOU’LL FIND ON AMAZON:
There you are lovelies! Easy DIY Chocolate Wedding Favor: Lindt!
** This post has Amazon links and as an Amazon Associate, Wedding Planning Resources earns from qualifying purchases.