DIY Thanksgiving Centerpieces: Top 20 Step-by-step Guide. Craft Your Perfect Thanksgiving Table with These 20 DIY Ideas! Get Crafty. Elevate Your Thanksgiving Feast with These Stunning DIY Centerpieces.
This site contains affiliate links. For more info, please see our full disclosure. This post has Amazon links and as an Amazon Associate, Peppermint & Co. Ltd. earns from qualifying purchases.
You’re about to make your Thanksgiving dinner table truly unforgettable by crafting your own decorations that feel warm, festive, and totally you. If you love the idea of a tablescape that reflects your personality and creativity, this guide will be your new favorite resource. You don’t need to buy expensive decor to create a beautiful, cozy dining space, just a few simple materials, some seasonal touches, and a little imagination. When you DIY your Thanksgiving dinner decor, you get to bring in natural elements like pumpkins, greenery, candles, and textured accents that make your table feel inviting and homey. You’ll discover how easy it is to mix rustic vibes with elegant details so your setting feels thoughtful but not fussy. With every project, you’ll feel excited as you bring together pieces that reflect the season’s warmth and richness.
You’ll also love that many of these ideas are budget-friendly, letting you decorate without stress or overspending. Whether your style leans toward farmhouse charm, modern simplicity, or classic harvest elegance, there’s something here for you. This isn’t about perfection; it’s about creating a space that feels joyful and authentic to you. As you work, you’ll feel the anticipation build, imagining your guests gathered around your beautifully decorated table. Each piece you create will tell part of your Thanksgiving story, combining texture, color, and thoughtful design. You’ll learn step-by-step how to build centerpieces, make place settings pop, and layer decor in a way that feels polished but relaxed. This guide will walk you through how to use natural items like dried leaves, small gourds, and branches, along with easy accents like votive candles or lanterns. You’ll also see how to bring in soft fabrics, like runners or napkins, for added warmth.
The very process of crafting becomes part of the holiday magic, giving you a hands-on way to make your table feel personal. And once everything is ready, your Thanksgiving dinner will feel even more special because you made it all yourself. Your guests will notice the little touches that reflect care and creativity, and the space will feel cozy, intimate, and inviting. At the same time, you’ll be free to enjoy the day, not stressed by last-minute decor. You’ll walk into your dining room with a sense of calm, knowing everything came together beautifully. These DIY ideas give you a chance to slow down, sip something warm, and take joy in the process of designing your holiday space. You’ll be amazed at how much ambience you can create with just a few well-chosen items. This guide is your invitation to bring your own style and heart into your Thanksgiving dinner decor. So pull out your crafting supplies, grab some candles and mini pumpkins, and let’s make a table that feels warm, meaningful, and wonderfully yours this Thanksgiving.
When you find the one you like from these DIY Thanksgiving Centerpieces, click on the photo caption to take you right to its step-by-step guide. If you want to see all of them, you can start here.

DIY Thanksgiving Centerpieces: Top 20 Step-by-step Guide (Part 1)
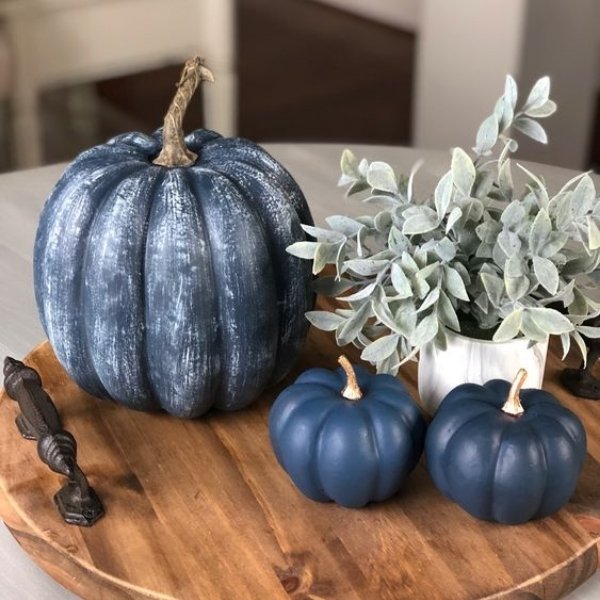
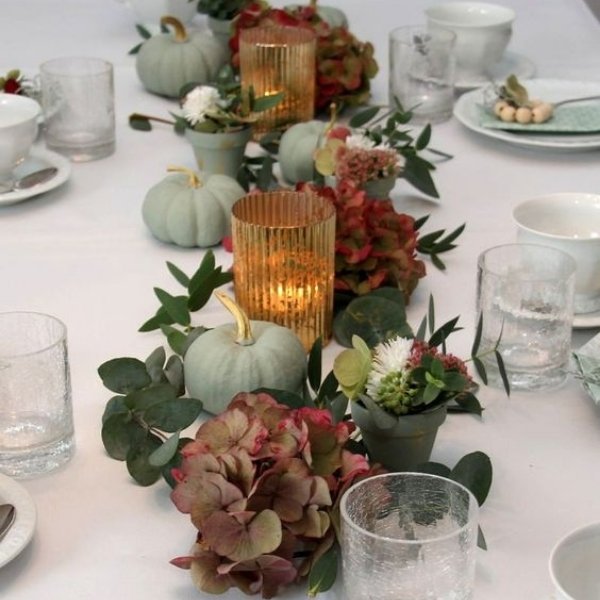
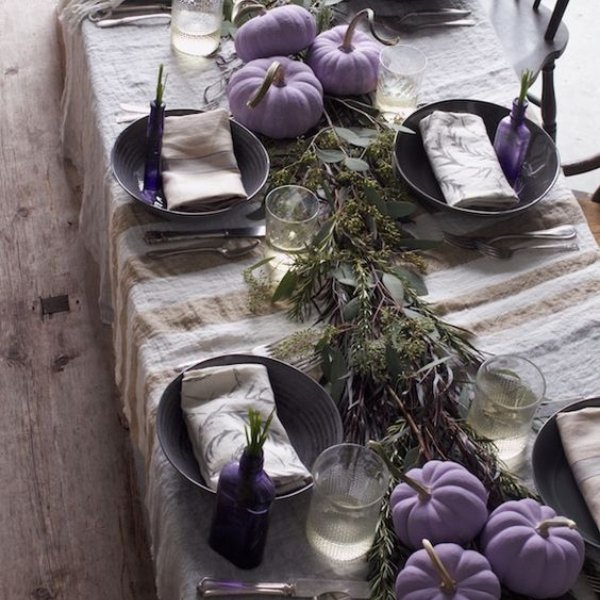
1. Play on blue
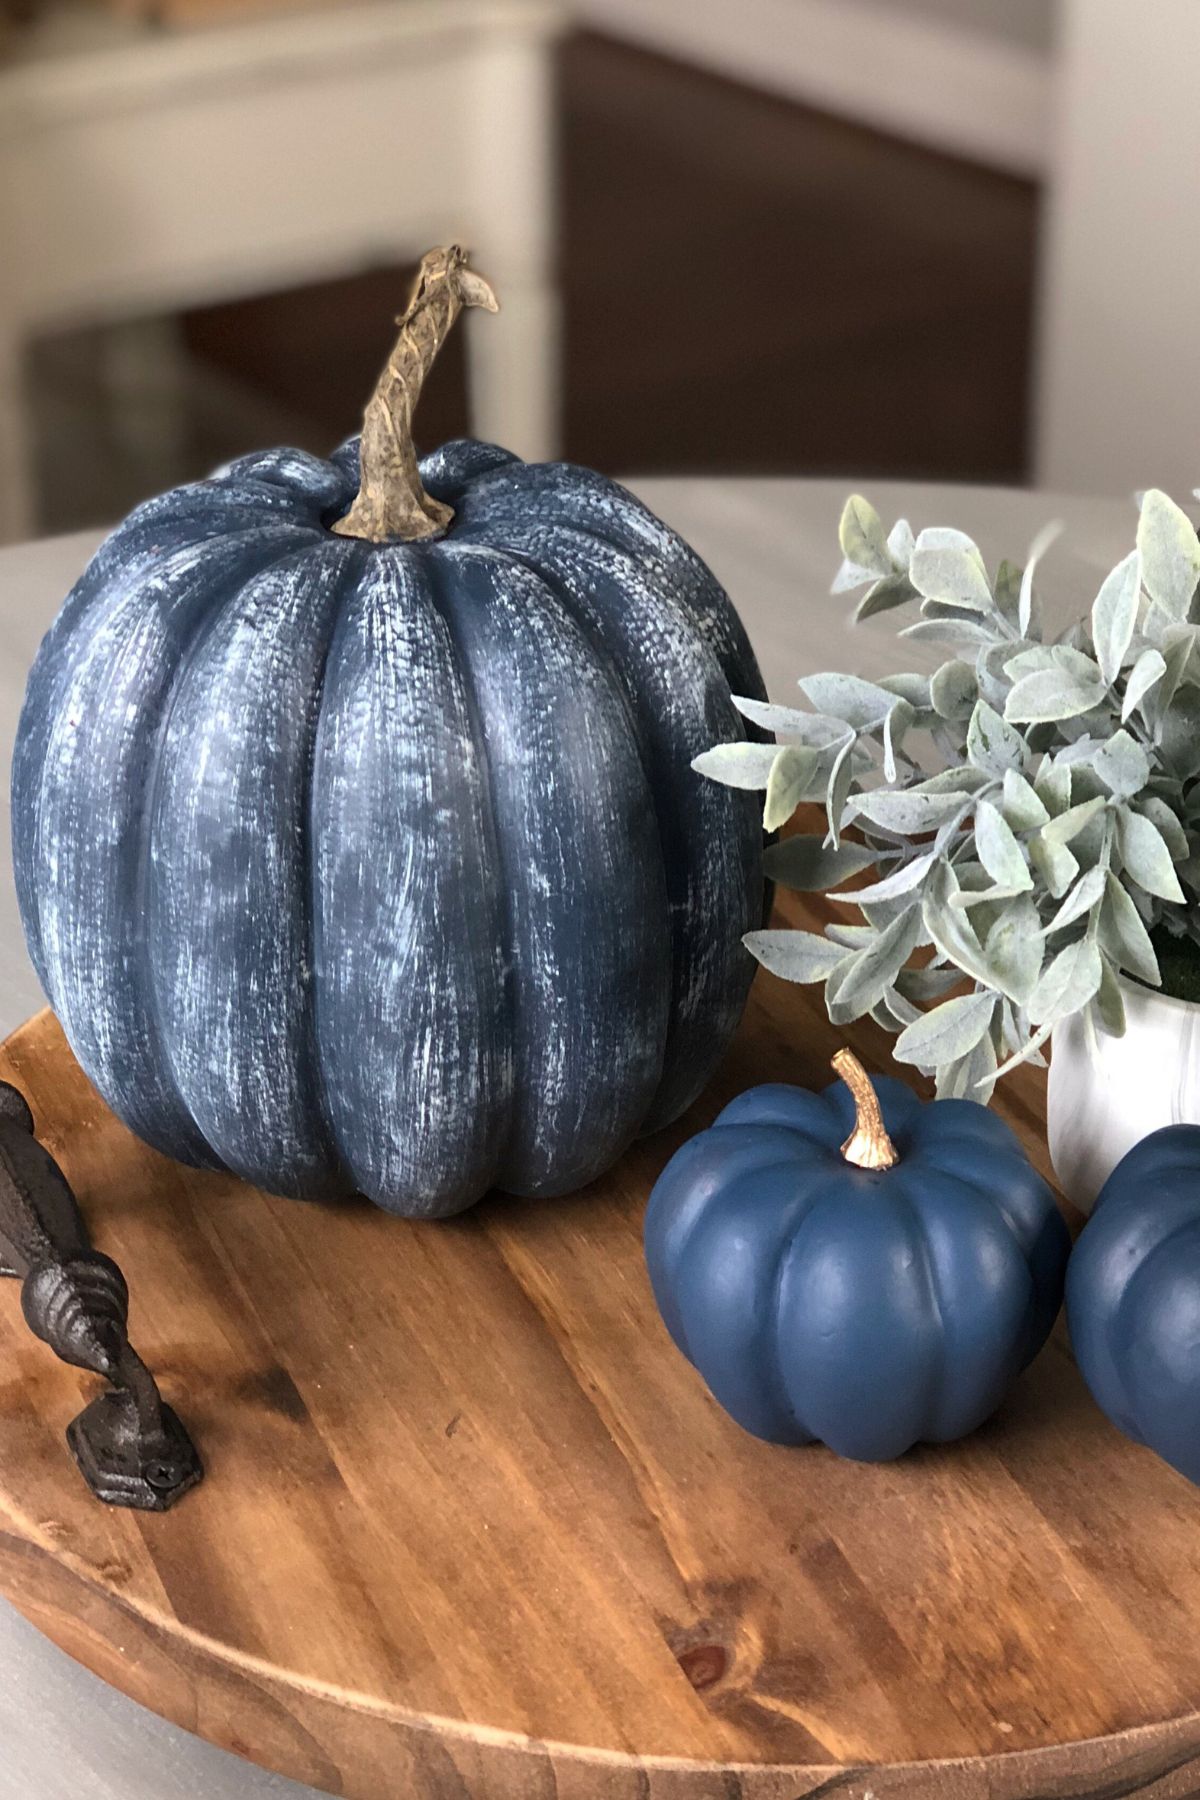
STEP-BY-STEP GUIDE: (we love this pumpkin centerpiece!)
- Start by looking for different-sized faux (plastic or styrofoam) pumpkins. White pumpkins are easier to paint on so you can get the “true” blue shade better without priming. We love these white pumpkin miniature ones!
- Purchase small bottles of acrylic paint. Choose your shades of blue. The ones in here are mostly navy blue, deep blue, and a combination of white and blue to add that rustic feel. Add that gold paint to lighten up the stem. Also, choose matte paint instead of shiny so it will look more “pumpkin-ish”.
- Choose your paint brushes. To achieve the rustic look, use a “fan brush” (included in this kit) and lightly brush on the pumpkin. You can add more layers until you get your preferred design.
- Find a wooden board or tray. Also, if you have a wooden chopping board, it will work great as well! Consider using wooden or rattan chargers for extra savings!
- Add faux potted greenery, preferably something with a mint color to offset the deep blue colors.
- For your dinner parties, add some votive candles to elevate the look and feel of your beautiful table setting!
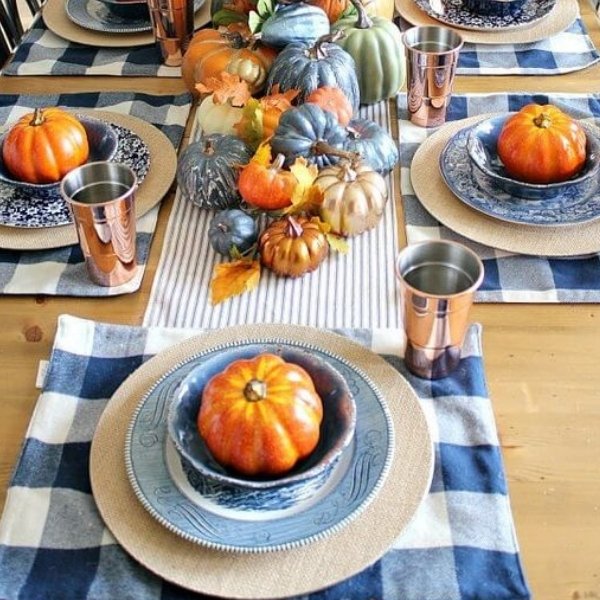
2. Copper and Navy
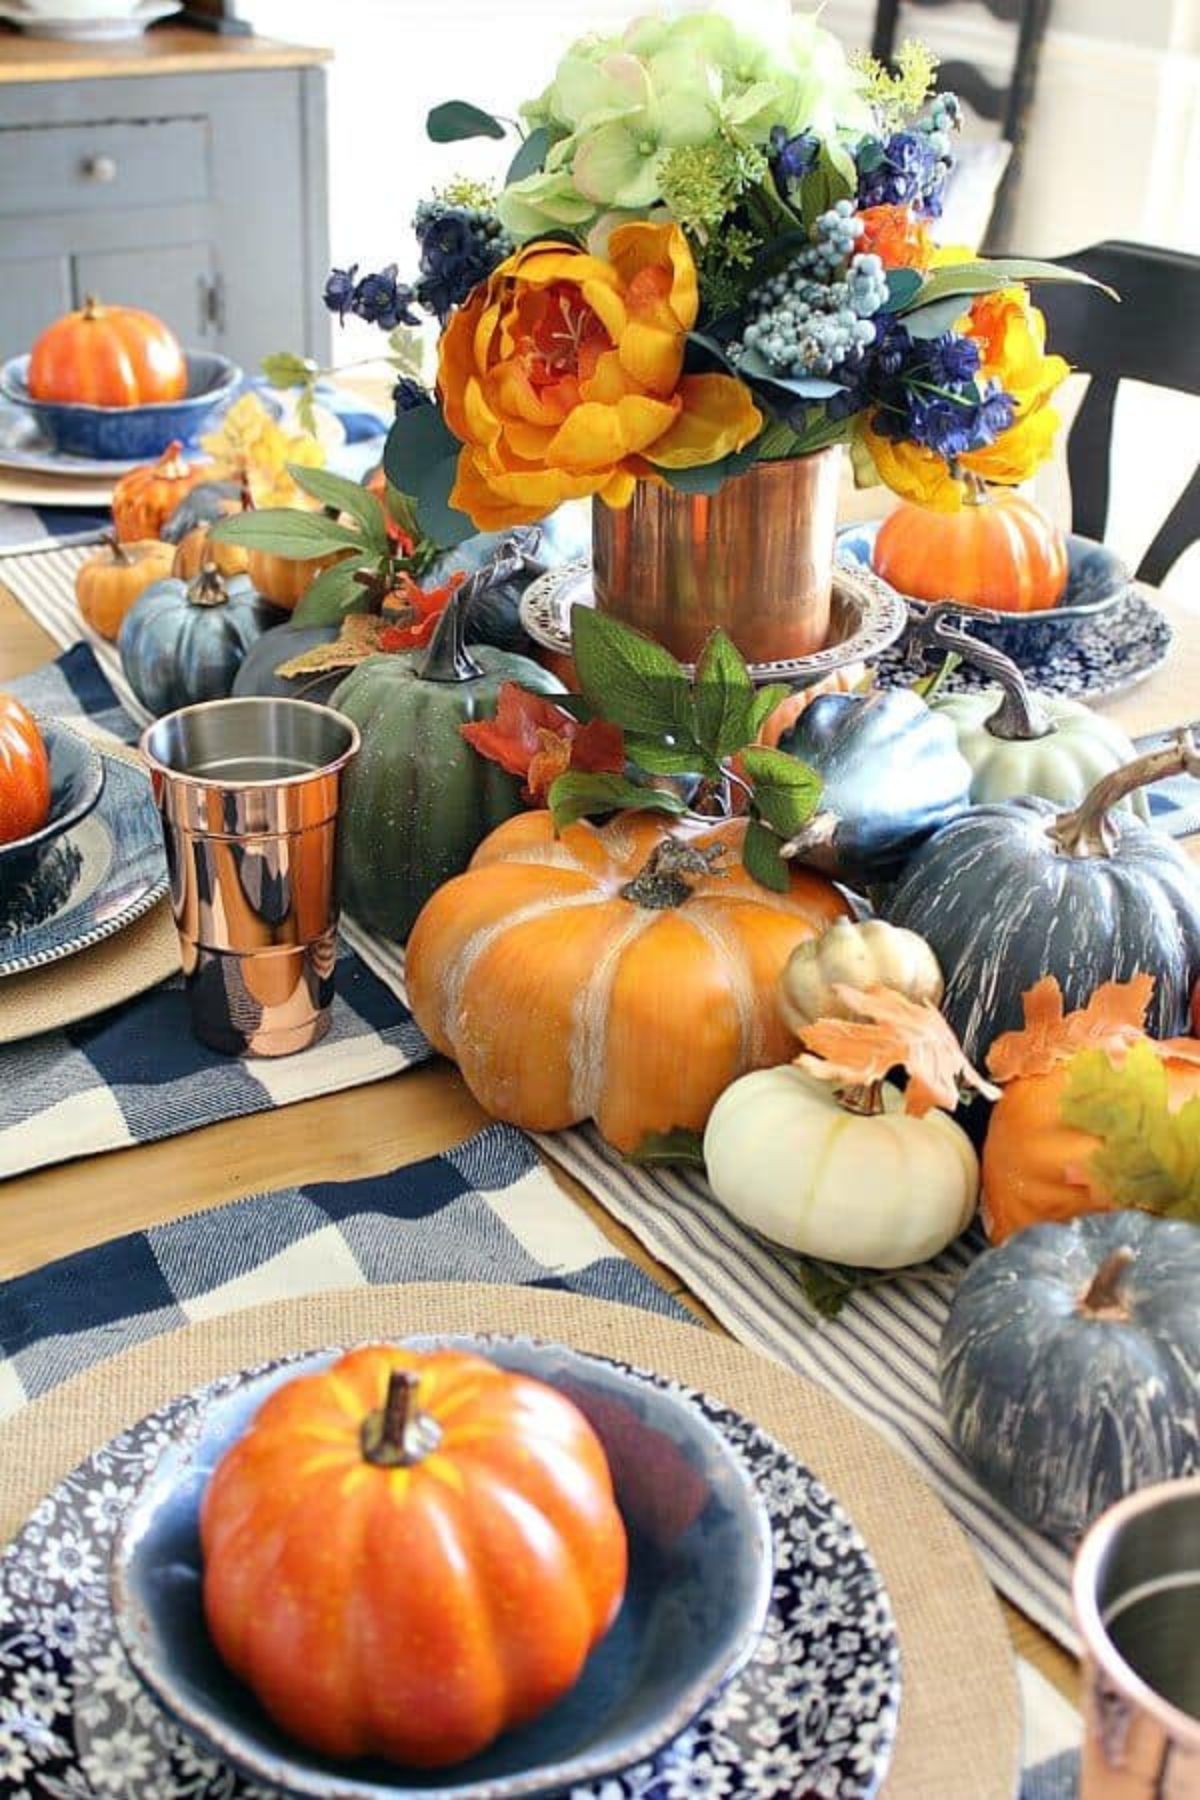
STEP-BY-STEP GUIDE:
- Start with, of course, your faux (styrofoam or plastic) mini (or large) pumpkins. White pumpkins are easier to paint on. This set-up also includes orange pumpkins. We love these white pumpkin miniature ones!
- Purchase small bottles of acrylic paint. This setting has copper, rose gold, navy blue, and some sage minty green. Use easy-to-use paintbrushes.
- If you have a plain white or deep navy table runner at home, it will also work with this.
- Use napkins with a checkered blue style to use as a table mat. To pocket extra savings, you can use paper napkin instead.
- You can tell that the plates are all mismatched – which is super cute. You can purchase or find plates that have blue or navy details and pull off this look!
- To add in a more fall feel, it also shows some orange leaves tucked in between the pumpkins.

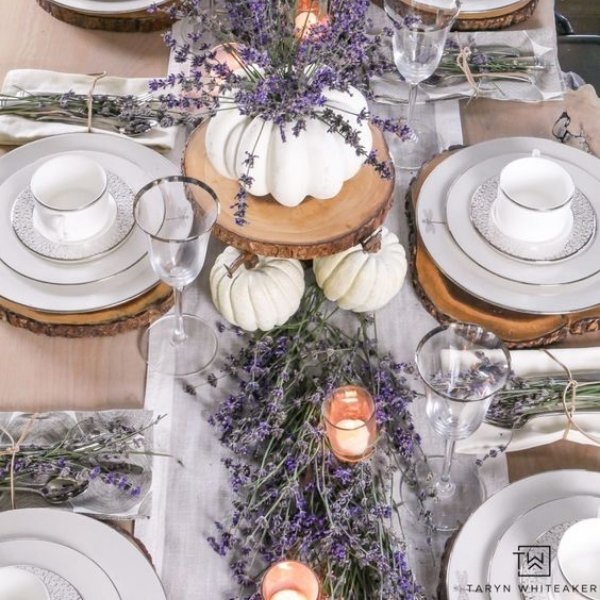
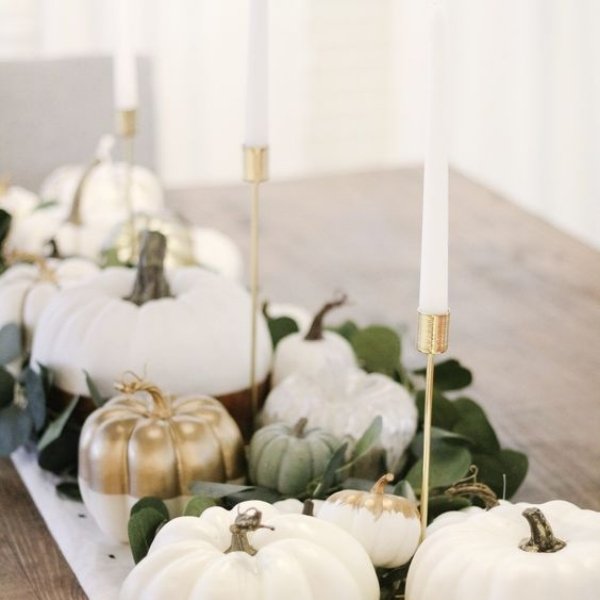
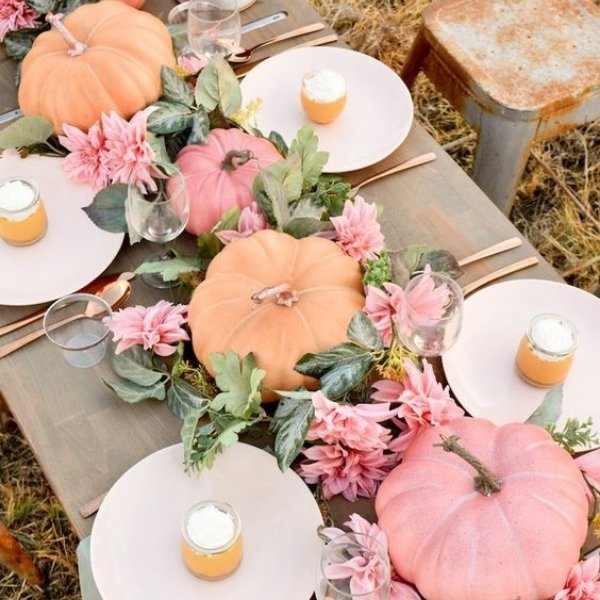
3. Auburn Vibes (if you’re looking for rustic DIY Thanksgiving Centerpieces, then this is for you!)
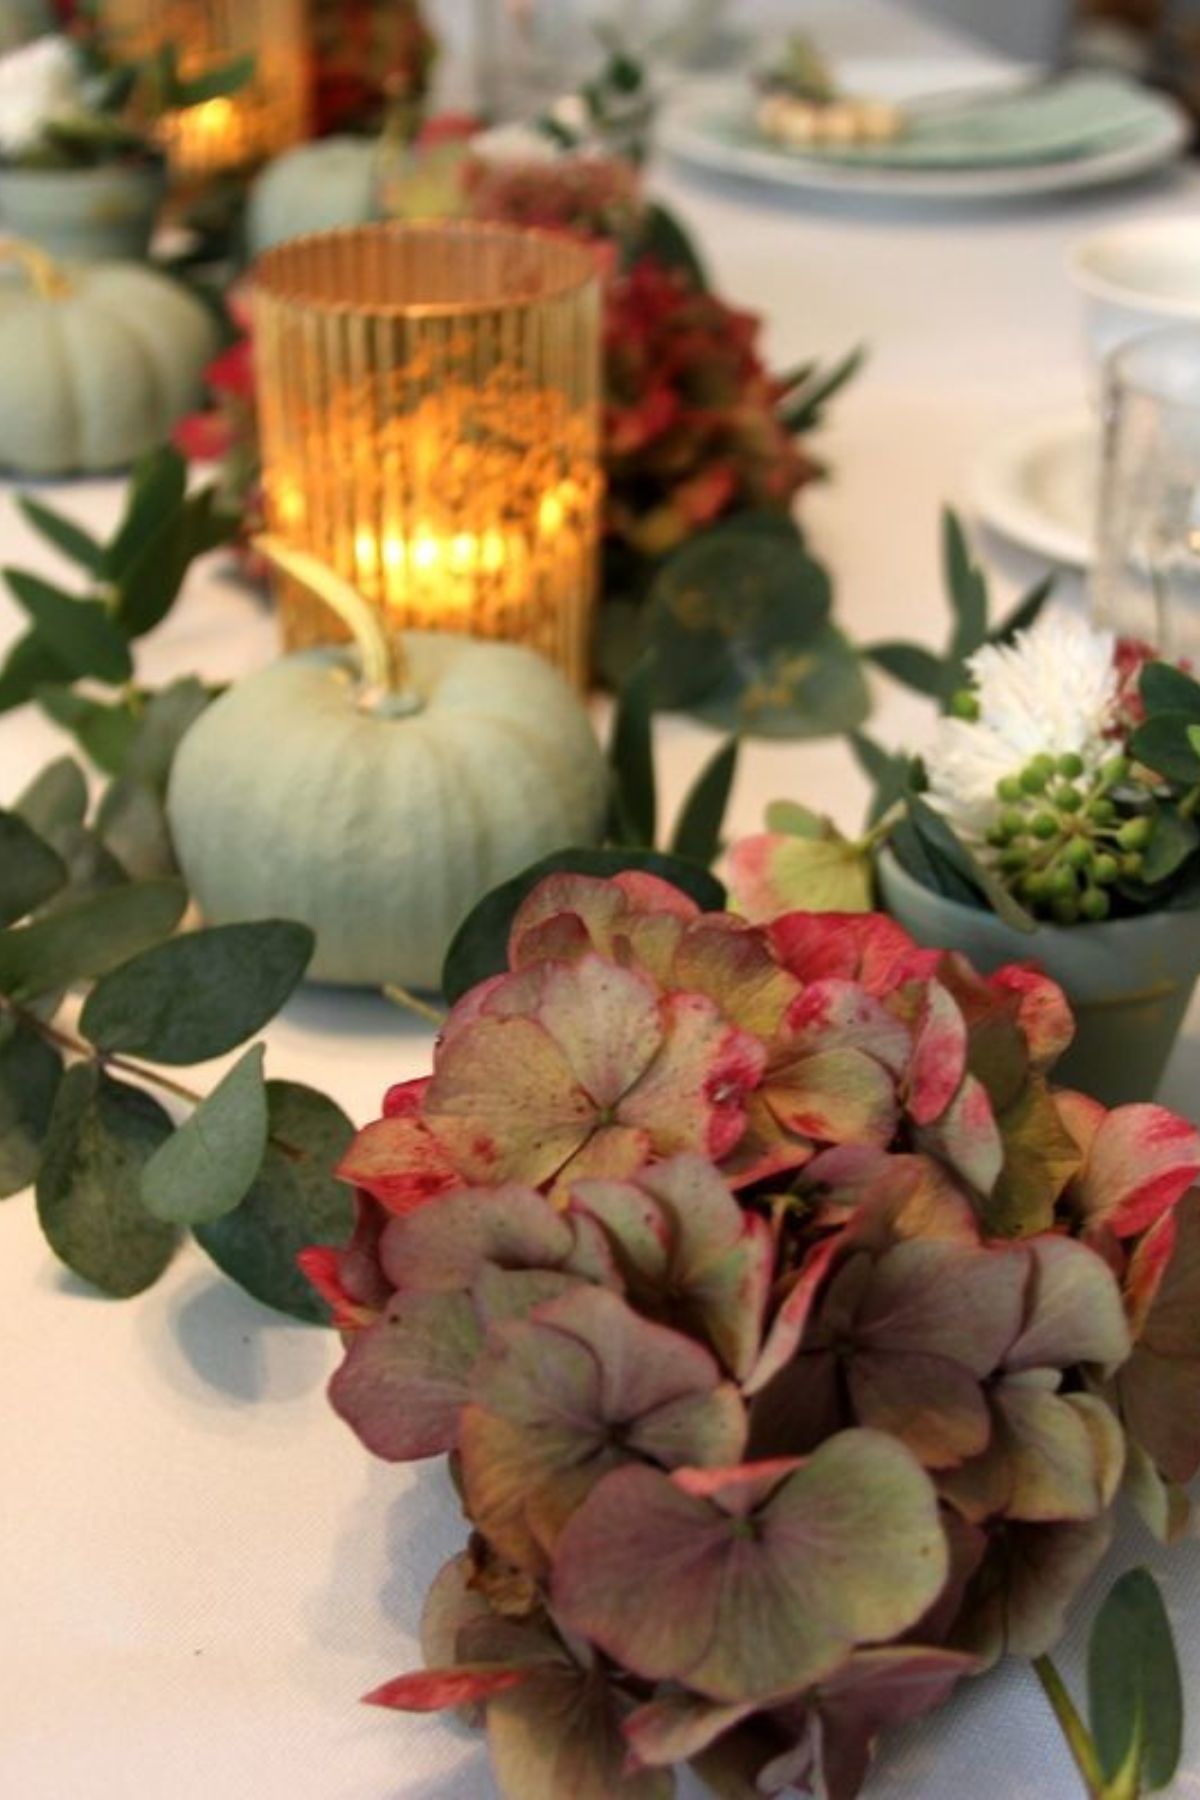
STEP-BY-STEP GUIDE:
- This setting does not show a table runner, but we would suggest adding a white runner to ensure the dried flowers and greenery do not stain the linen.
- Start with your pumpkins. White pumpkins are easier to paint on. We love these white pumpkin miniature ones!
- Find easy-to-use paint brushes.
- The pumpkins here are painted mint sage green with gold stem tips.
- You can purchase auburn hydrangeas dried (preserved) or faux.
- For the eucalyptus, you can also purchase it dried (preserved) or faux.
- There are also small pots (paint them using gray or green acrylic paint) with mini floral arrangements made with auburn and white daisies as well as more (seeded) eucalyptus greenery inserts.
- Using some gold candle holders elevated the look of this setting.
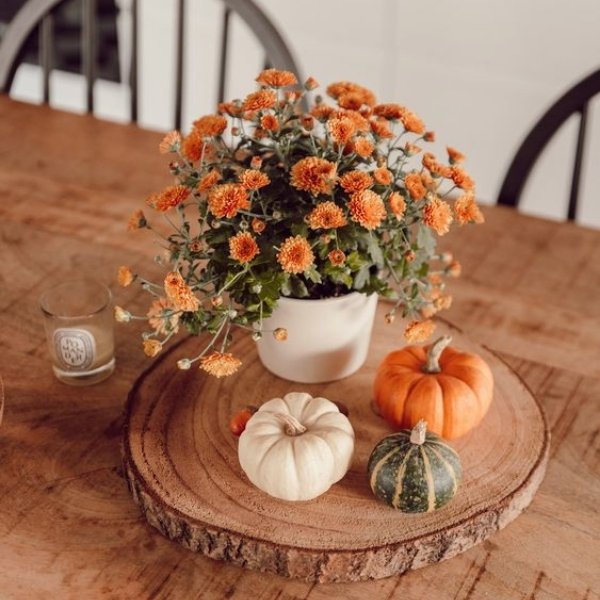
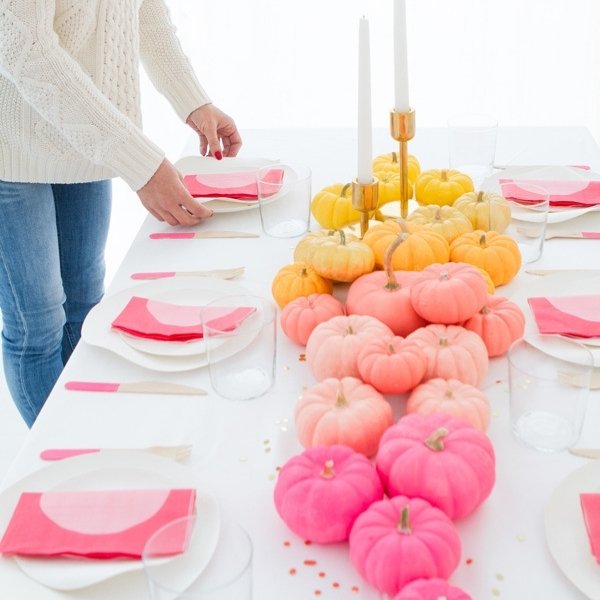
4. Orange you glad
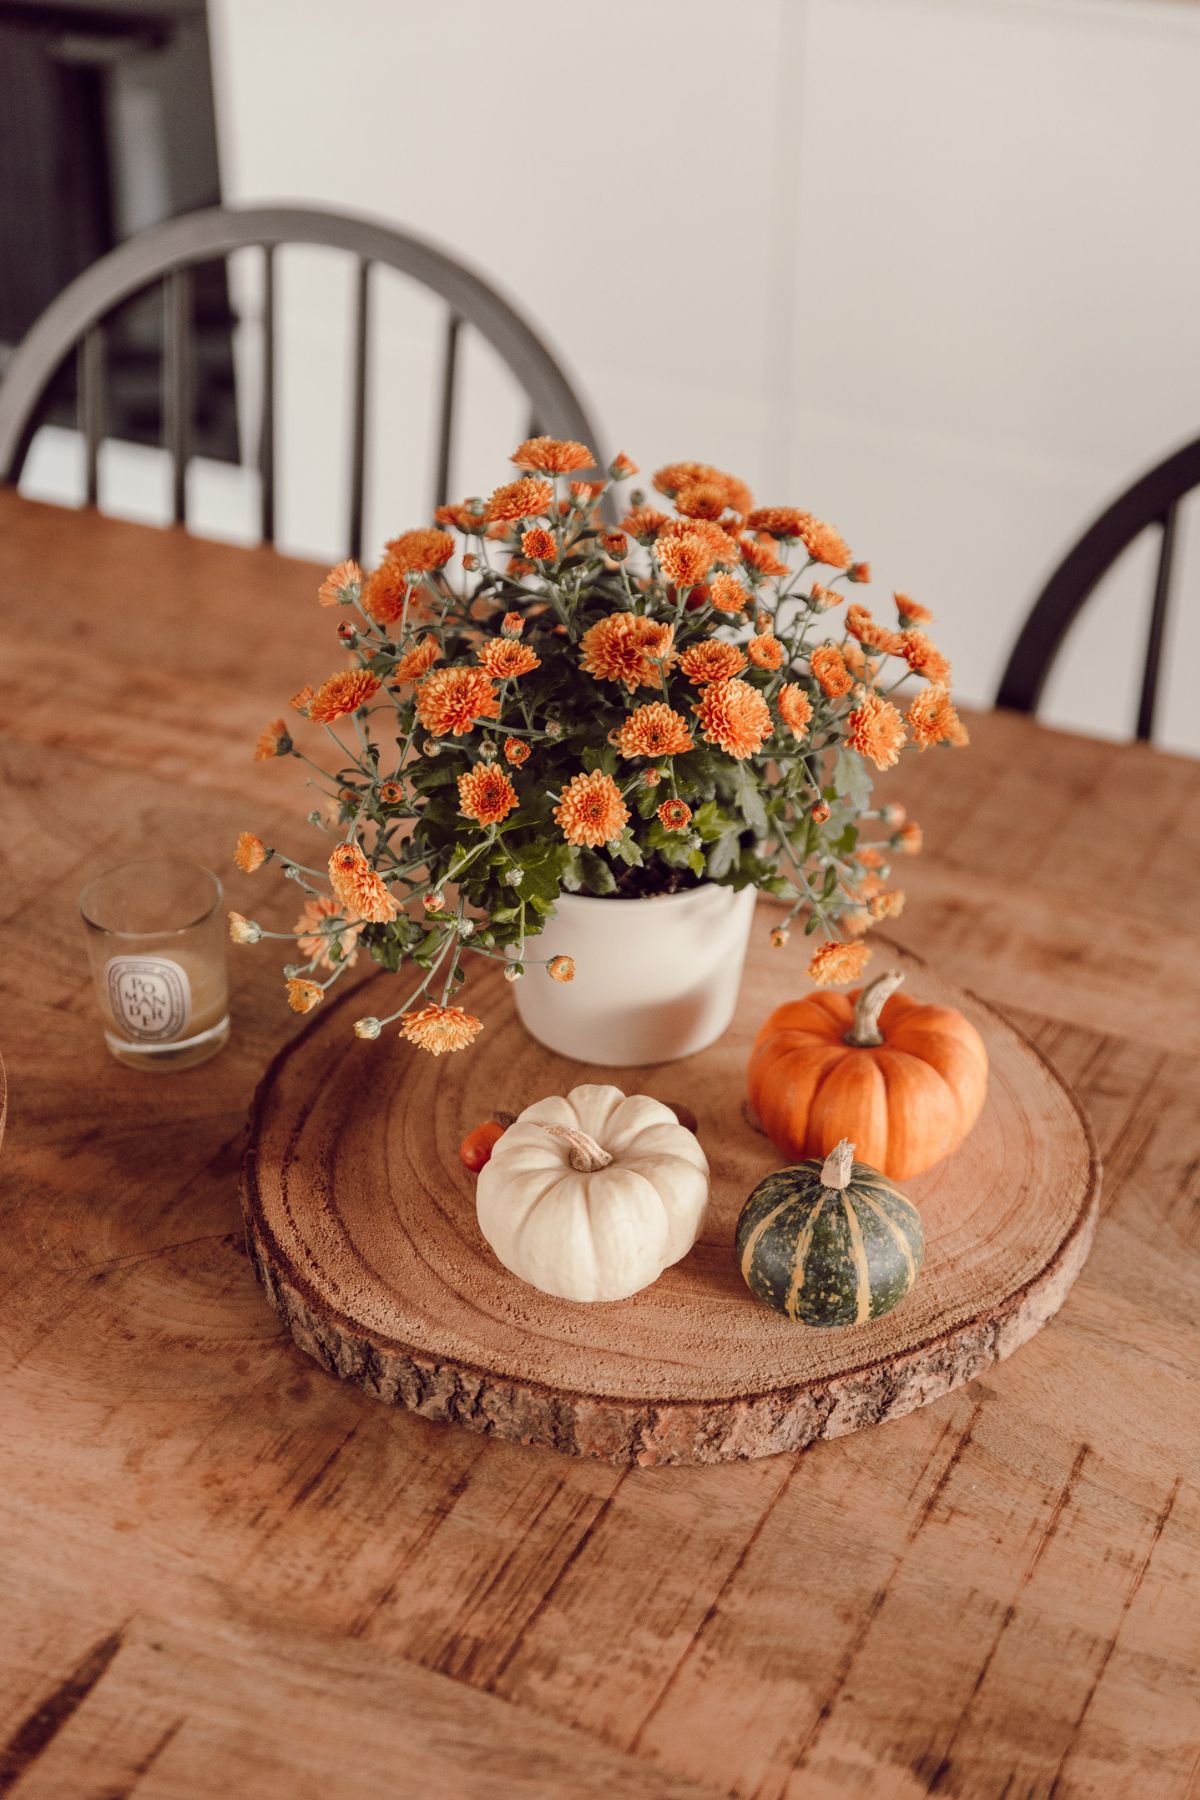
STEP-BY-STEP GUIDE:
- Start with a round wooden slab. If you have a wooden chopping board, it will work great as well! Consider using wooden or rattan chargers for extra savings!
- Of course, you will need your pumpkins. Choose white, orange, and green.
- We love these white pumpkin miniature ones!
- Add a pot of either fresh, faux, or dried blossoming orange flowers with greeneries.
- Finish off the look of your holiday table with votive candles.
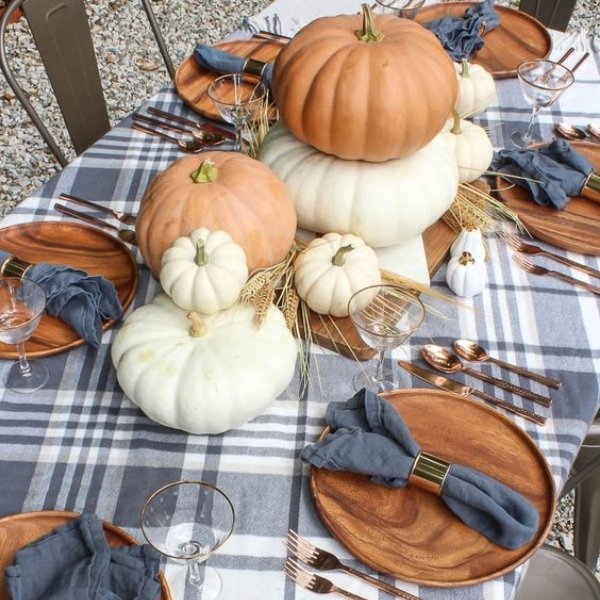
5. Orange and Gray

STEP-BY-STEP GUIDE:
- Here’s a major trick- purchase a throw blanket with your fave black and gray pattern. Or if you have one lying around, you can also use it. Lay over this scarf on top of your white table linen. Even if it doesn’t cover the whole thing, as long as the top part shows the pattern, it will still work.
- You will notice the wooden chopping board right in the middle used to place the pumpkins of different sizes in white and orange. Purchase large pumpkins and a variety of small ones so you can stack them together. Larger pumpkins are always better off bought from your local grocery store.
- We love these white pumpkin miniature ones! You can use these to insert in between.
- There is also some dried rice straw peeking through in between the pumpkins.
- Wooden chargers with gray napkins (you can use fabric or paper) are placed on the table. **TIP: Choose shades of gray that are close to achieving a monochromatic look.
- This setting used a mix of gold or rose gold flatware and napkin holder, as well as gold rimmed glasses.
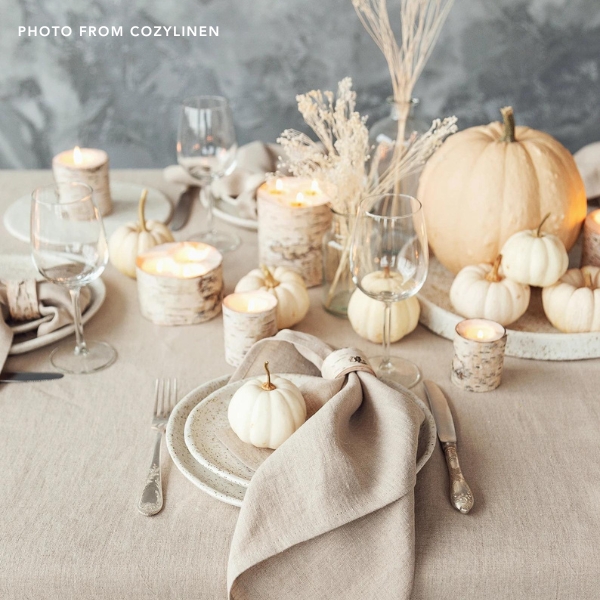
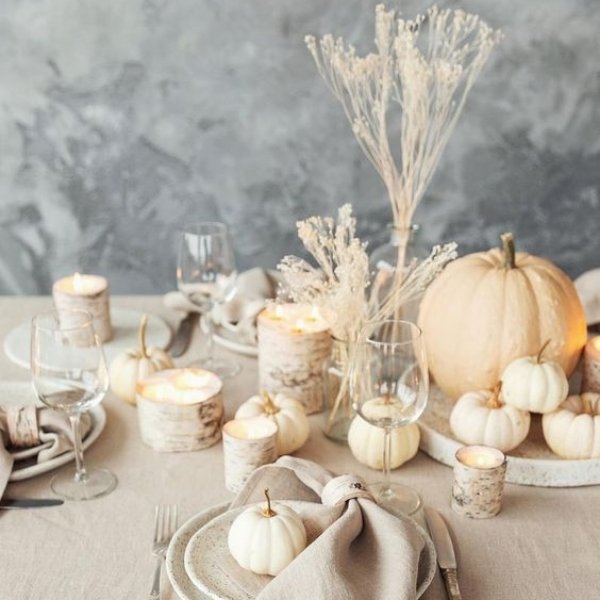
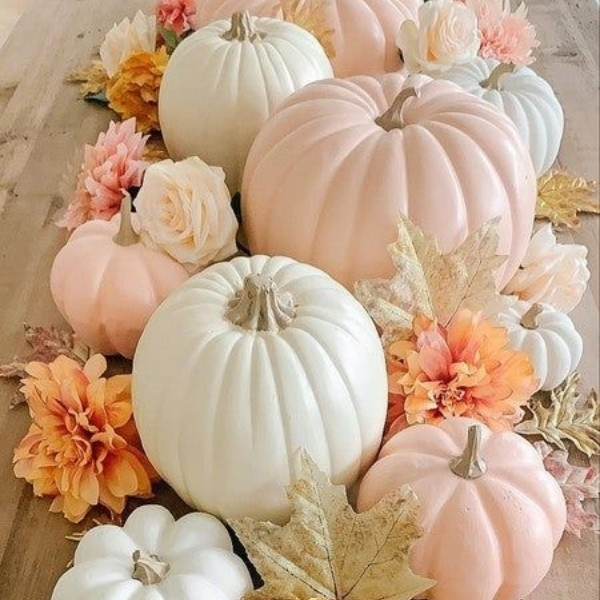
6. Neutral Love
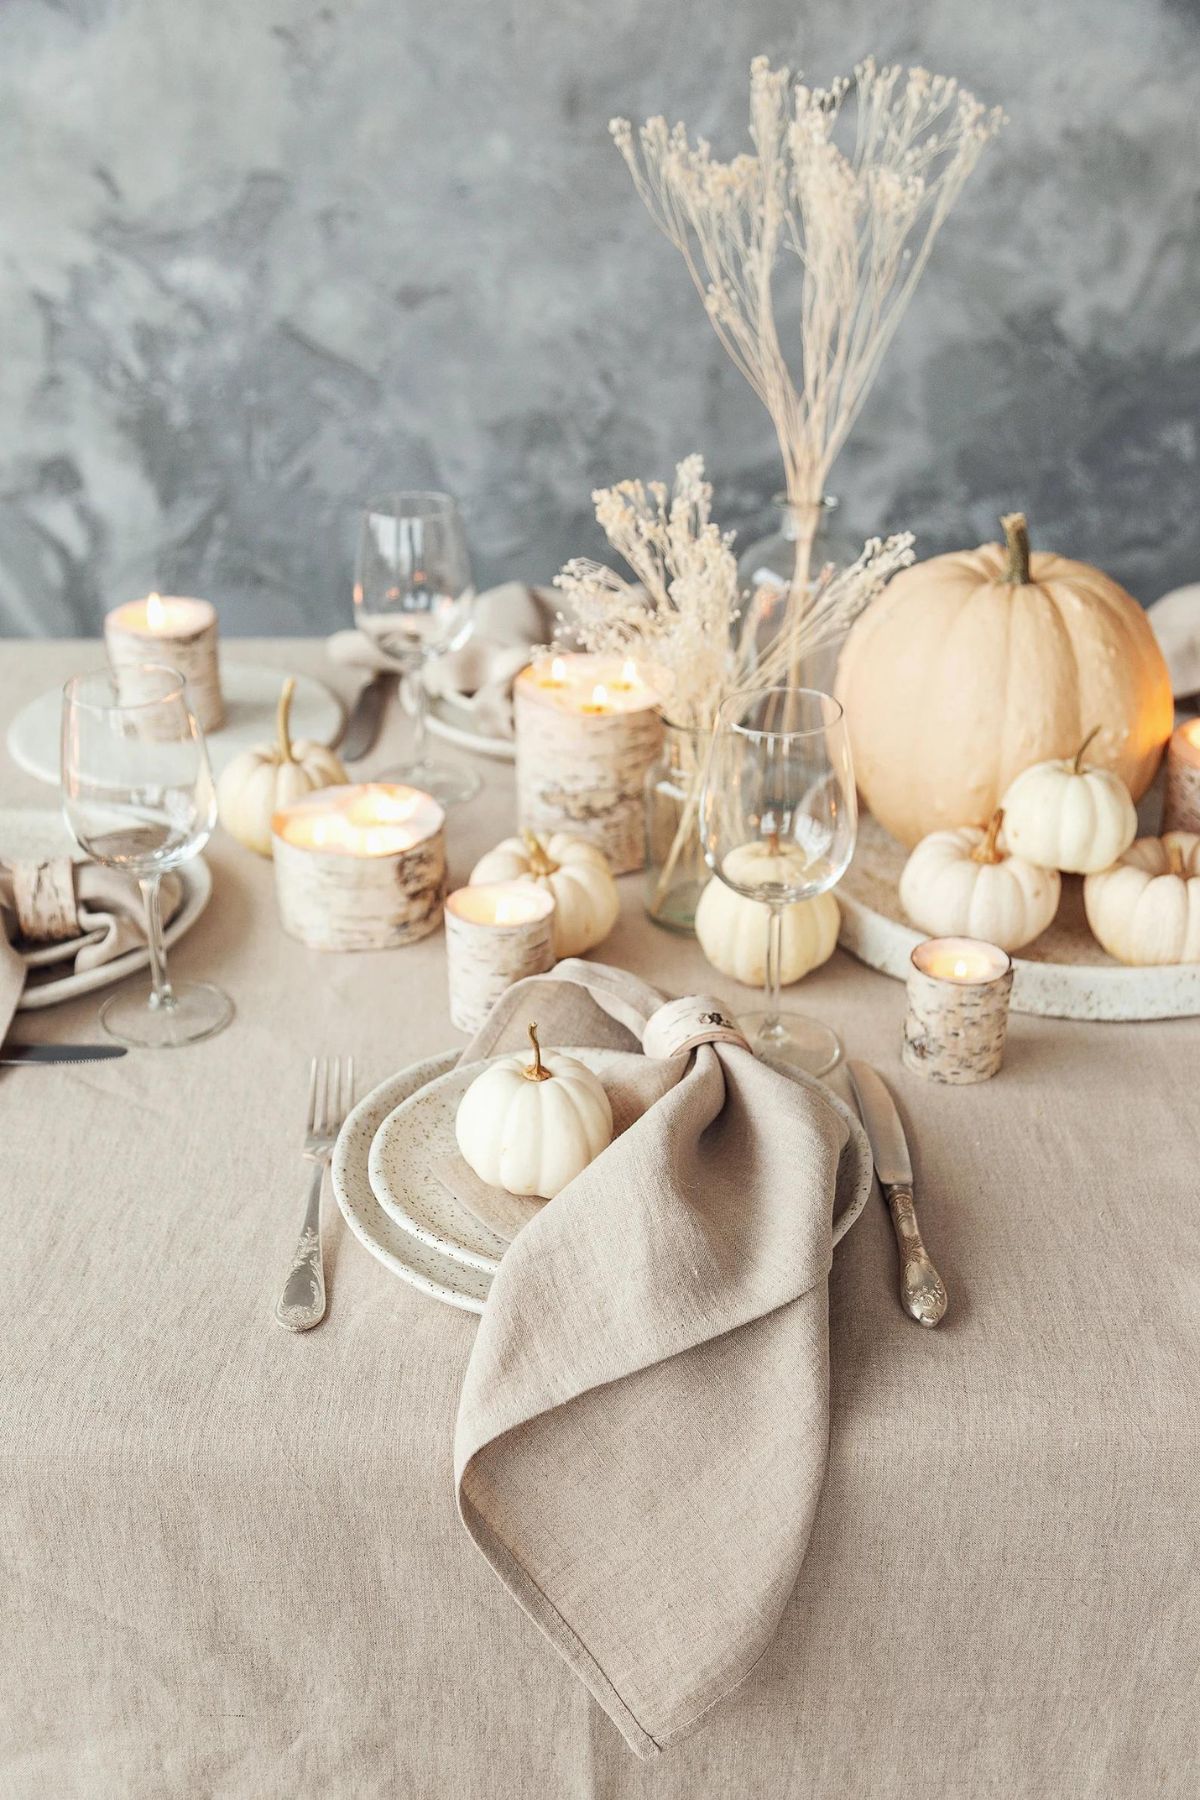
STEP-BY-STEP GUIDE:
(this is one of our favorite DIY Thanksgiving Centerpiece ideas with candles!)
- The beige linen and napkin are what set the tone for this setting.
- Use light orange (paint with peach or light orange acrylic paint) and white pumpkins in different sizes.
- We love these white pumpkin miniature ones!
- Find easy-to-use paint brushes.
- Birch candle holders in different sizes add texture to the design.
- Add inserts of white dried flower stems in a small bud vases to create some height and length (since everything is round-shaped)
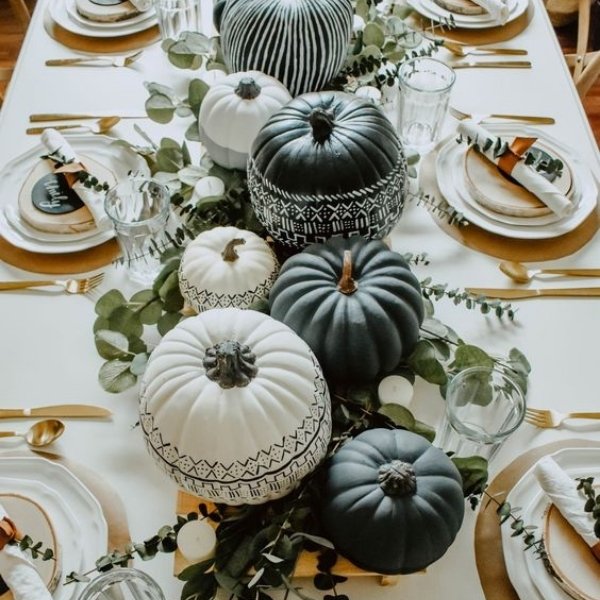
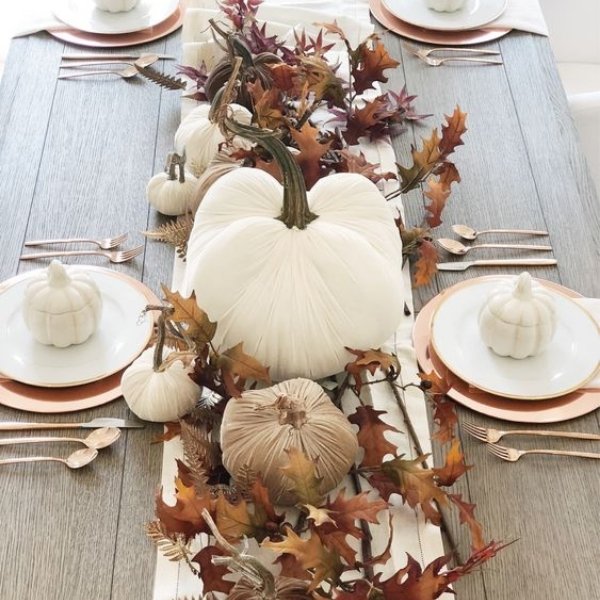
7. Black and White
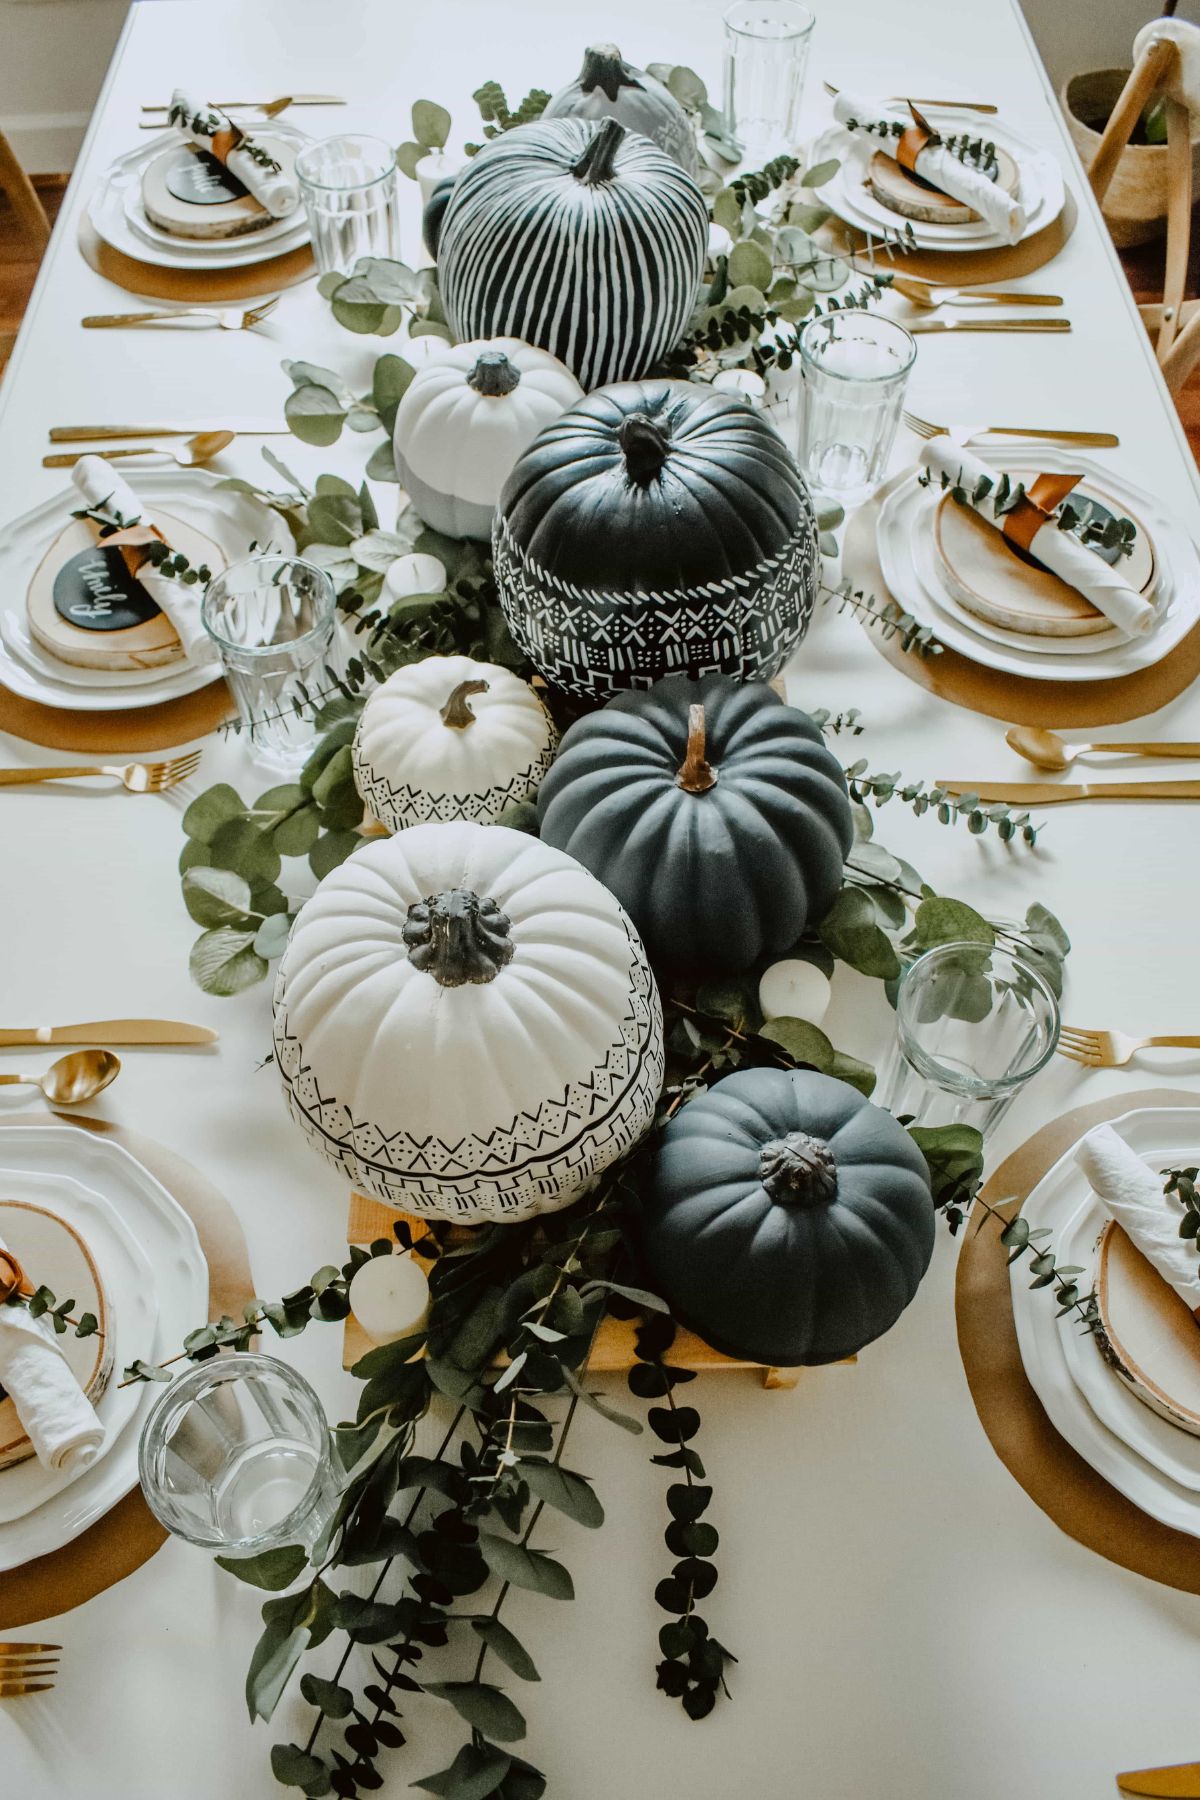
STEP-BY-STEP GUIDE:
- Purchase large and medium white pumpkins. Larger pumpkins are always better off bought from your local grocery store.
- We love these white pumpkin miniature ones! You can use them in between or as guest favors!
- There is a long wooden board right in the middle where the pumpkins are set. You can definitely purchase this or skip it altogether if you don’t want to. **TIP: You can use long wooden trays as well!
- Use matte black acrylic paints to paint some of the white (you can also paint the orange ones white!) pumpkin black (the balance is up to you.)
- Find easy-to-use paint brushes.
- Instead of painting on the detail (unless of course you really want to!), a trick you can do is to purchase white and black lace applique and use a paintbrush to paint on clear glue and stick them around the middle of the pumpkin. Use black lace on white pumpkins and of course, white lace on black pumpkins.
- Add a mix of dried eucalyptus (small and medium) in between the pumpkins.
- Line each plate with a wooden charger or a trick is to cut kraft paper in circles (trace a larger plate) and create that “rustic effect”
- Use a white napkin and top it off with small eucalyptus greenery to tie everything together.
- Finish with chalkboard paper with names written on it to use as place cards.
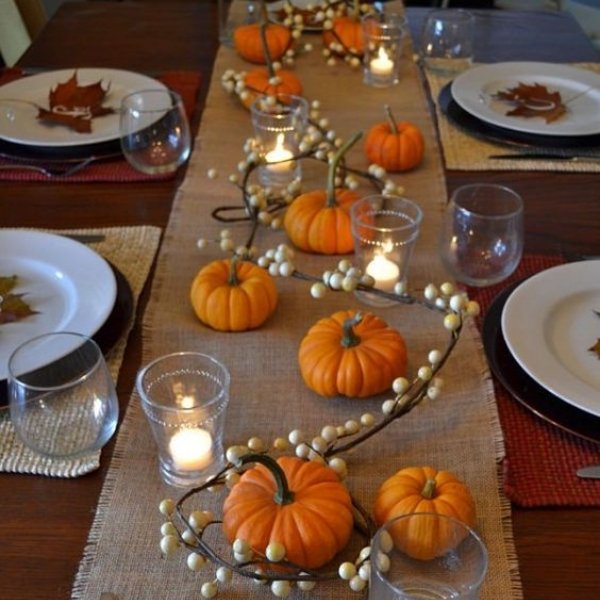
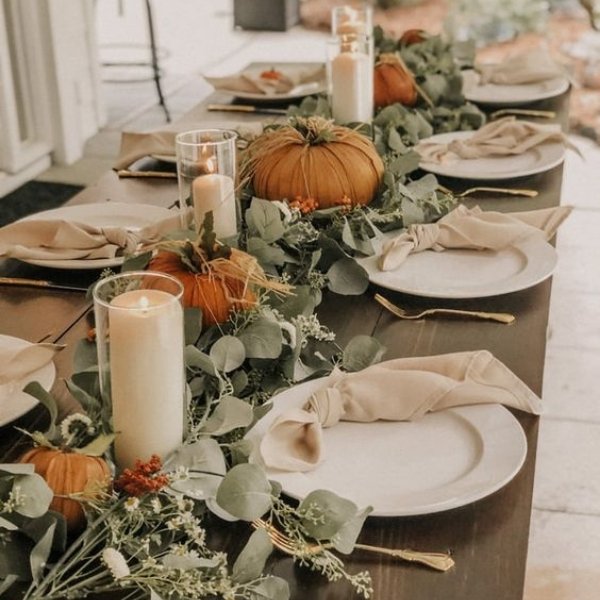
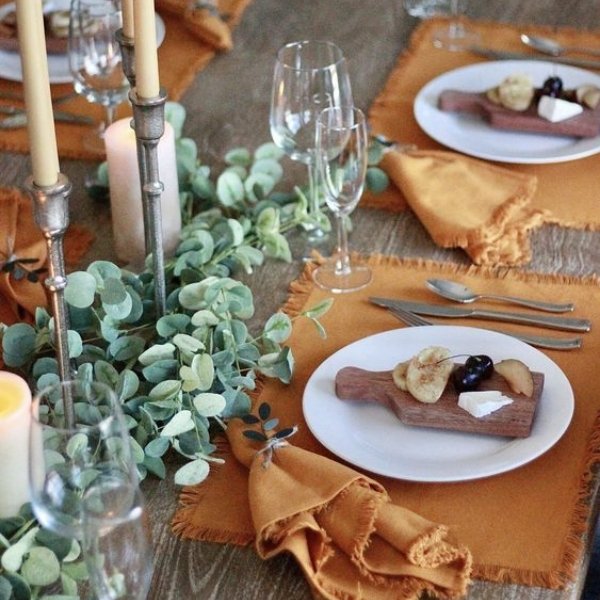
8. Classic Rustic

STEP-BY-STEP GUIDE:
- This is probably an easy Thanksgiving table design. Start by laying out your burlap table runner.
- Of course, add your orange pumpkins in different sizes. You can also add Thanksgiving fruit centerpieces.
- Add a long white berry stem/garland (you can purchase them shorter and tie the ends together) around the pumpkins. Notice how the stem of the berry is deliberately left to almost “float” and not lay flat. This adds dimension and height. The more fluid and uneven, the better.
- Finish off with votive candles.
- If you are looking for a fuller look, you can achieve it by using a thicker white berry stem garland, and adding more pumpkins and votive candles.
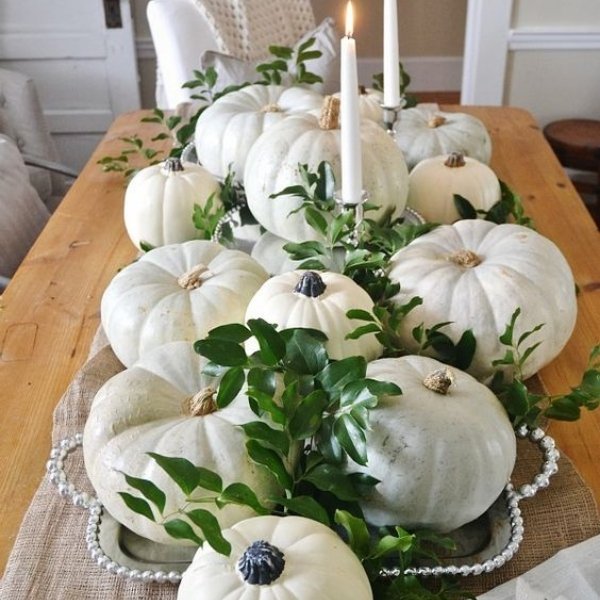
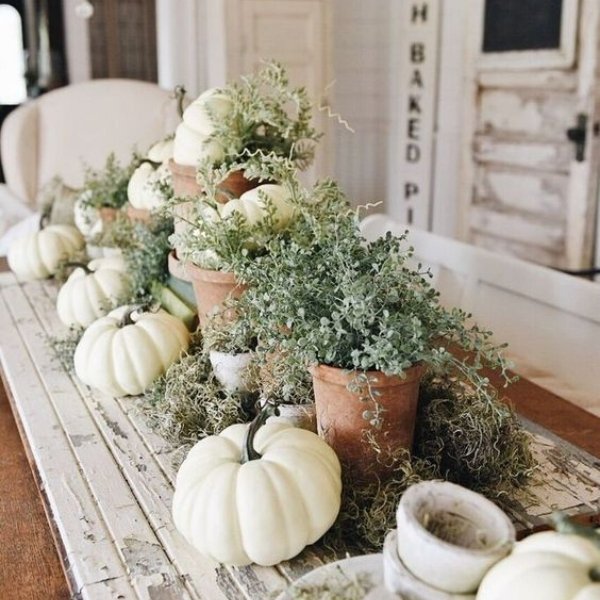
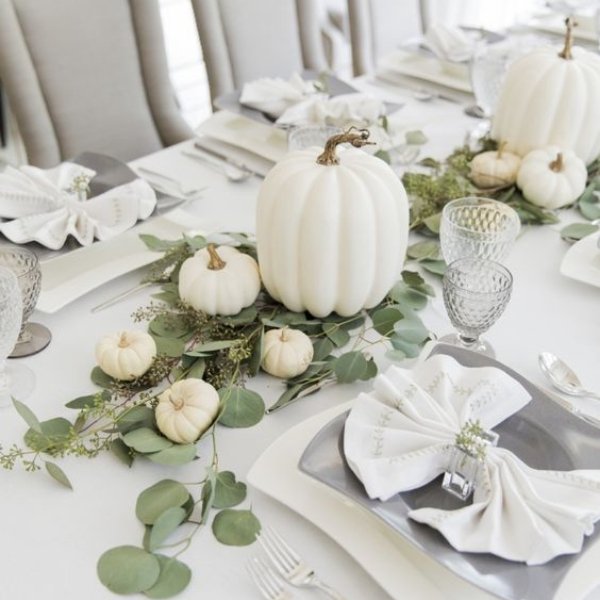
9. White and Green (this is one of the easiest DIY Thanksgiving Centerpieces)
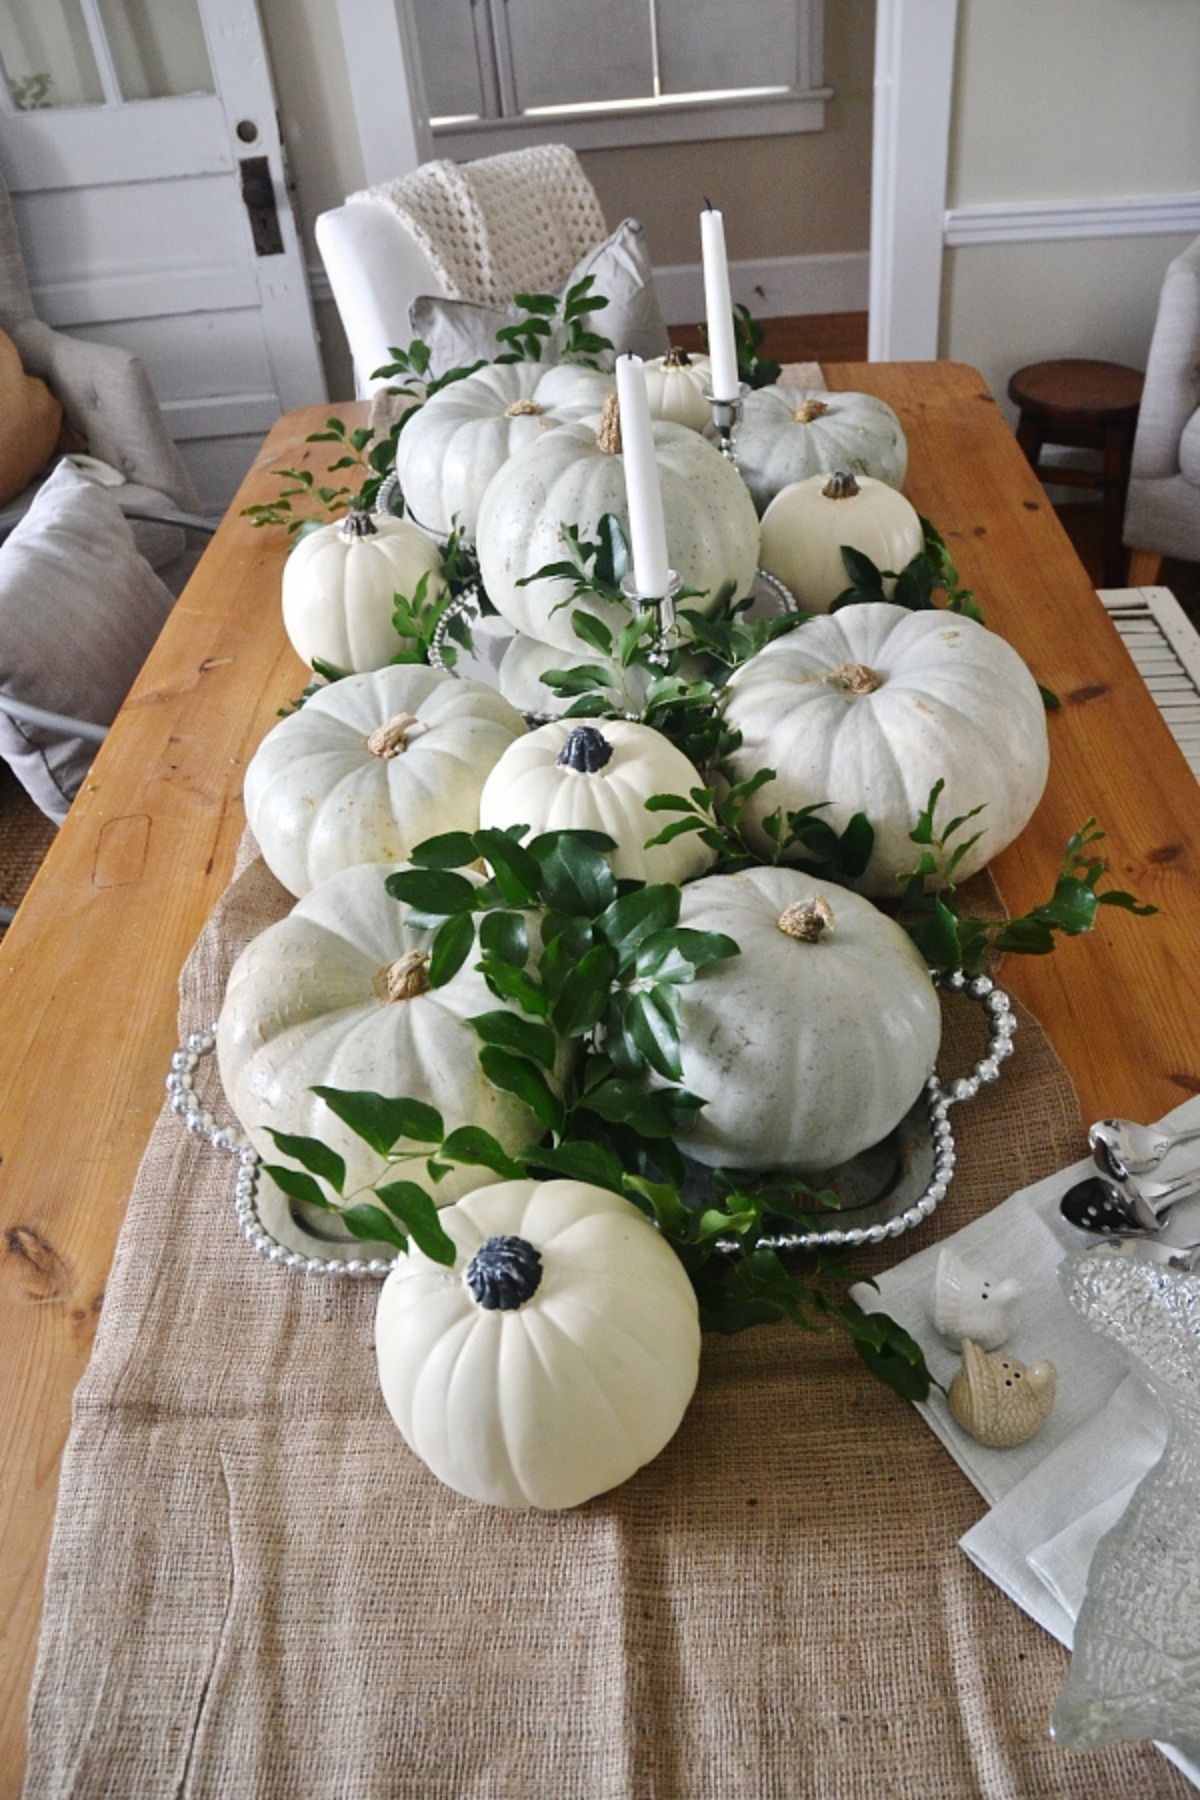
STEP-BY-STEP GUIDE:
- If you already have a wooden table, you can skip the burlap table runner altogether. But if not, adding a rustic table runner creates texture.
- Use silver trays and place them on top of the runner.
- Add white pumpkins, mostly large and medium ones. You can stack some of them on top of each other. Larger pumpkins are always better off bought from your local grocery store.
- You can also purchase orange ones and paint them white! Perfect homemade Thanksgiving decorations!
- We love these white pumpkin miniature ones! You can use them in between or as guest favors!
- In between the pumpkins, add greeneries to make the table lively.
- Tapered candles in silver holder to finish the look.
Looking for the rest? Check out part 2 of this 2 part post!
Table design 10-20, is discussed further in Part 2. Read more about them here.
What You Really Need To Know
creating DIY Thanksgiving centerpieces is a fun and creative way to add personality to your Thanksgiving table. Whether you’re using mini pumpkins, gourds, or even construction paper for place cards, these easy and affordable ideas will elevate your table decor. A simple floral centerpiece paired with a festive table runner or candles can transform your dinner table into a welcoming, cozy space.
You don’t need to splurge at the store—many of these centerpiece ideas can be crafted using items from your grocery store or home, like small pumpkins and floral foam. With some thoughtful touches like Thanksgiving place cards, you’ll have a place setting that’s both beautiful and personal.
Let your creativity shine and make this year’s Thanksgiving table decor extra special. Plus, it’s a fun activity for kids to help with as you prep for the big day! With these easy Thanksgiving centerpiece ideas, your holiday will feel festive, warm, and truly unforgettable.
There you are! DIY Thanksgiving Centerpieces + Ideas: Top 20 Step-by-step Guide!
** This post has Amazon links and as an Amazon Associate, Peppermint & Co. Ltd. earns from qualifying purchases.