DIY Thanksgiving Decor. Create a Cozy Thanksgiving Table with Our 20 DIY Centerpiece Ideas. Step-by-Step DIY Thanksgiving Centerpieces: Top 20 Ideas You’ll Love. Transform Your Thanksgiving Table. Your Ultimate Guide.
This site contains affiliate links. For more info, please see our full disclosure. This post has Amazon links and as an Amazon Associate, Peppermint & Co. Ltd. earns from qualifying purchases.
In this guide, we are sharing part 2 of our DIY Thanksgiving Decor: Top 20 Step-by-step Guide.
You’re about to dive into a gorgeous collection of DIY Thanksgiving centerpiece ideas that are not only beautiful but totally doable for your table. If you love fall decor and want to craft something personal and warm for your holiday gathering, this guide is just for you. In this second part of our step-by-step series, we’re sharing even more creative ways to decorate your Thanksgiving table with your own two hands. You’ll work with natural materials, seasonal colors, and simple tools to make something truly special. These ideas let you mix pumpkins, foliage, candles, and dried botanicals into pieces that feel rich, cozy, and authentic. You don’t need to buy expensive decor; many of the items can be found at craft stores or even out in nature. With each design, we walk you through the process so you feel confident, no matter your crafting level. You’ll see how easy it is to build a low centerpiece that still makes a big statement.
You’ll also learn how to arrange taller elements to add height without blocking your guests’ view. There’s something magical in gathering simple things like gourds, branches, and pinecones and turning them into a warm tablescape. You’ll be wowed by how the right mix of textures; wood, dried florals, wicker, can elevate your table. And you’ll love how candles or lanterns bring a soft, warm glow that feels so Thanksgiving. When you create your own centerpiece, every piece has meaning, and your table feels more personal. These ideas let you reflect your own style, whether that’s rustic charm, farmhouse cozy, or elegant simplicity. You’ll feel proud of what you make, your guests will notice and appreciate the effort. Plus, doing this DIY project can be a relaxing, fun way to prep for the holiday.
You’ll build your decor ahead of time, so on the day you’re not scrambling as you cook and serve. Your Thanksgiving table will look curated, intentional, and warm. With just a few materials and some imagination, you’ll craft something that feels like it came straight out of a magazine. And the best part is you’ll remember that you made it yourself. By the time your guests sit down, your centerpiece will be a beautiful conversation starter. This guide helps you confidently step into each project, from gathering supplies to styling your final look. You’ll end up with a centerpiece that feels seasonal, thoughtful, and totally you. So grab your pumpkins, your branches, your dried florals, and let’s get crafting. Your Thanksgiving table is about to get a serious upgrade with pieces that shine.
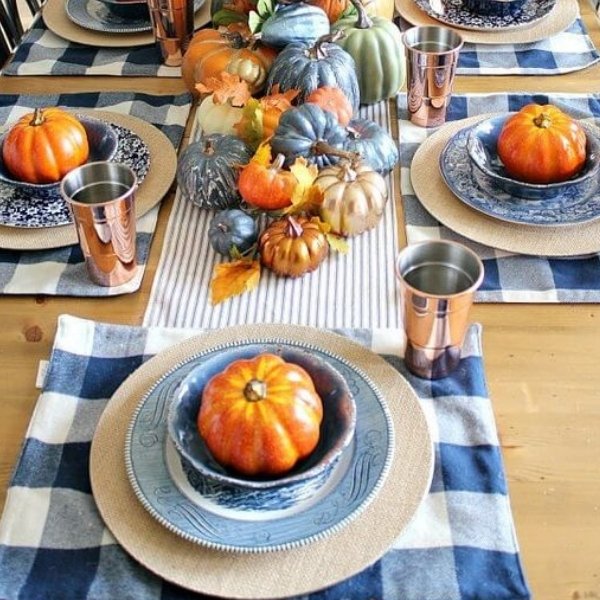
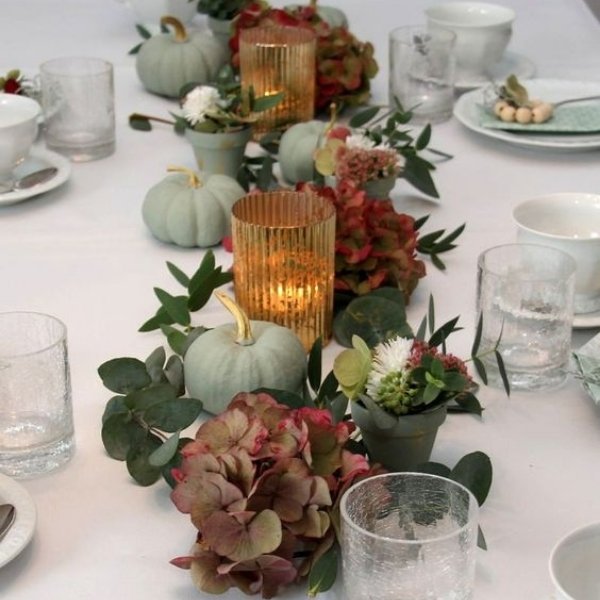
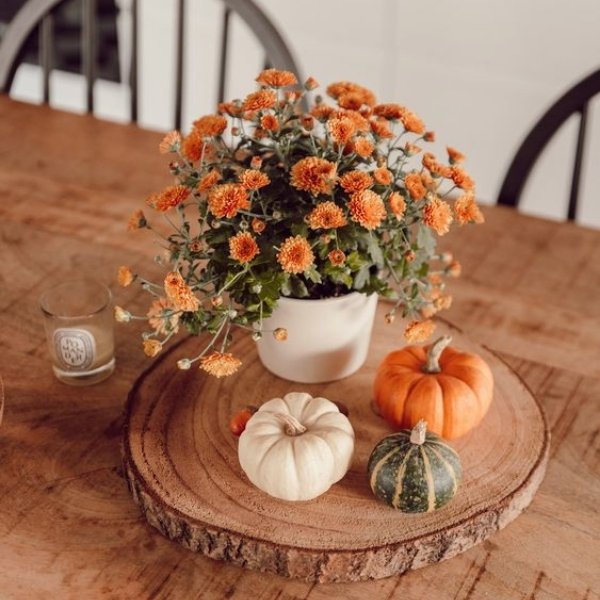
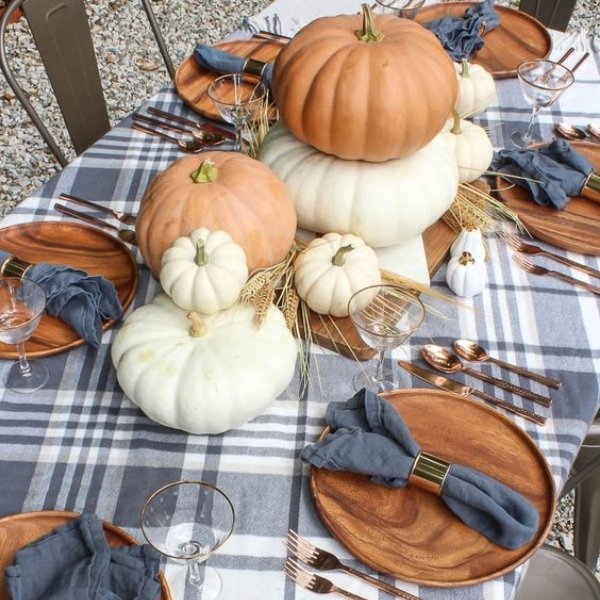
When you find the one you like from these DIY Thanksgiving Centerpieces, click on the photo caption to take you right to its step-by-step guide. If you want to see all of them, you can start here.
In this post, you can find inspiration #10-20!
Looking for the first 1-9 decor?
Check out part 1 of this 2-part post!
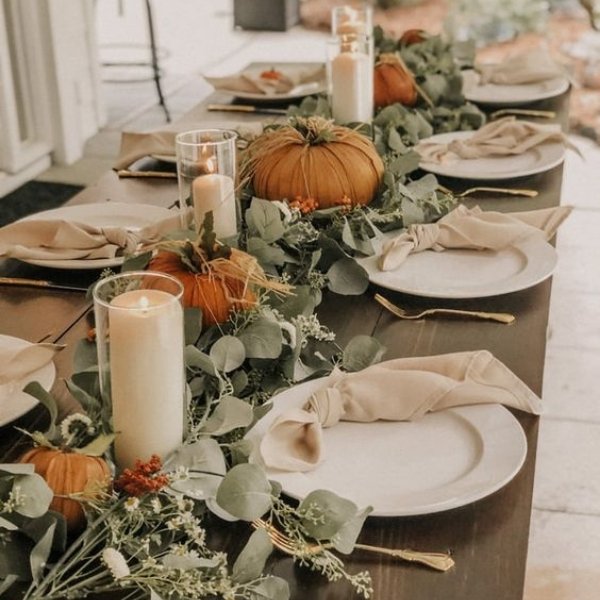
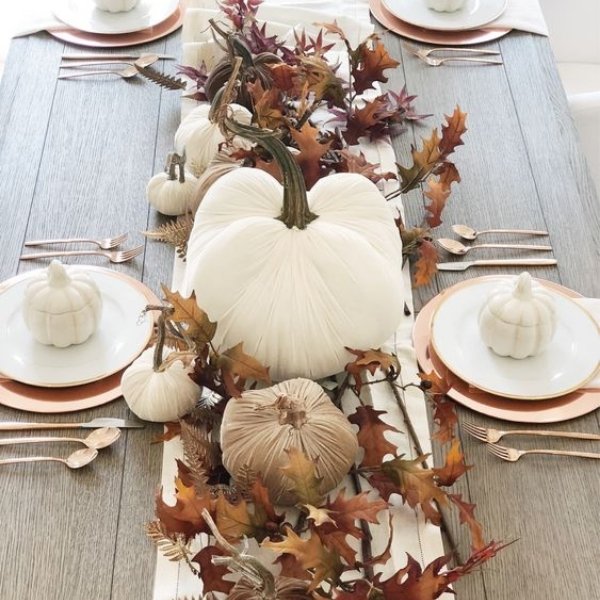
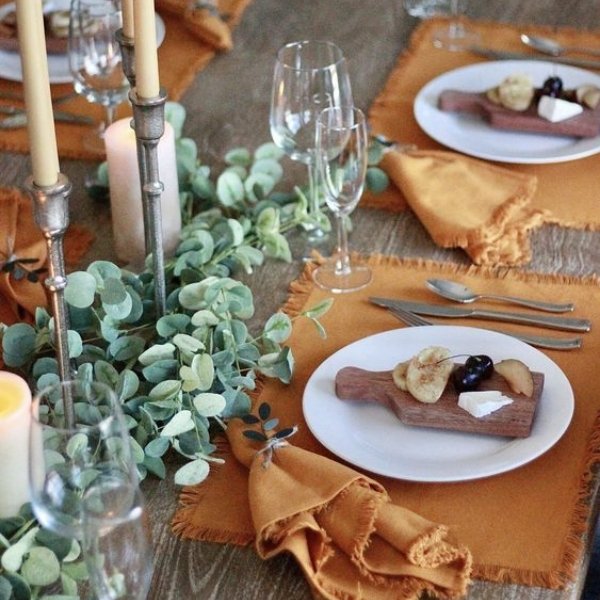
Table decor 1-9 are further discussed in Part 1. Read more about them here.

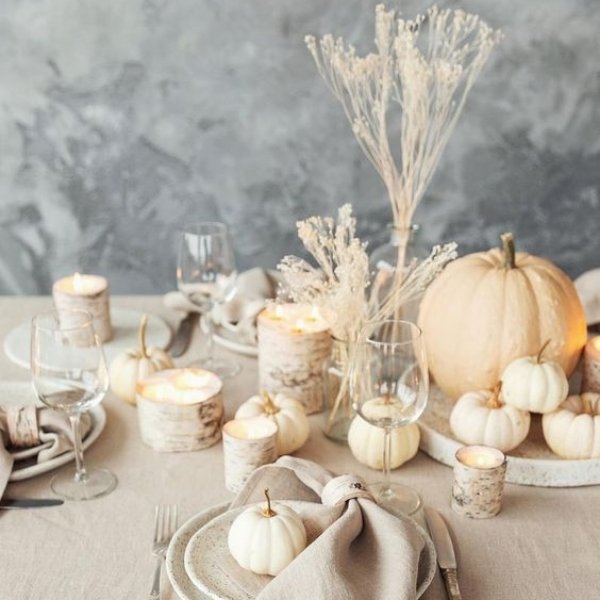
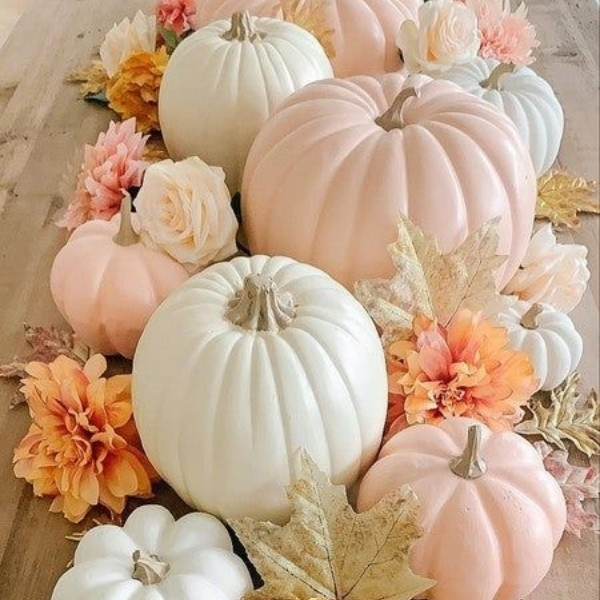
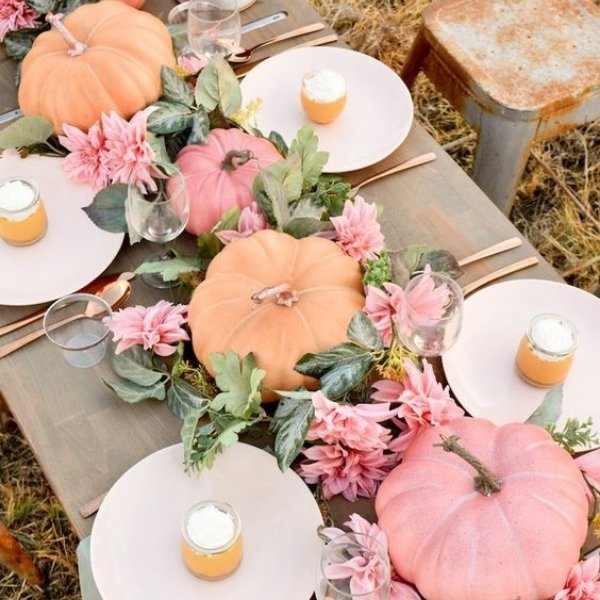
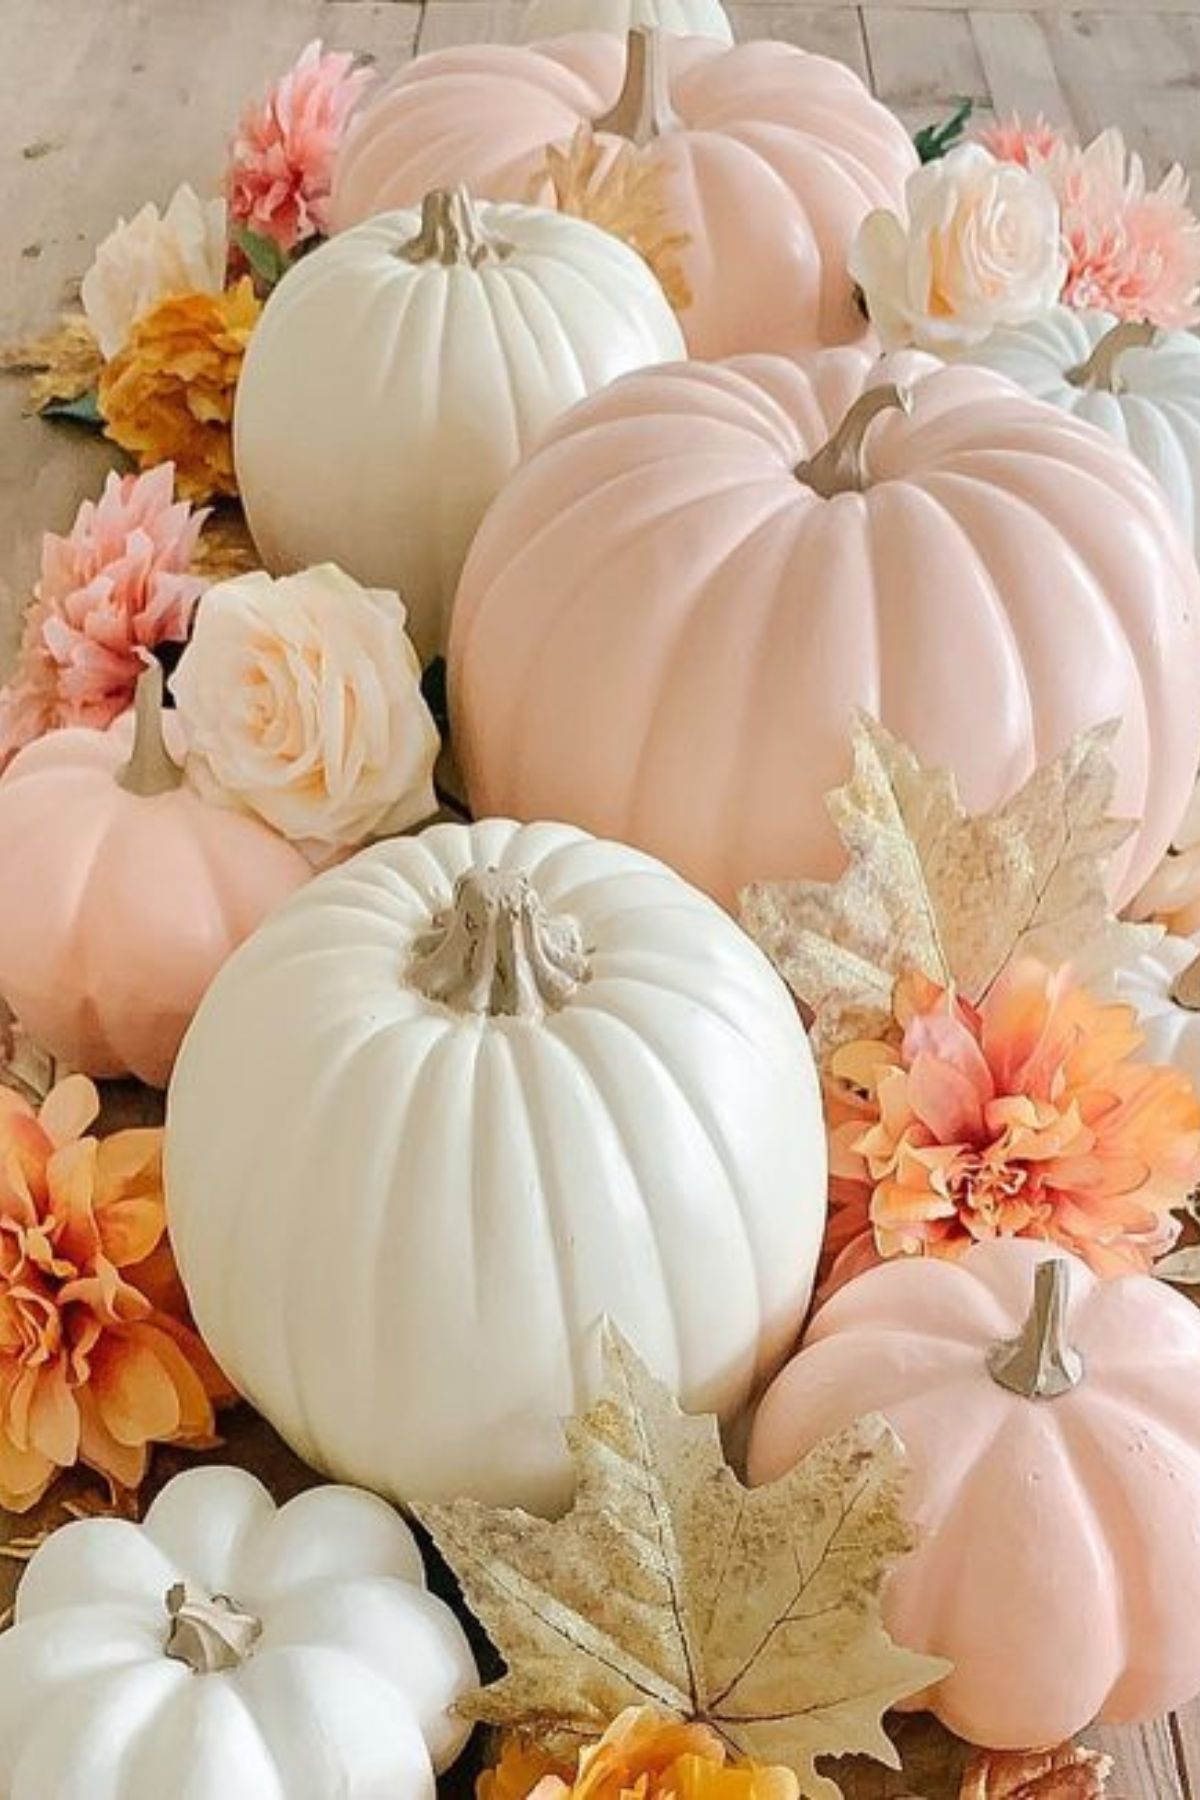
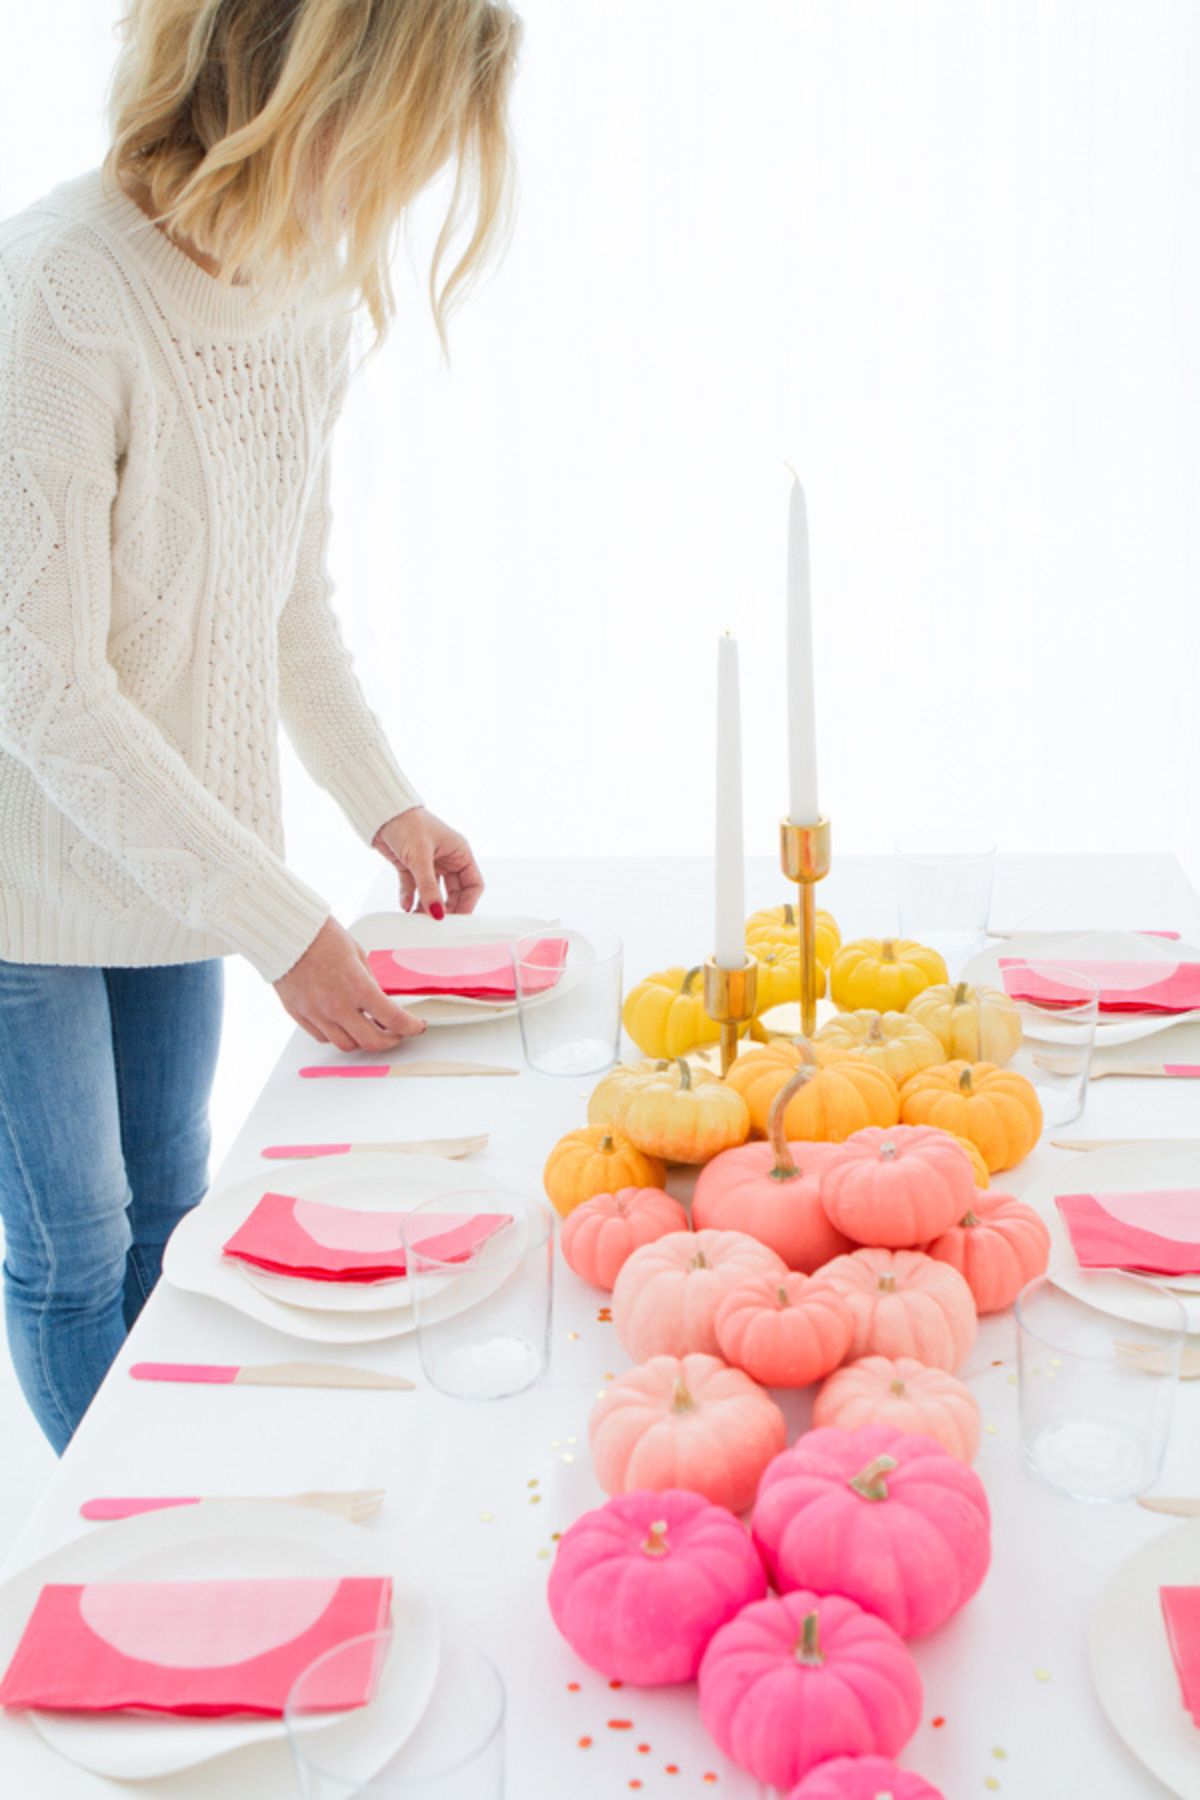
10. Pastel Dream
STEP-BY-STEP GUIDE:
- Pick pumpkins with different sizes and textures. White pumpkins are the easiest to paint on. Larger pumpkins are always better off bought from your local grocery store.
- We love these white pumpkin miniature ones (we love mini pumpkins!!) You can use them in between or as guest favors!
- Choose your pastel acrylic paint colors. This setting has white, peach, and light pink.
- Find easy-to-use paint brushes. Enjoy homemade Thanksgiving decorations.
- In between the pumpkins, you can add beige leaves, orange dahlias, peach roses, and some light pink dahlias.
- To add some sparkle, insert some gold leaves in between the pumpkins and blooms.
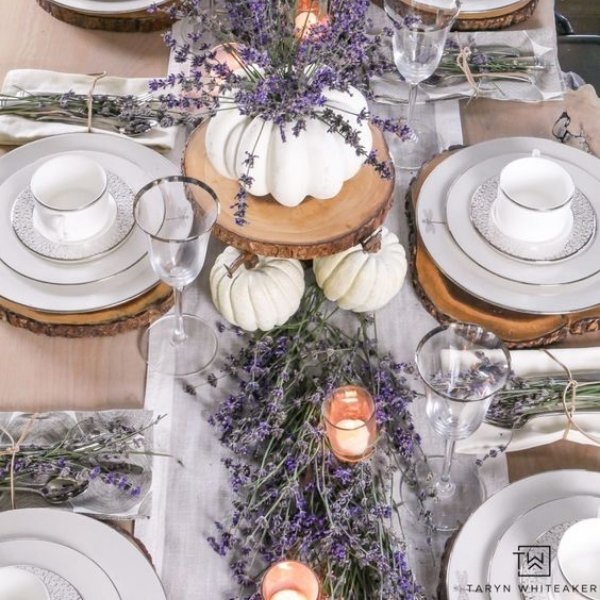
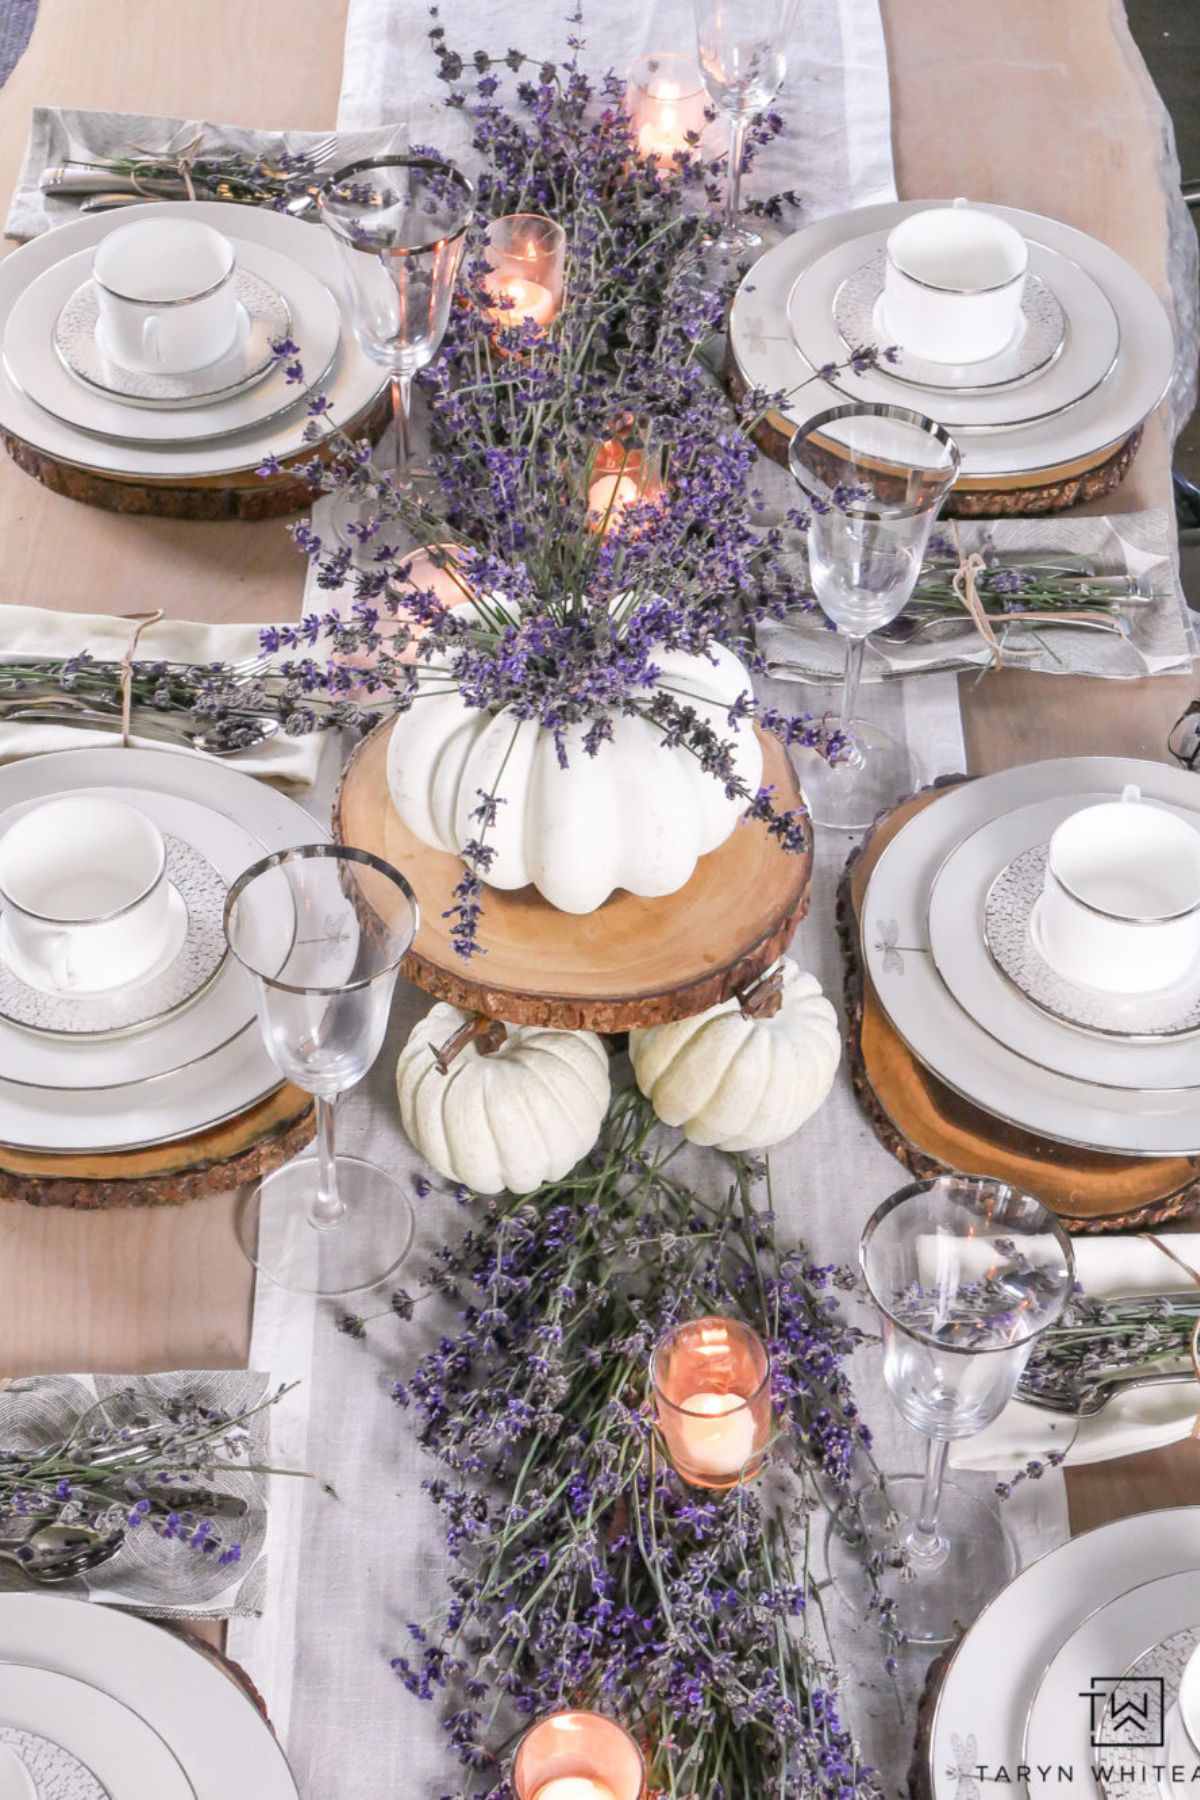
11. Lavender Love
STEP-BY-STEP GUIDE:
- If you do not have a wooden table, you can use a wooden-ish or burlap-ish colored linen and add a white table runner.
- Purchase your white pumpkins in different sizes.
- We love these white pumpkin miniature ones! You can use them in between or as guest favors!
- You can skip the wooden stand or slabs for the pumpkins and replace them with a wooden or rattan charger to place some of the pumpkins on.
- Look for dried lavender stems. Cut the stems according to your desired length. Lay them on the table runner around the pumpkins.
- For some of the pumpkins, you can cut off the top and shave the inside (just like how you would make a jack-o-lantern!) and use it as a vase to place the lavender stems inside.
- Use the same wooden or rattan chargers for your plates.
- Add mini bundles of lavenders tying them with twine– great to give out as guest favors as well.
- Finish it off with votive candles.
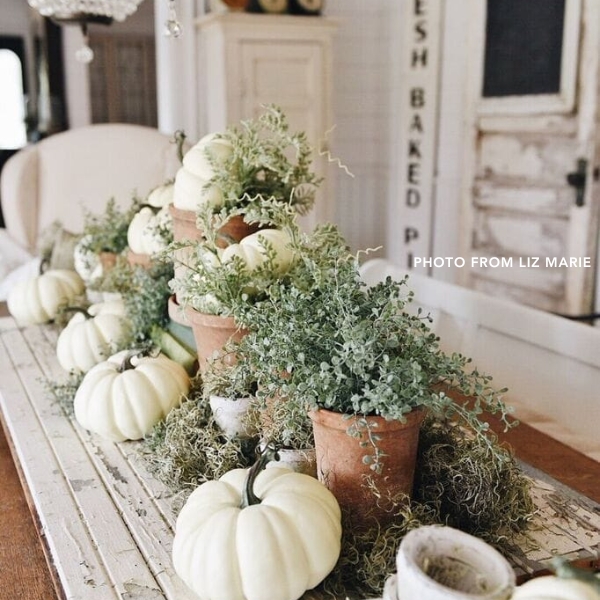
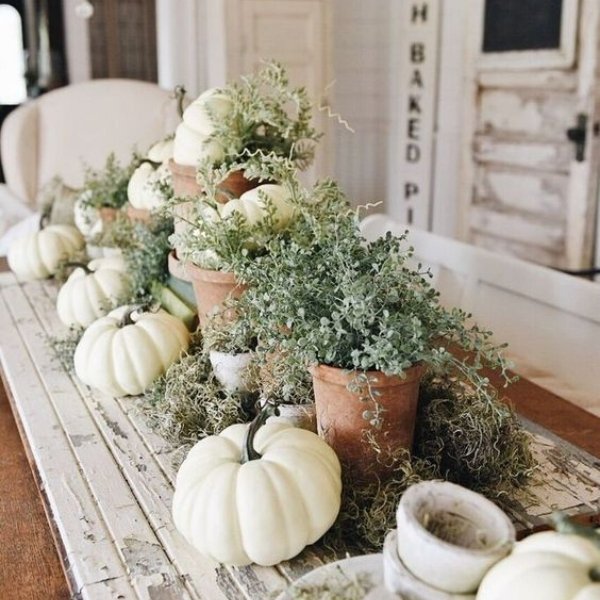
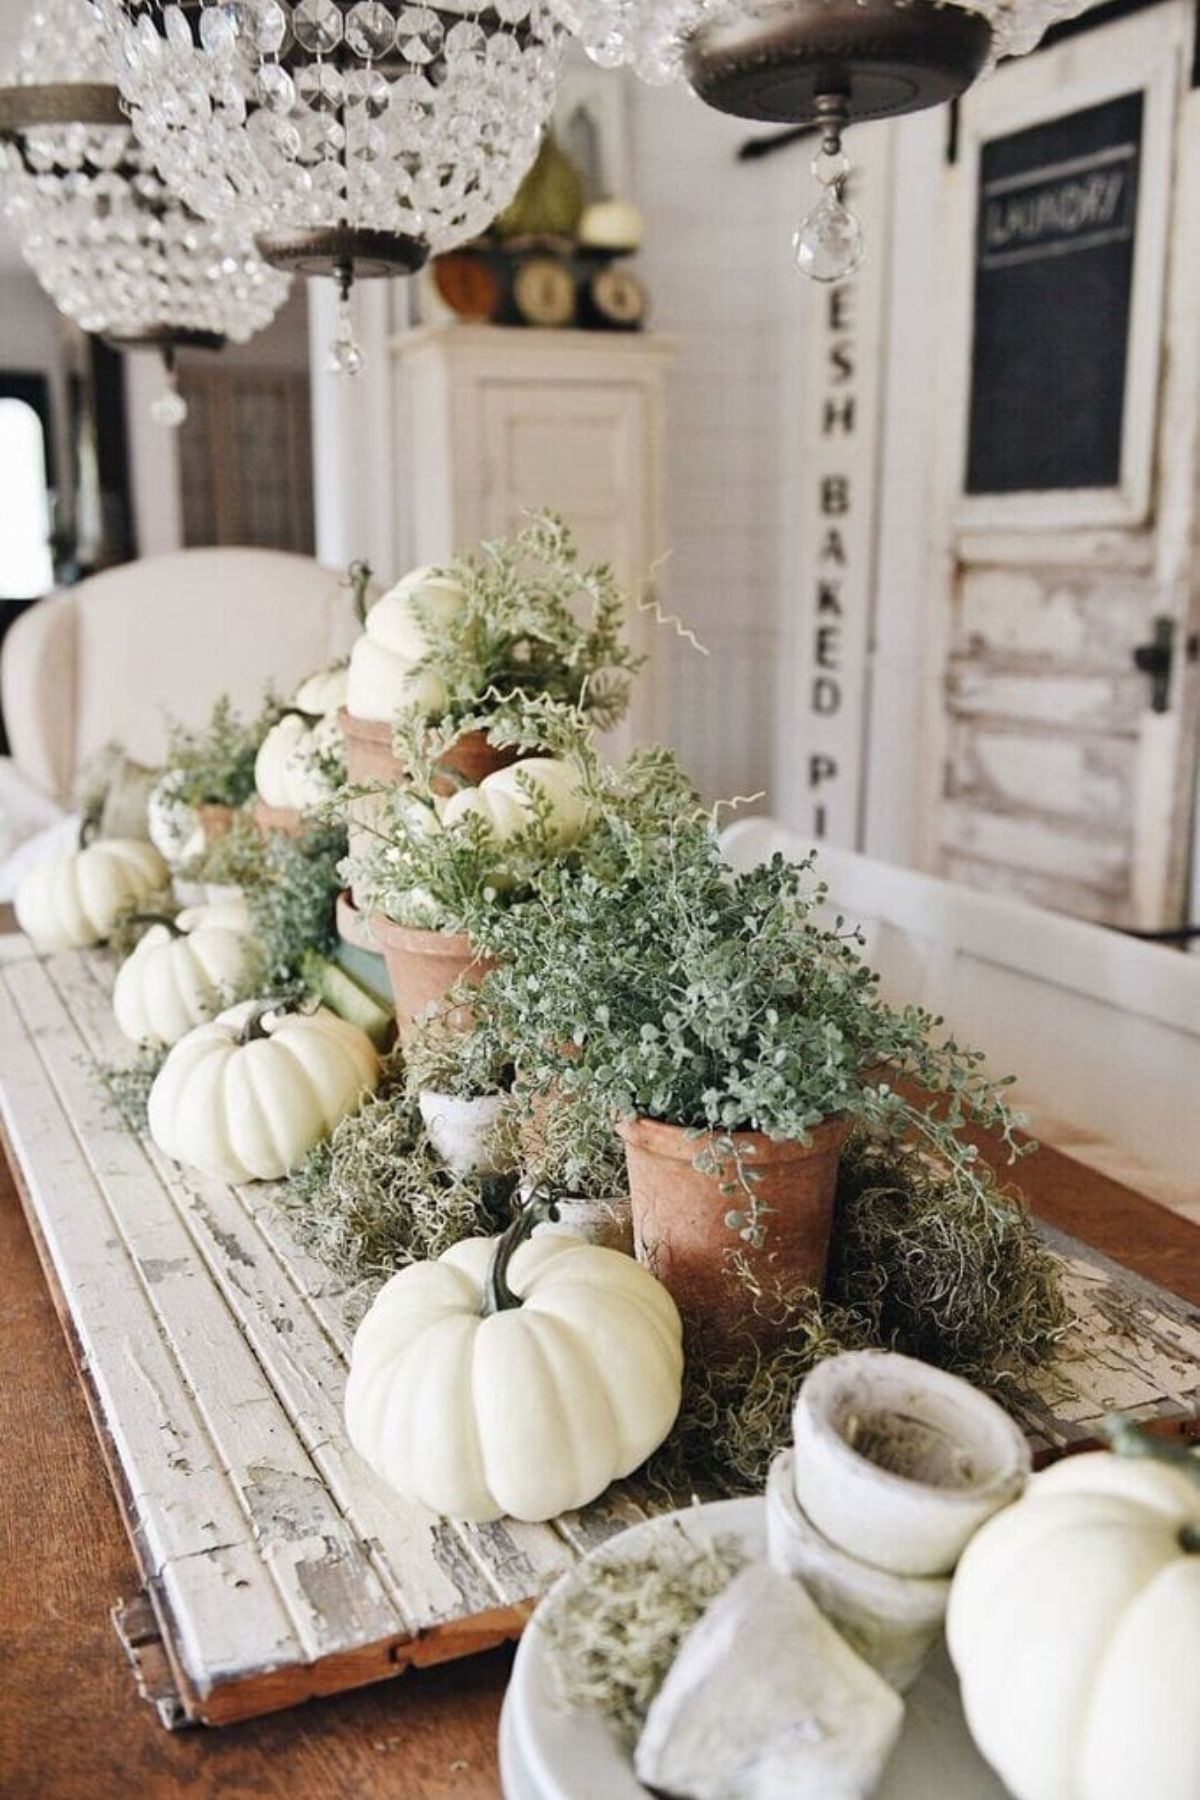
12. Herbs & Pumpkins
STEP-BY-STEP GUIDE:
- Find your choice of potted herbs from your local grocery or garden store in different heights. You can also opt for any faux potted plants if you prefer. Line them up in the middle of the table. Such an easy idea to decorate Thanksgiving.
- Purchase white pumpkins in different sizes. Place them along with the pots and some of them on top of the pots.
- We love these white pumpkin miniature ones! You can use them in between or as guest favors!
- In between the pumpkins and pots, insert textured moss.
- To add some “glow” to the table, add some votive candles around the pumpkins. Ensure the candles are not touching the moss to avoid it catching fire.

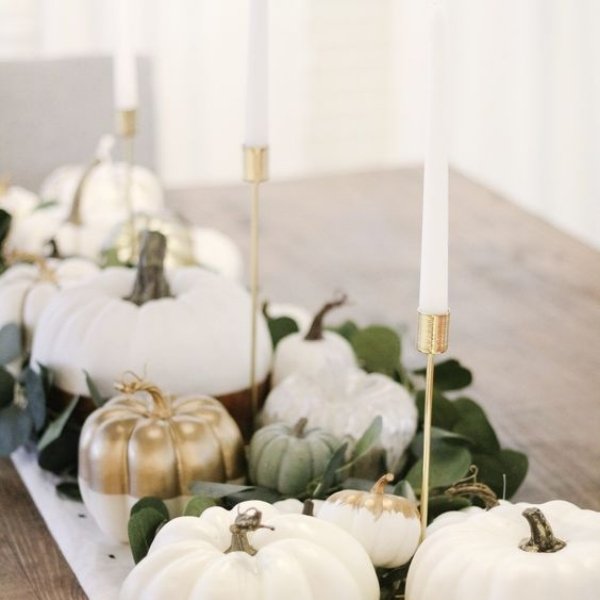
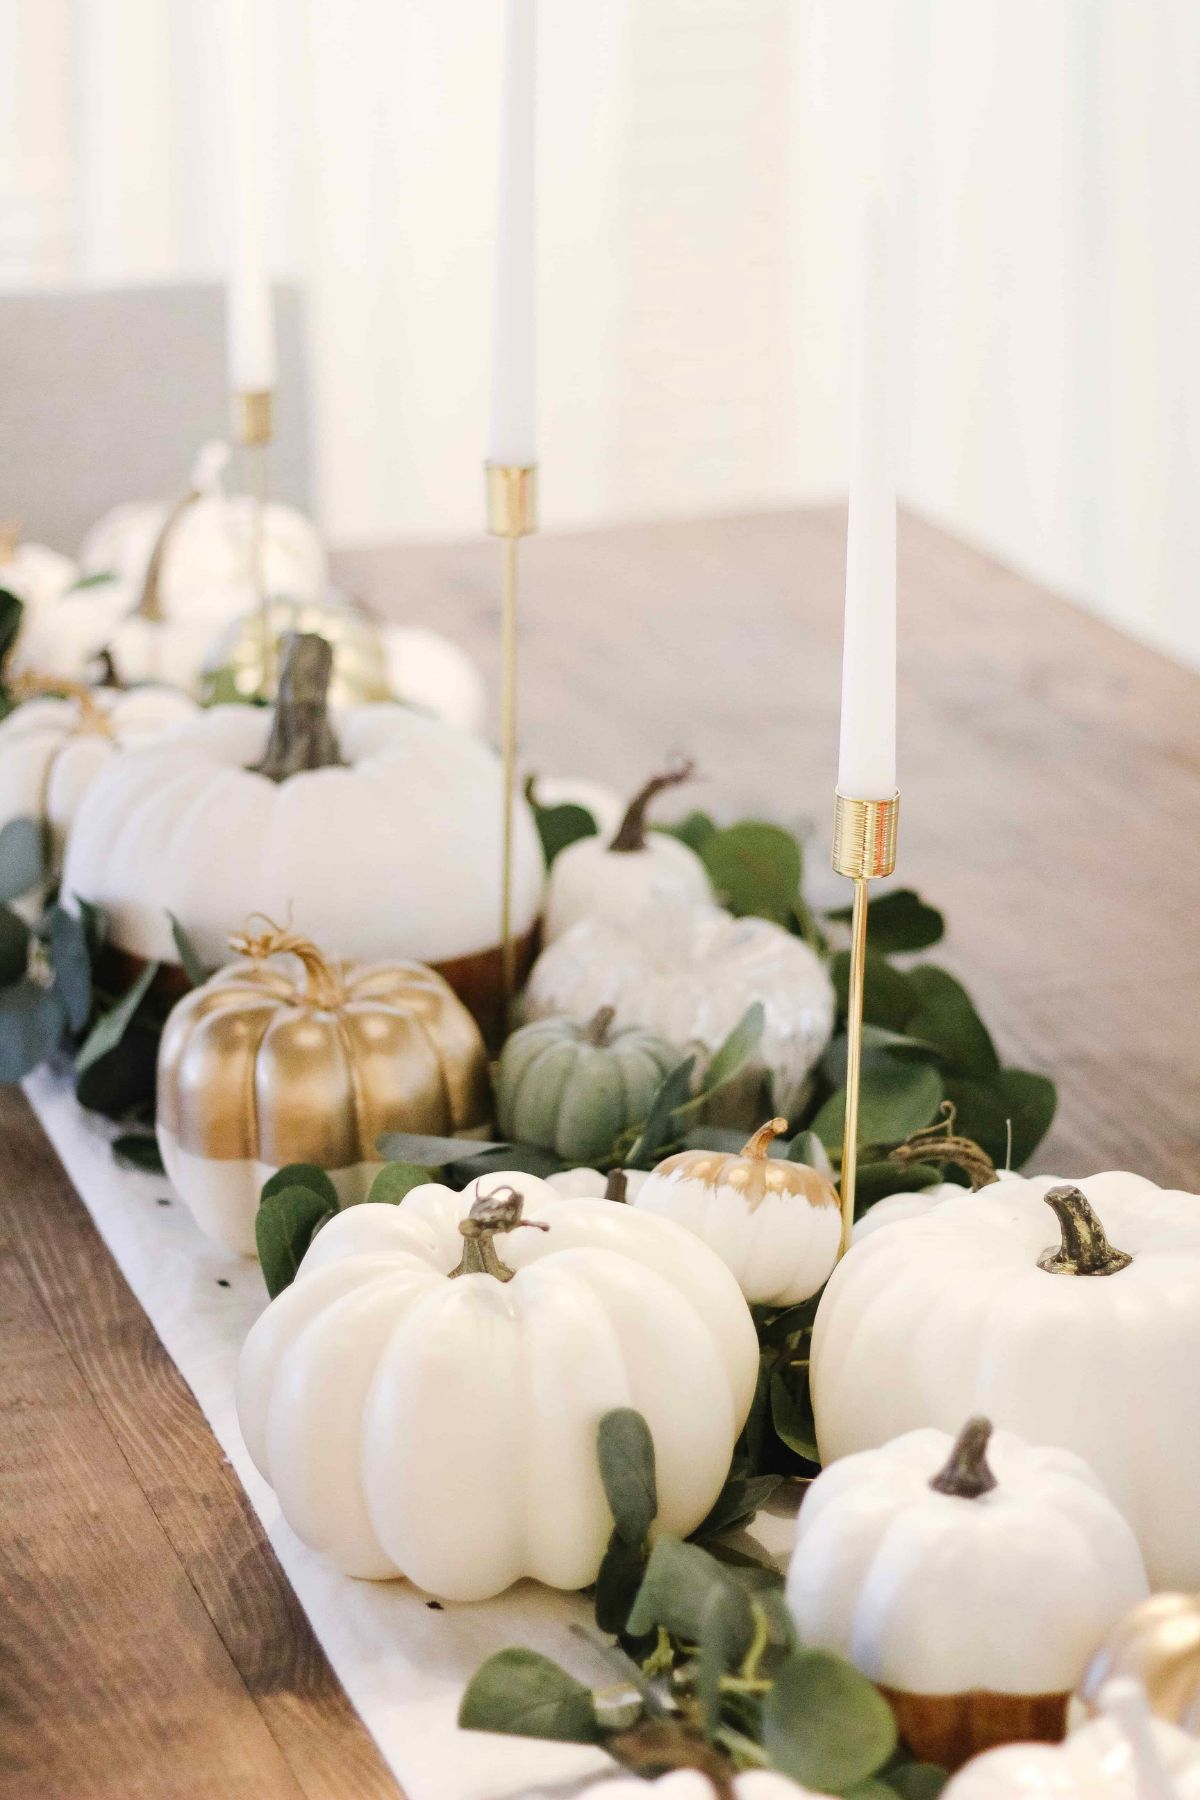
13. Gold Details
STEP-BY-STEP GUIDE:
- If you do not have a wooden table, consider using a wooden-ish or burlap-ish colored table linen. Add a white table runner. If you have white table linen, you might be able to skip the runner altogether. However, note that there might be candle wax drippings and some staining from the greeneries.
- Purchase white pumpkins, mostly medium and large-sized. You can add some light green pumpkins if you’d like. Larger pumpkins are always better off bought from your local grocery store.
- We love these white pumpkin miniature ones! You can use them in between or as guest favors!
- Look for acrylic paint in your favorite shade of gold.
- Find easy-to-use paint brushes.
- Start painting the upper half of the large pumpkins with gold. For the smaller pumpkins, paint a little bit off the top only.
- Line up your pumpkins the way you desire.
- In between the pumpkins, add tapered candles with gold holders.
- Insert dried eucalyptus greeneries in between the pumpkins and the candles. You can also use faux eucalyptus greenery.
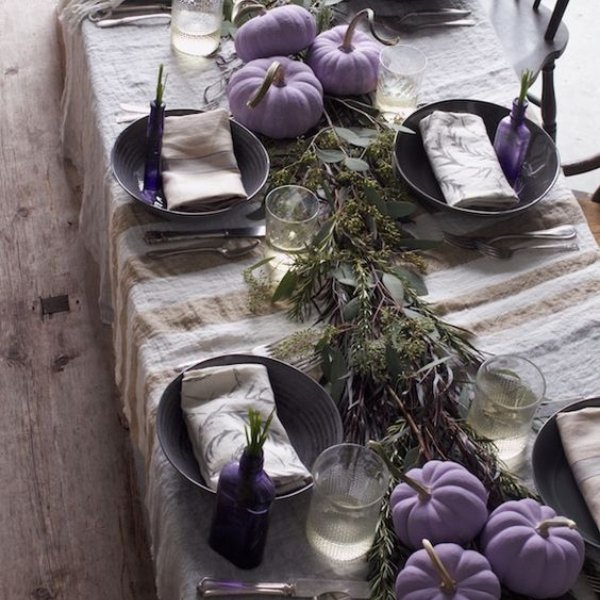
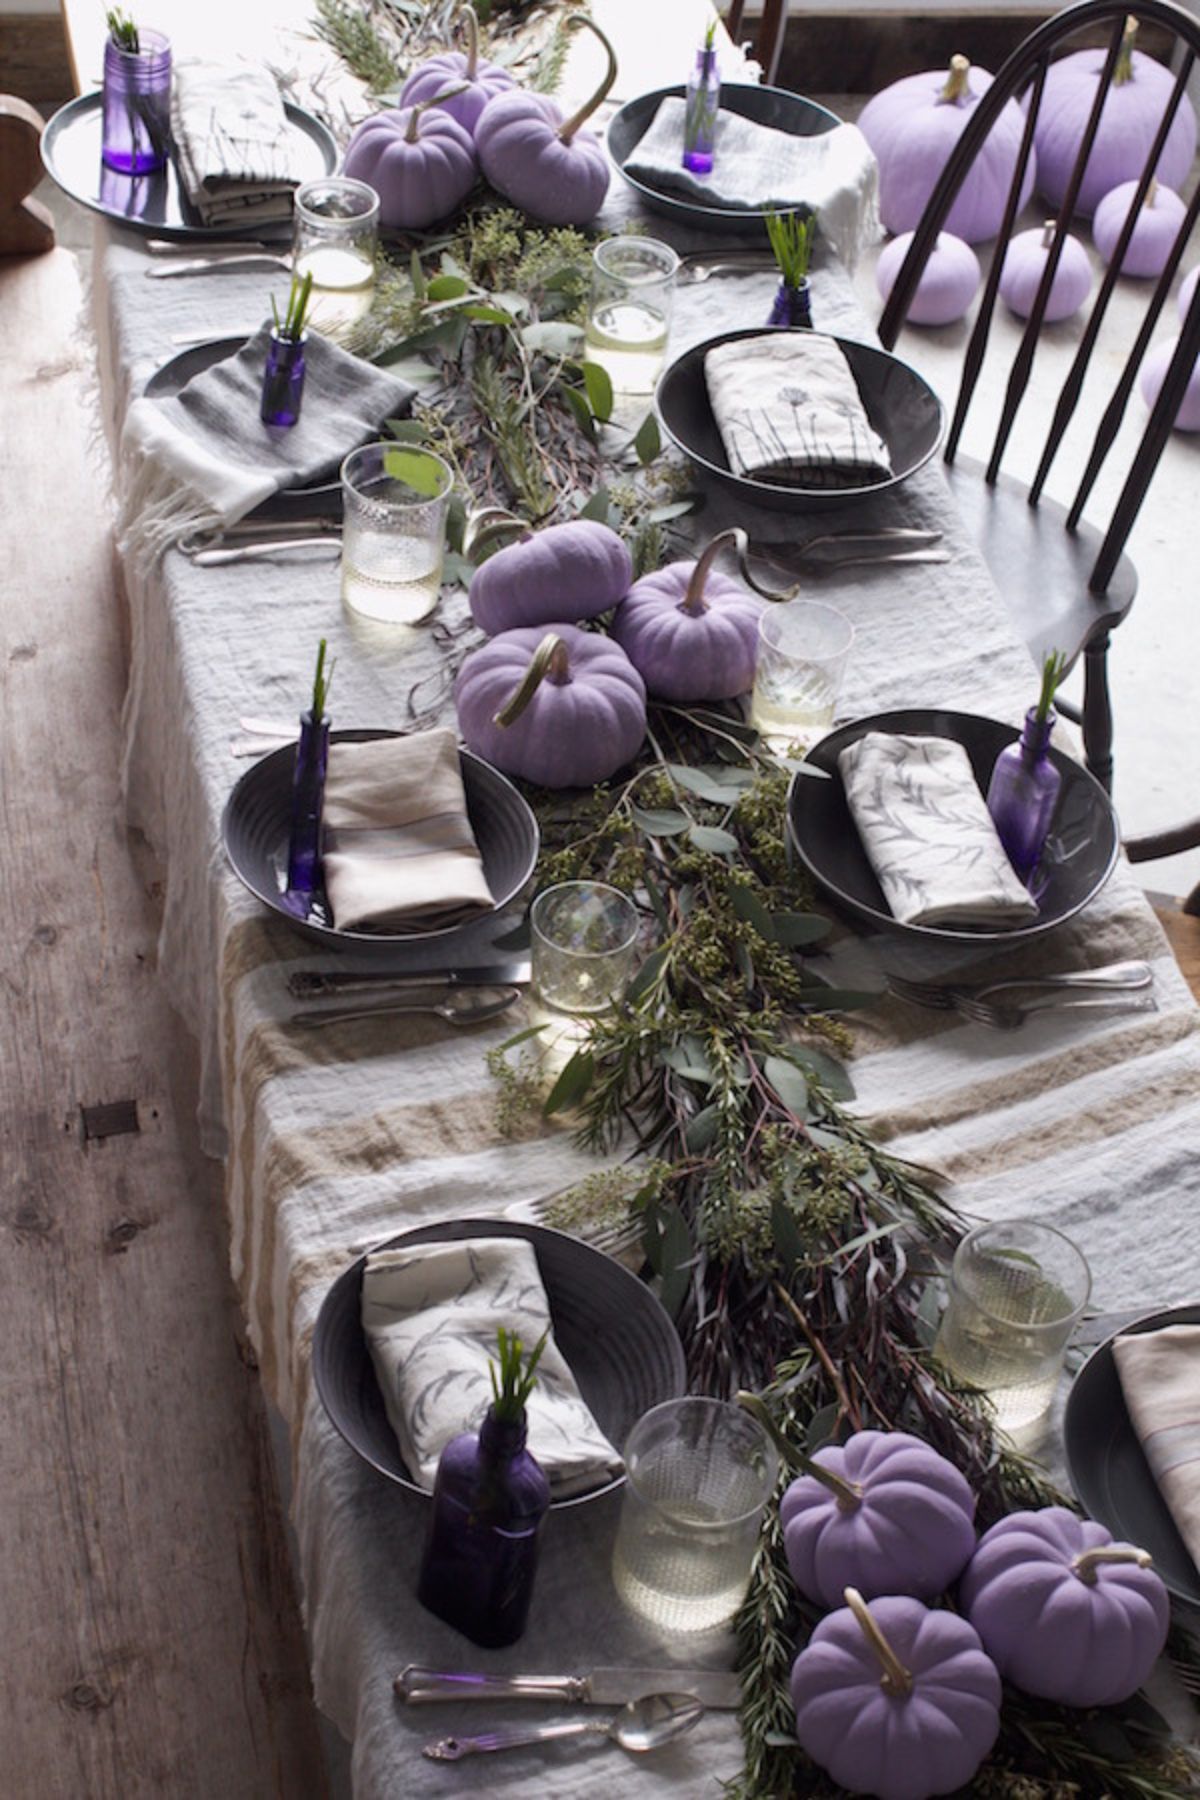
14. Purple Beauty
STEP-BY-STEP GUIDE:
- Find your favorite gray or beige table linen. The subtle gray linen is what makes this table design work.
- Purchase white pumpkins similar in size.
- Find acrylic paint in your fave shade of purple or lilac.
- Look for easy-to-use paintbrushes.
- Start by lining up the table with greenery garlands right in the middle. You can use dried or faux greenery garland.
- Place the purple pumpkins in groups of 3.
- Make the setting glow by adding some votive candles.
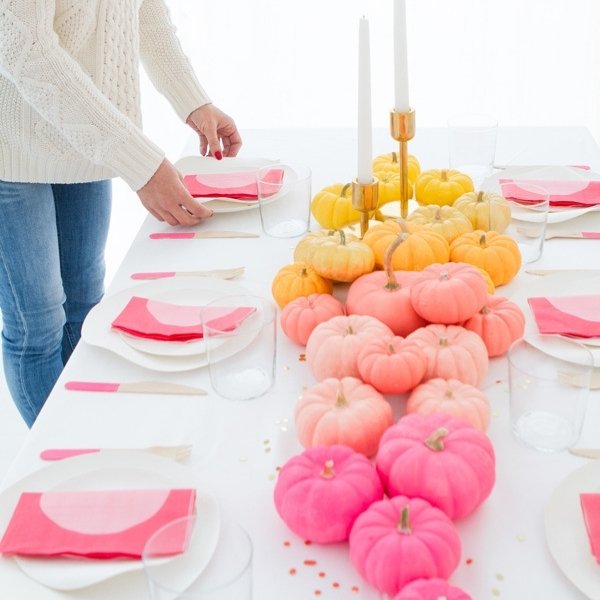
15. Bright & Light
STEP-BY-STEP GUIDE:
- Purchase white pumpkins in different sizes.
- We love these white pumpkin miniature ones! You can use them in between or as guest favors!
- If you already have plain white table linen, you can use that. Ensure that it is bright white linen.
- Use acrylic paint in shades of pink, peach, light orange, and white. To play around with the shades (lighter and darker), add white to the shades as you paint to adjust the color.
- Find easy-to-use paintbrushes.
- Use white tapered candles and gold holders. Or vice versa.
- Add small specks of chunky glitters on the table to carry on that rose gold detail.
- Use a napkin color that matches one of the shades you chose: pink, peach, and coral.
16. Adorable & Cute (this is such a great DIY Thanksgiving Decor!)
STEP-BY-STEP GUIDE:
- Start by purchasing large and medium pumpkins. Some in white and some orange. Larger pumpkins are always better off bought from your local grocery store.
- Find easy-to-use paintbrushes.
- Paint the white pumpkins with light pink acrylic paint.
- Use beige or burlap-colored table linen.
- Lay the pumpkins in the middle of the table.
- In between the pumpkins, add some greeneries and pink dahlias. Remove the blooms from their stems if you don’t want to cut them short. This way you can re-use it later on when you re-attach it to its stem. You can also purchase flower arrangements online from The Bouqs.
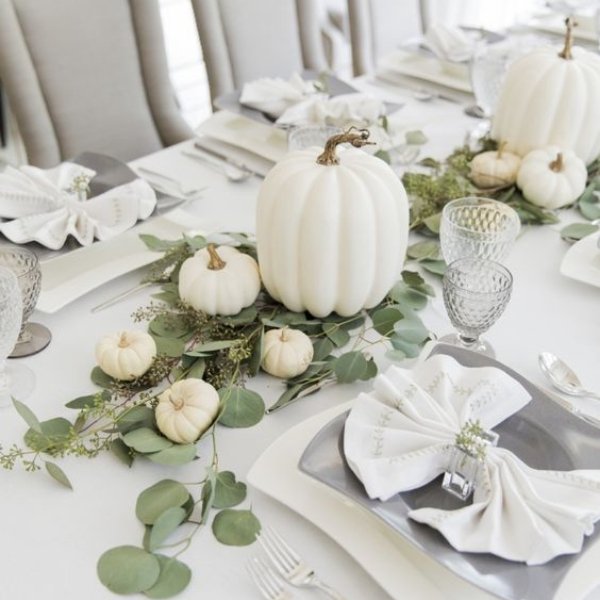
17. Monochromatic
STEP-BY-STEP GUIDE:
- Purchase white pumpkins of different sizes and heights.
- We love these white pumpkin miniature ones! You can use them in between or as guest favors!
- Start by setting up your table with white linen.
- Line up eucalytpus greenery through the middle of the table. You can use dried or faux.
- Place your pumpkins on top of the garland. Balance the pumpkins by putting the taller ones evenly, while placing the smaller ones in between.
- Add some hints of grey through glassware, plates,m or napkins.
- Finish the look with some votive candles.
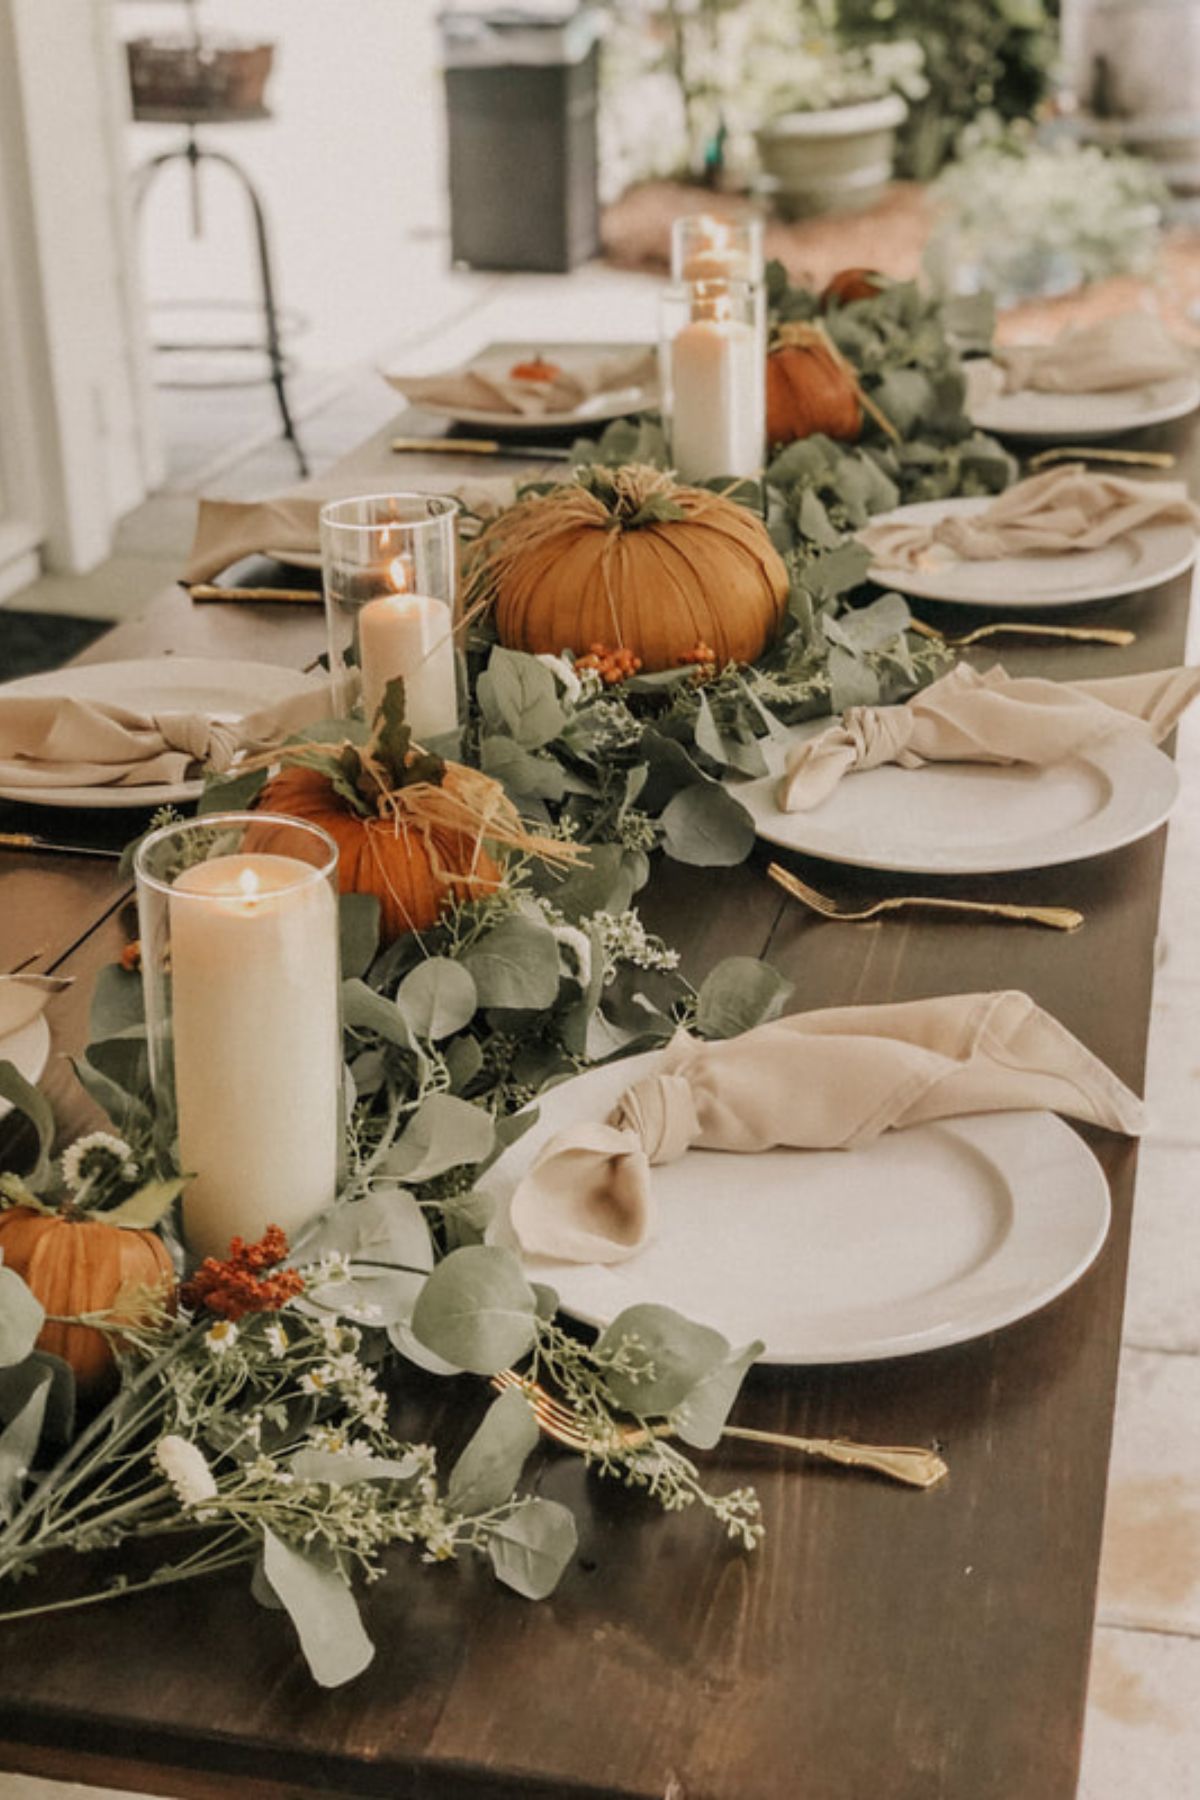
18. Classic Feast
STEP-BY-STEP GUIDE:
- Purchase orange pumpkins in different sizes. Larger pumpkins are always better off bought from your local grocery store.
- Find a brown or burlap colored table linen.
- Start by placing your pumpkins along the middle of the table.
- Also, place pillar candles in cylinders vases along the middle of the table.
- Add greenery garlands through the middle of the table working around the pumpkins and candles. Seeded eucalyptus is a favorite!
- Place some votive candles to add more dimension.
- Use beige napkins and white plates.
19. Orange, Brown & Gold (this can be more than a DIY Thanksgiving Decor! It can also be a staple fall decor!)

STEP-BY-STEP GUIDE:
- Find a light wooden or burlap-colored table linen.
- Purchase white pumpkins in different sizes. Larger pumpkins are always better off bought from your local grocery store.
- We love these white pumpkin miniature ones! You can use them in between or as guest favors!
- Start by placing a white runner through the middle of the table.
- Place your pumpkins as you desire.
- In between the pumpkins, insert fall brown-orange leaves or garland.
- Insert a few golden leaves in between the pumpkins to add some glow.
- Use rose gold or gold chargers and flatware. You can also use rose gold doilies instead of a real charger to pocket some savings!
- Add some votive candles to finish off.
20. No Pumpkin Vibe
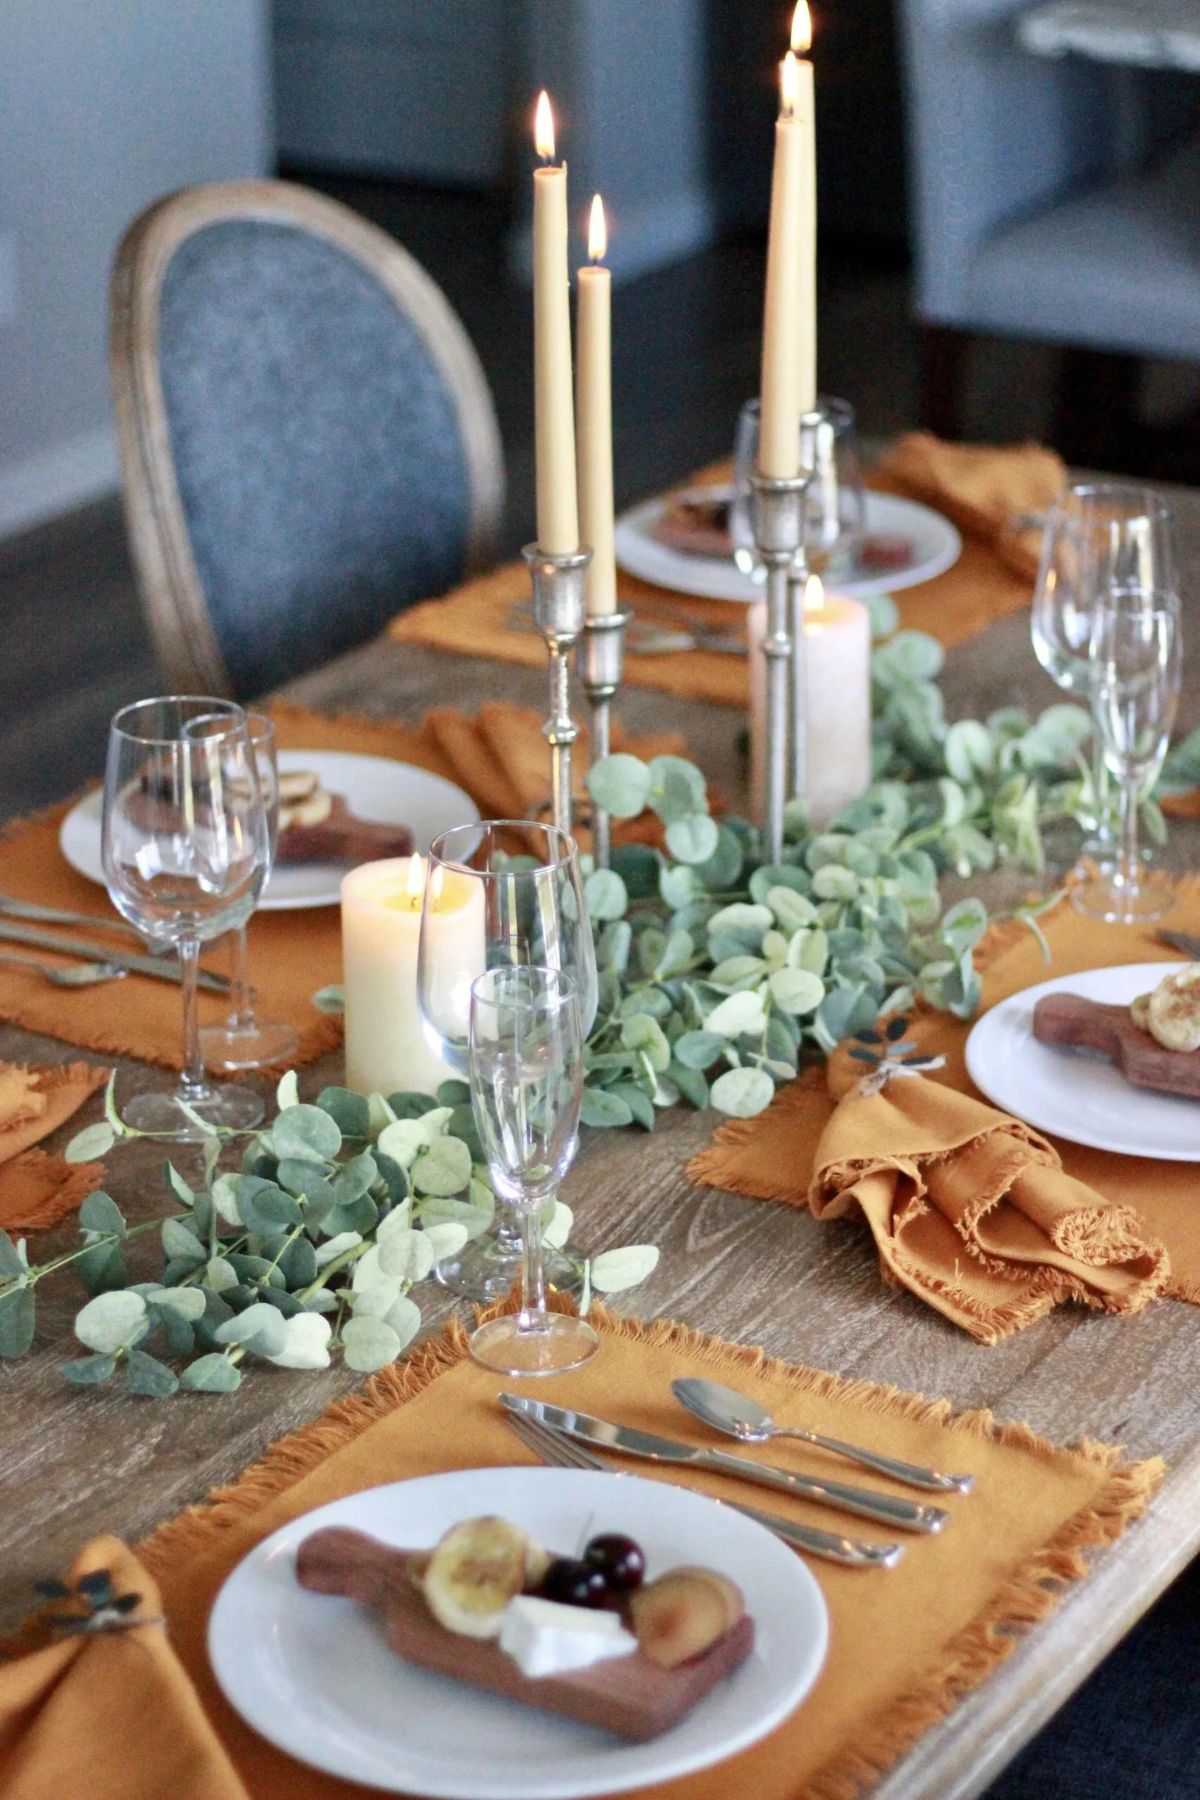
STEP-BY-STEP GUIDE:
- Use light brown or burlap-colored linen.
- Purchase orange placemats and napkins. We’ve included a chiffon wrinkled version.
- Start by lining up eucalyptus greenery stems along the middle of the table. You can use dried or faux.
- Use flameless pillar candles and place them along the middle.
- Insert tapered candles in silver holders.
- Tie your napkin with twine and insert a small stem of greenery to tie everything together.
- Add votives to finish up the design.
What You Really Need To Know
Your Thanksgiving table deserves to shine just as much as the food. Along with easy Thanksgiving recipes, adding some DIY Thanksgiving decorations can create a warm and festive atmosphere. Whether it’s a Thanksgiving tablescape featuring a stunning centerpiece or simple DIY decor like a handcrafted wreath, you can transform your space into something special.
With a few craft ideas and a bit of creativity, you’ll have beautiful and personalized Thanksgiving decorations that guests will love. From pumpkins to table settings, you can find easy tutorials to help you create the perfect holiday decor. Even kids can get involved in making these crafts, adding a personal touch to your table decor.
With these DIY Thanksgiving ideas, your home will feel festive, welcoming, and ready for the holiday celebration. Plus, you’ll save money by creating your own decorations!
There you are! DIY Thanksgiving Decor: Top 20 Step-by-step Guide!
** This post has Amazon links and as an Amazon Associate, Peppermint & Co. Ltd. earns from qualifying purchases.